在正式讲博客的美化之前,我想先感谢@jerryc 能够带来这么棒的主题~如果你同样想使用butterfly主题,你可以去查看安装文档
如果你想让我在butterfly中添加新功能,你可以直接在本文章下方留言,我会尽量满足
另:
话不多说,让我们开始吧!
注:写这篇文章的时候我的主题版本是2.1.0
友链界面加入更多的自定义文字
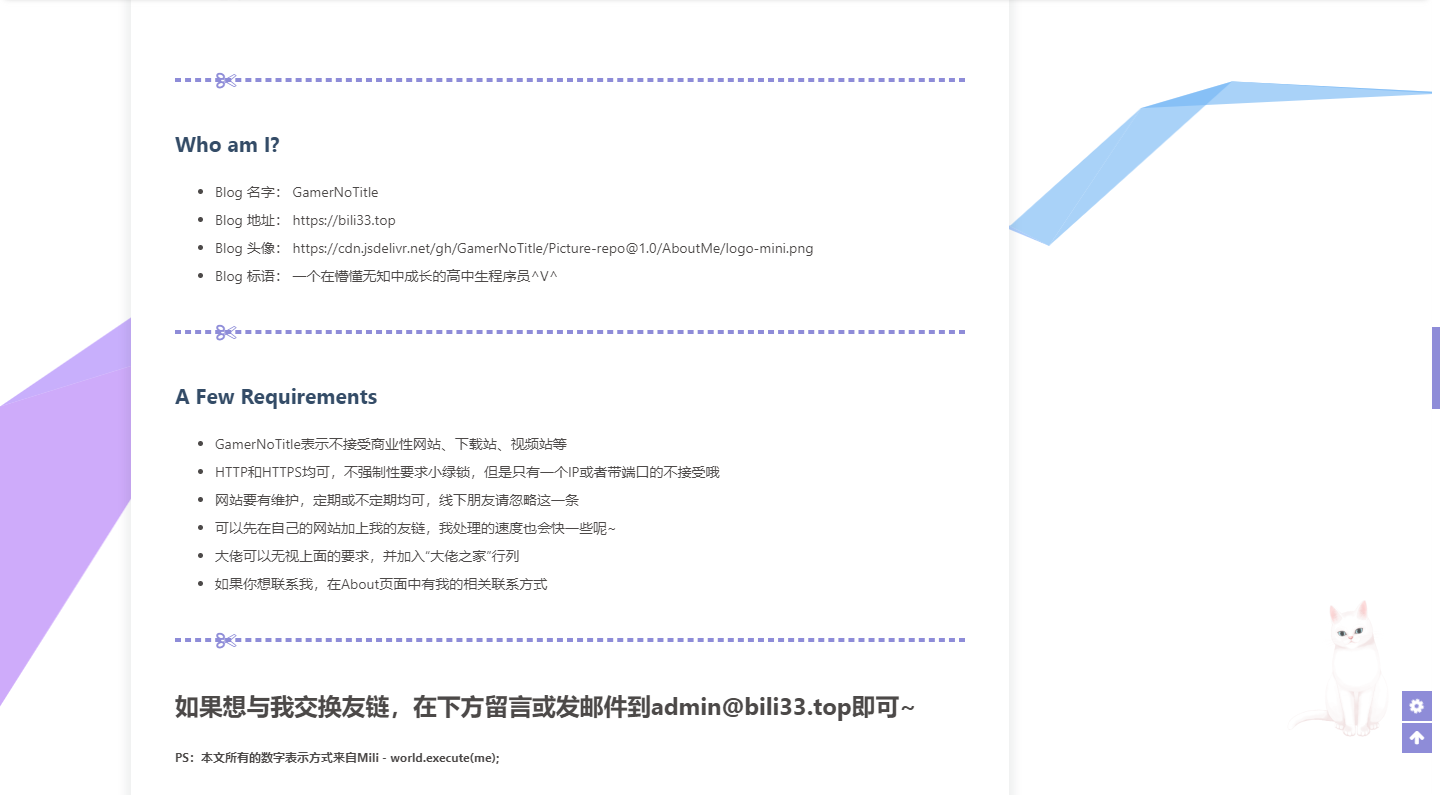
关于友链界面,我加入了很多内容,如A Few Requirements和下面的PS就是我加入的。
之前闲着没事翻了一下主题的layout文件夹,里面的文件都已经命好名了,所以说一看我就知道哪个文件对应哪个部分,而我需要修改的就是flink.pug这个文件
原来它长这样:
1
2
3
4
5
6
7
8
9
10
11
12
13
14
15
16
17
18
19
20
21
22
23
24
25
26
27
.flink each i in site.data.link h1= i.class_name .post-cards ul.md-links each item in i.link_list li.md-links-item a(href=item.link title=item.name target="_blank") if theme.lazyload.enable img.lazyload(data-src=item.avatar onerror=`this.onerror=null;this.src='` + url_for(theme.lodding_bg.flink) + `'` alt=item.name ) else img(src=item.avatar onerror=`this.onerror=null;this.src='` + url_for(theme.lodding_bg.flink) + `'` alt=item.name ) .md-links-title= item.name .md-links-des= item.descr hr div h2= theme.Flink.info_headline ul li= theme.Flink.name li= theme.Flink.address li= theme.Flink.avatar li= theme.Flink.info hr .comment_int p.comment-word= theme.Flink.comment
尽管我不是很懂pug这个东西,但是我还是能看懂代码的内容,其中hr就是一条分割线,所以说区块就用分割线来分开就好了。
最开始使用这个主题的时候(当时版本应该是1.2.0,还没有按钮分级),在做友链界面的时候,我这边就有人对我的数字提出了疑问,然后我就加入了下面那行PS:本文所有的数字表示方式来自Mili - world.execute(me);
在flink.pug中加入:
1 p(style="font-size:9px;font-weight:bold")= theme.Flink.PS
然后在butterfly的配置文件中加入一行
1 PS: PS:本文所有的数字表示方式来自Mili - world.execute(me);
就可以在友链界面加入自定义的内容了
至于A Few Requirements区块在更新2.1.0后用同样的方式加入的
在flink.pug加入:
1
2
3
4
5
6
7
8
9
10
11
hr div h2= theme.Flink.require_headline ul li= theme.Flink.requirement1 li= theme.Flink.requirement2 li= theme.Flink.requirement3 li= theme.Flink.requirement4 li= theme.Flink.requirement5 li= theme.Flink.requirement6
有多少的requirement就加入多少行,然后在配置文件butterfly.yml用同样的方式加入
1
2
3
4
5
6
7
require_headline: A Few Requirements requirement1: GamerNoTitle表示不接受商业性网站、下载站、视频站等 requirement2: HTTP和HTTPS均可,不强制性要求小绿锁,但是只有一个IP或者带端口的不接受哦 requirement3: 网站要有维护,定期或不定期均可,线下朋友请忽略这一条 requirement4: 可以先在自己的网站加上我的友链,我处理的速度也会快一些呢~ requirement5: 大佬可以无视上面的要求,并加入“大佬之家”行列 requirement6: 如果你想联系我,在About页面中有我的相关联系方式
就可以了~
友链链接区块加入一行小字
Butterfly忘了哪个版本(我发现的时候是2.3.5)后不再需要此方法!
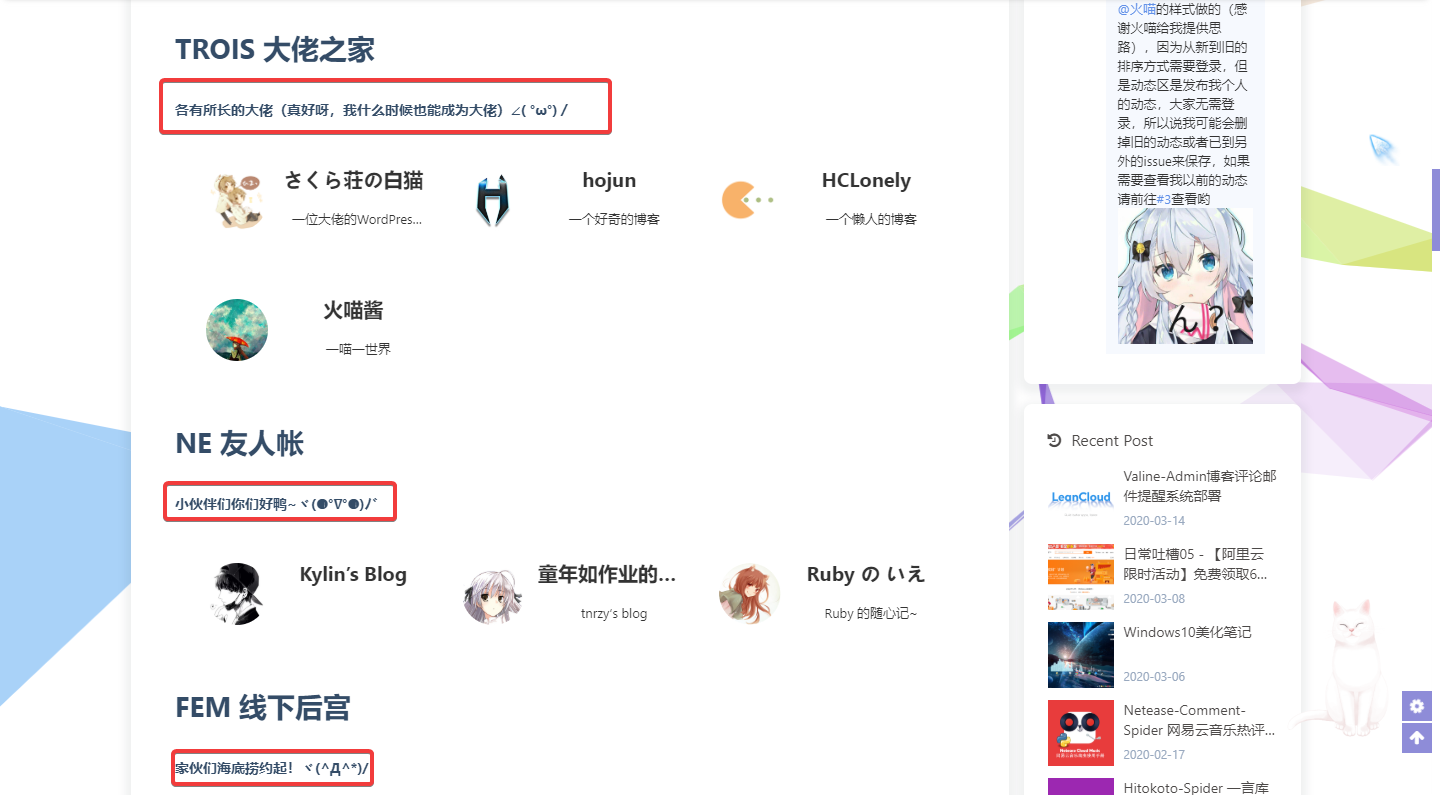
效果就像图片里面的那样
其实这个也很简单,跟上面一样还是要动flink.pug文件,在最顶上那一块代码中加入一行,将所需的字典名字命名为class_descr,加入后的代码如下
1
2
3
4
5
6
7
8
9
10
11
12
13
14
15
.flink each i in site.data.link h1= i.class_name h4= i.class_descr //- 给每个class加入class_descr参数 .post-cards ul.md-links each item in i.link_list li.md-links-item a(href=item.link title=item.name target="_blank") if theme.lazyload.enable img.lazyload(data-src=item.avatar onerror=`this.onerror=null;this.src='` + url_for(theme.lodding_bg.flink) + `'` alt=item.name ) else img(src=item.avatar onerror=`this.onerror=null;this.src='` + url_for(theme.lodding_bg.flink) + `'` alt=item.name ) .md-links-title= item.name .md-links-des= item.descr
然后在link.yml的每一个class中就可以加入descr了,这里以一个区块做例子
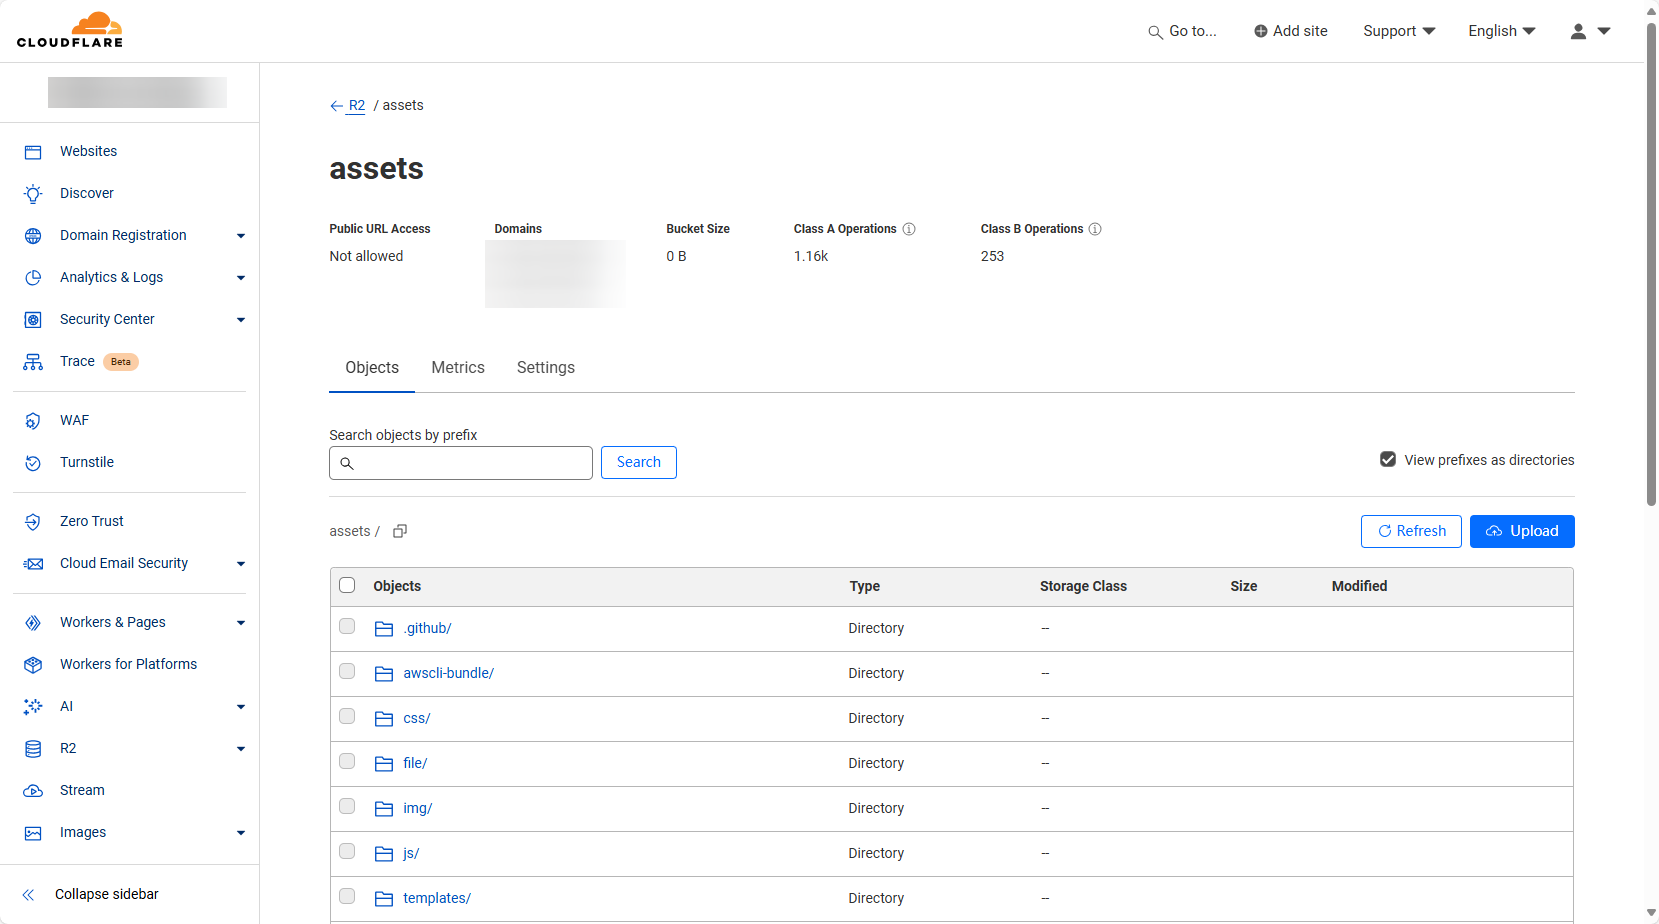
1
2
3
4
5
6
7
8
9
10
class2: class_name: DOS 私人服务 class_descr: 我个人在使用的不同网络服务,在这里列出(^U^)ノ~YO link_list: 1: name: CloudFlare link: https://www.cloudflare.com/ avatar: https://dash.cloudflare.com/favicon.ico descr: 免费的域名托管平台
在class_name下面加入一行参数叫class_descr并设定为想要的内容即可,当然你也可以加在link_list的下面,但是请注意缩进要跟class_name和link_list平齐
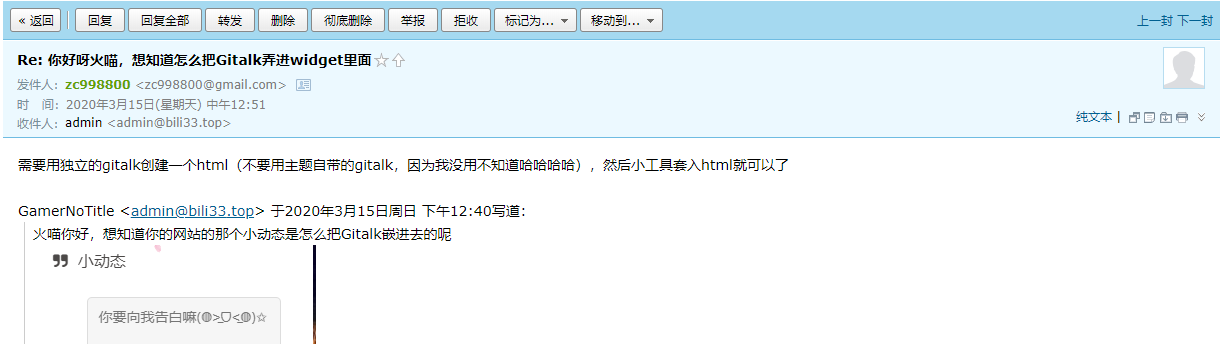
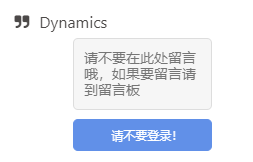
加入基于Gitalk的动态栏小部件 这个部件最开始是在@火喵 的博客看到的,然后就发了邮件问了一下是怎么实现的
感谢@火喵 提供的思路~!
然后我参照了Gitalk的文档,用一个非常简单的什么都没有的html文件来装我这个Gitalk,正因为只有Gitalk,所以整个html文档就很简单
1 2 3 4 5 6 7 8 9 10 11 12 13 14 15 16 17 18 19 20 21 <head > <link rel ="stylesheet" href ="https://cdn.jsdelivr.net/gh/GamerNoTitle/Picture-repo-v1@gitalk-css/css/gitalk-dorcandy.css" > <script src ="https://cdn.jsdelivr.net/gh/GamerNoTitle/Picture-repo-v1@gitalk/js/gitalk.min.js" > </script > </head > <body > <div id ="gitalk-container" > </div > <script > var gitalk = new Gitalk ({ id : 'Dynamics' , clientID : 'xxxxxxxxxxxxxxxxxxxx' , clientSecret : 'xxxxxxxxxxxxxxxxxxxxxxxxx' , repo : 'GamerNoTitle.Github.io' , owner : 'GamerNoTitle' , admin : ['GamerNoTitle' ], title : 'Dynamics' , pagerDirection : 'last' , perPage : 5 , }) gitalk.render ('gitalk-container' ) </script > </body >
其中,pagerDirection本来是排序的顺序,但是按照Gitalk的issue#210 中官方所述,不登录的话排序顺序只能是从旧到新,所以我也没办法,我采取的操作是一个issue中只容纳5条动态,历史动态就放到另外的issue中
将这个html文件命名一下为gitalk.html,然后放在主题目录的source文件夹下,然后进入.\layout\includes\widget文件夹,将card_announcement.pug(公告卡片)复制一份作为模板并且重命名为card_dynamics.pug,然后打开修改里面的内容。原来里面的内容如下
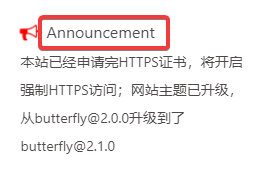
1
2
3
4
5
6
.card-widget.card-announcement .card-content .item-headline i.fa.fa-bullhorn.card-announcement-animation(aria-hidden="true") span= _p('aside.card_announcement') .announcement_content= theme.announcement.content
在这里面,span应该是显示的字(如图红框处)
但是我加入的字不在语言配置文件中有,所以直接修改成
就可以了,接着是要修改图标,作为动态,一个小喇叭的图标显得不是很好看。所以我就访问了Fontawesome@v4.7.0 ,选择了现在的这个图标
将图标的信息修改为
1 i.fa.fa-quote-right(aria-hidden="true")
图标后面的那串动画就不要了,动画多了也不是很好看
最后需要引入Gitalk.html文件,在下面加入一行
这样当部署完后,网站就会自动引用根目录下的gitalk.html文件。当然你要是直接访问我的gitalk.html文件也是能打开的
接着我们需要在网站的渲染中加入这个小部件
打开此目录下的index.pug,然后将这个引入加在认为合适的地方,我直接加载了公告的下面
1
2
if theme.aside.card_dynamics include ./card_dynamics.pug
最后到butterfly.yml文件中,加入小部件的开关
1
2
3
4
5
6
7
8
9
10
aside: position: right card_author: true card_announcement: true card_recent_post: true card_categories: true card_tags: false card_archives: true card_webinfo: true card_dynamics: true
部署自己的网页,就能够出现这种效果啦!
当然你要是在上面不要if判断,直接加入,那你就不需要在配置文件中加入开关了
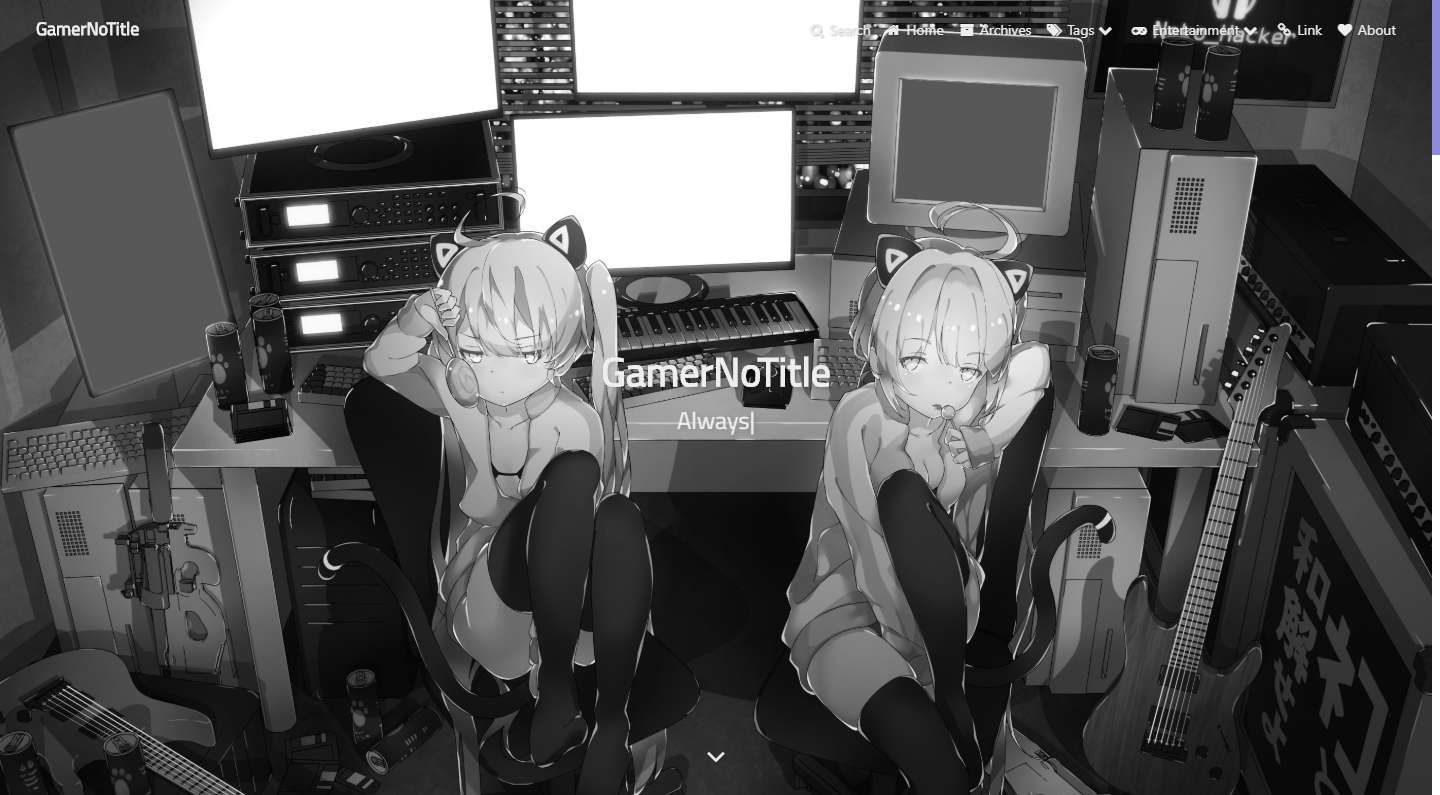
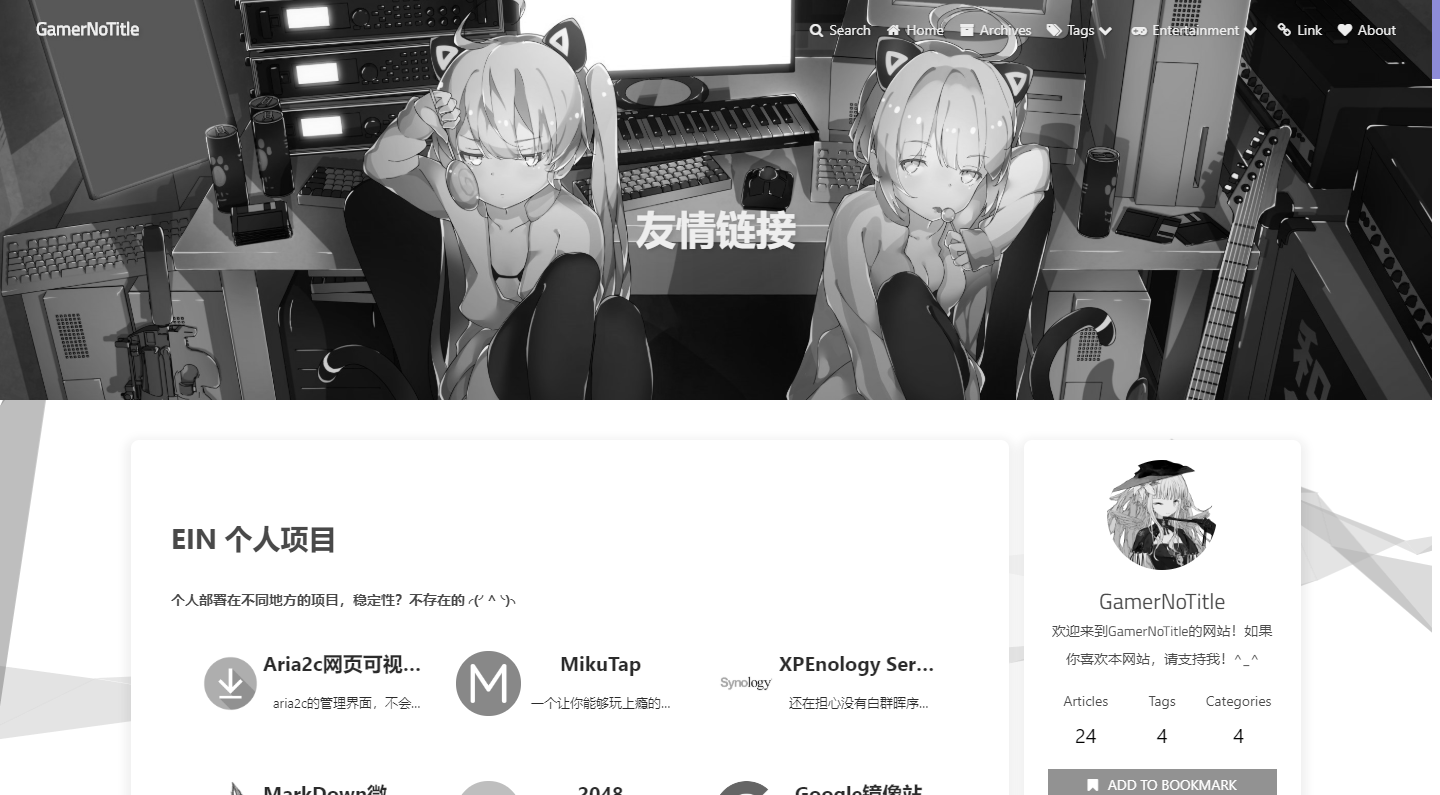
为网站加上全局黑白效果 为什么加这个效果呢?我一开始加是2020.4.4 为了纪念为抗争新冠肺炎而牺牲的各位烈士们,所以加了全局的黑白效果。先放两张图给你们看看加入后的效果
就是像这样的全局黑白效果,加起来其实也不难,一开始@yuleng 给我分享了全局黑白的html代码,告诉我要加就加载header或者是body里面(下面先放html代码)
1 2 3 4 5 6 7 8 9 10 11 12 13 <style > html {filter : grayscale ( 100% );-webkit-filter : grayscale ( 100% ); -moz-filter : grayscale ( 100% ); -ms-filter : grayscale ( 100% ); -o-filter : grayscale ( 100% ); filter : url ( "data:image/svg+xml;utf8,<svg xmlns=\'http://www.w3.org/2000/svg\'><filter id=\'grayscale\'><feColorMatrix type=\'matrix\' values=\'0.3333 0.3333 0.3333 0 0 0.3333 0.3333 0.3333 0 0 0.3333 0.3333 0.3333 0 0 0 0 0 1 0\'/></filter></svg>#grayscale" );filter :progid:DXImageTransform.Microsoft.BasicImage (grayscale=1 );-webkit-filter : grayscale ( 1 ); } </style >
但是我们的butterfly后端是使用的pug文件作为网站样式的编写方式,所以我们要先把它转成pug形式的,转出来就是像下面这样
1
2
3
4
5
6
7
8
9
10
11
12
13
14
15
html body // 黑白色 style. html{ filter: grayscale( 100%); -webkit-filter: grayscale( 100%); -moz-filter: grayscale( 100%); -ms-filter: grayscale( 100%); -o-filter: grayscale( 100%); filter: url( "data:image/svg+xml;utf8,<svg xmlns=\'http://www.w3.org/2000/svg\'><filter id=\'grayscale\'><feColorMatrix type=\'matrix\' values=\'0.3333 0.3333 0.3333 0 0 0.3333 0.3333 0.3333 0 0 0.3333 0.3333 0.3333 0 0 0 0 0 1 0\'/></filter></svg>#grayscale"); filter:progid:DXImageTransform.Microsoft.BasicImage(grayscale=1); -webkit-filter: grayscale( 1); }
然后我把这一串代码存到一个名为blackandwhite.pug的文件,将它放在主题目录下的layout/includes/addons里面,然后就要在layout.pug里面引入文件。在原文件的include ./head.pug下面加入一行来引入我们的文件
1
2
if theme.blackandwhite include ./addons/blackandwhite.pug
加个if判断是为了下次要使用的时候还能够用,不用再次修改。
接着我们到butterfly.yml文件内加多一行
这样就开启了我们的黑白效果
为了方便大家,我将文件放出来blackandwhite.pug ,大家只需要将文件放在对应的位置,加上对应的配置项即可!
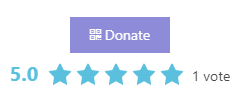
为文章加上投票评分功能 按照群友的要求,我又来更新啦,这次我们给文章加上投票评分功能,具体的效果像下面那样(Donate按键是主题自带的,不是我加入的)
那么废话不多说,让我们直接开始!(如果你想直接使用我做好的只需要替换id的预设文件,那你可以点击这里 直接跳到文档,而不必看我是如何做的)注册一个你自己的账号,注册过程相信我不用说你也会。注册完以后,会把我们导到安装界面,我们选择最右边的Rating widget,获取我们自己的引入代码,等待下一步使用,我这里获取到的引入代码如下(为保证信息准确性,我将自己的id替换成了xxxxx)
首先你得去widgetpack 注册一个你自己的账号,注册过程相信我不用说你也会。注册完以后,会把我们导到安装界面,我们选择最右边的Rating widget,获取我们自己的引入代码,等待下一步使用,我这里获取到的引入代码如下(为保证信息准确性,我将自己的id替换成了xxxxx)
1 2 3 4 5 6 7 8 9 10 11 12 13 14 15 <div id ="wpac-rating" > </div > <script type ="text/javascript" > wpac_init = window .wpac_init || []; wpac_init.push ({widget : 'Rating' , id : xxxxx}); (function ( if ('WIDGETPACK_LOADED' in window ) return ; WIDGETPACK_LOADED = true ; var mc = document .createElement ('script' ); mc.type = 'text/javascript' ; mc.async = true ; mc.src = 'https://embed.widgetpack.com/widget.js' ; var s = document .getElementsByTagName ('script' )[0 ]; s.parentNode .insertBefore (mc, s.nextSibling ); })(); </script > <a href ="https://widgetpack.com" class ="wpac-cr" > Star Rating WIDGET PACK</a >
接着,我们要在对应的地方引用它,但是butterfly是使用pug和stylus的组合来进行渲染的,所以我们要先把上面的这一串代码转成pug形式的
1
2
3
4
5
6
7
8
9
10
11
12
13
14
15
16
html body #wpac-rating script(type="text/javascript"). wpac_init = window.wpac_init || []; wpac_init.push({widget: 'Rating', id: xxxxx}); (function() { if ('WIDGETPACK_LOADED' in window) return; WIDGETPACK_LOADED = true; var mc = document.createElement('script'); mc.type = 'text/javascript'; mc.async = true; mc.src = 'https://embed.widgetpack.com/widget.js'; var s = document.getElementsByTagName('script')[0]; s.parentNode.insertBefore(mc, s.nextSibling); })(); a.wpac-cr(href="https://widgetpack.com") Star Rating WIDGET PACK
然后将其保存成rating.pug,放到./layout/includes/addons里面去。不过在这代码里面,投票UI不是居中的就让我很不上,而且最后一行有一串a标签,然而我并不是很喜欢它,我将代码改成了下面这个样子(这里把id改成了变量,可以在butterfly.yml里面修改)
1
2
3
4
5
6
7
8
9
10
11
12
13
14
15
16
17
18
19
20
21
22
html body #wpac-rating(align="center") script(type="text/javascript"). wpac_init = window.wpac_init || []; wpac_init.push({widget: 'Rating', id: !{theme.rating.id}}); //- 这里将xxxxx改成自己的id (function() { if ('WIDGETPACK_LOADED' in window) return; WIDGETPACK_LOADED = true; var mc = document.createElement('script'); mc.type = 'text/javascript'; mc.async = true; mc.src = 'https://embed.widgetpack.com/widget.js'; var s = document.getElementsByTagName('script')[0]; s.parentNode.insertBefore(mc, s.nextSibling); })(); //- 下面的那行小字 如果你不需要可以把17~21行注释掉 #copy(align="center") | Rating addon based on a(herf="https://widgetpack.com/") widgetpack | , by a(href="https://bili33.top") GamerNoTitle
保存完成后,我们进入./layout/post.pug里面对我们的文件进行引入,在合适的位置添加引入代码,我这里是在打上的下面进行了添加
1
2
3
4
5
if theme.reward.enable !=partial('includes/post/reward', {}, {cache:theme.fragment_cache}) //- 上面是打赏功能,下面是添加的投票功能 if theme.rating.enable include includes/addons/rating.pug
接着,我们到butterfly.yml里面加入新的配置项
1
2
3
rating: enable: true id: 00000
这样就加入了一个开关(不过是全局的),可以控制rating功能是否开启(讲真我觉得这个功能我自己用的很少,我自己应该会关掉)
接着我们就可以部署自己的应用啦,看看是不是可以开始投票了呢?
关于投票的设定,默认是需要社交账号登录的,但是看着这几个图标,又有几个是在国内能够使用的呢?
我们需要更改这个设定,让其不需要社交账号登录也能够进行投票
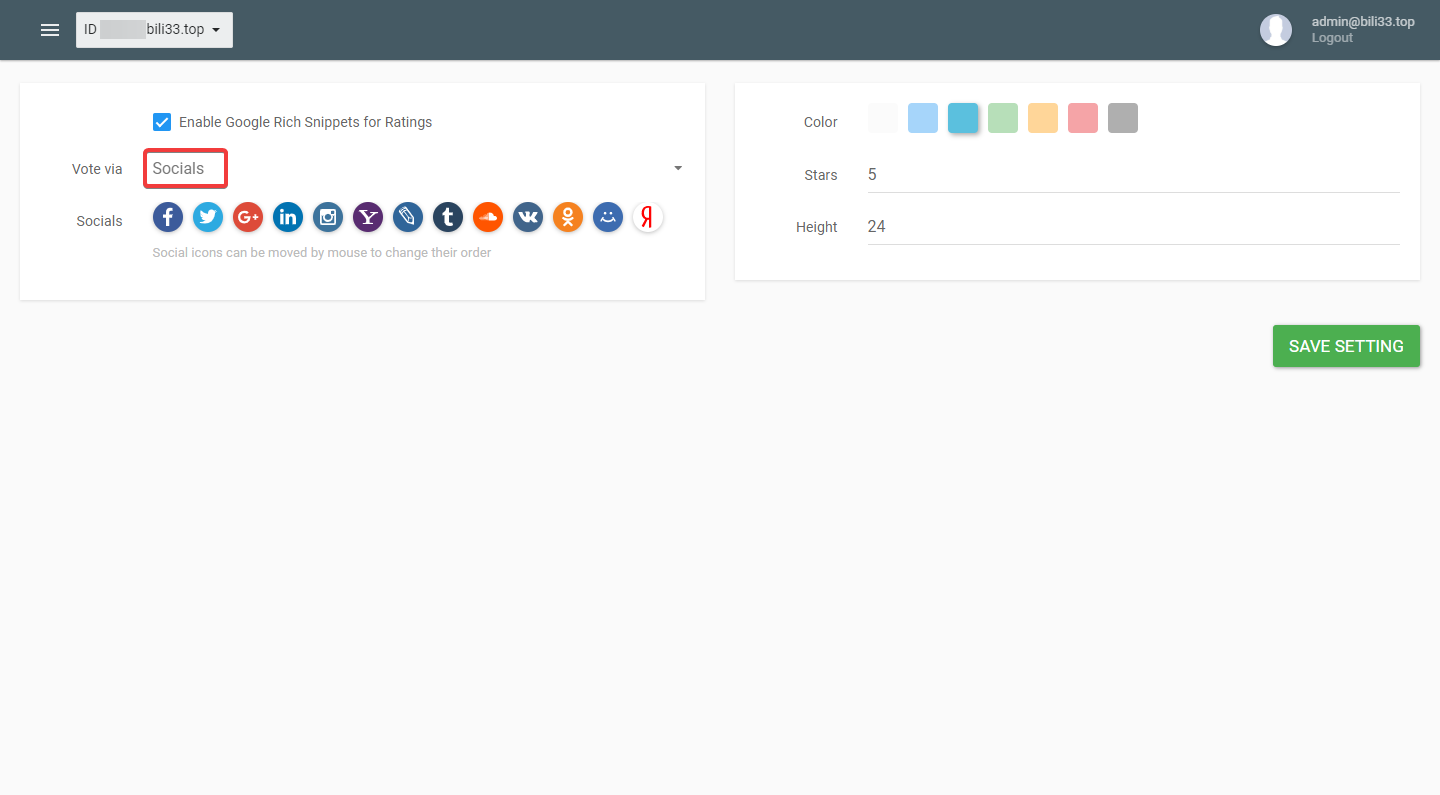
点开左上角的三条横线,选择Rating,然后点击里面的Setting,在这里面就有我们需要的设置
我们可以看到左边的框选择的是Social,我们可以选择IP address或者Cookies的任意一个,这取决于你要怎么计算你的文章投票,如果选择IP的话,那么同公网IP下的一个人进行了投票,剩下的人就不能够投票了(会怎么点都没反应);选择Cookie的话,可能会存在刷票的问题(因为cookie是可以清理的,但是谁这么无聊呢?)
至于右边,可以选择星星的颜色,我这里选择的是淡蓝色;你还可以设置星星上限,默认是5星满分,你可以把它改成你想要的数字,而另一个输入框是设定星星的大小,取决于你自己的审美吧
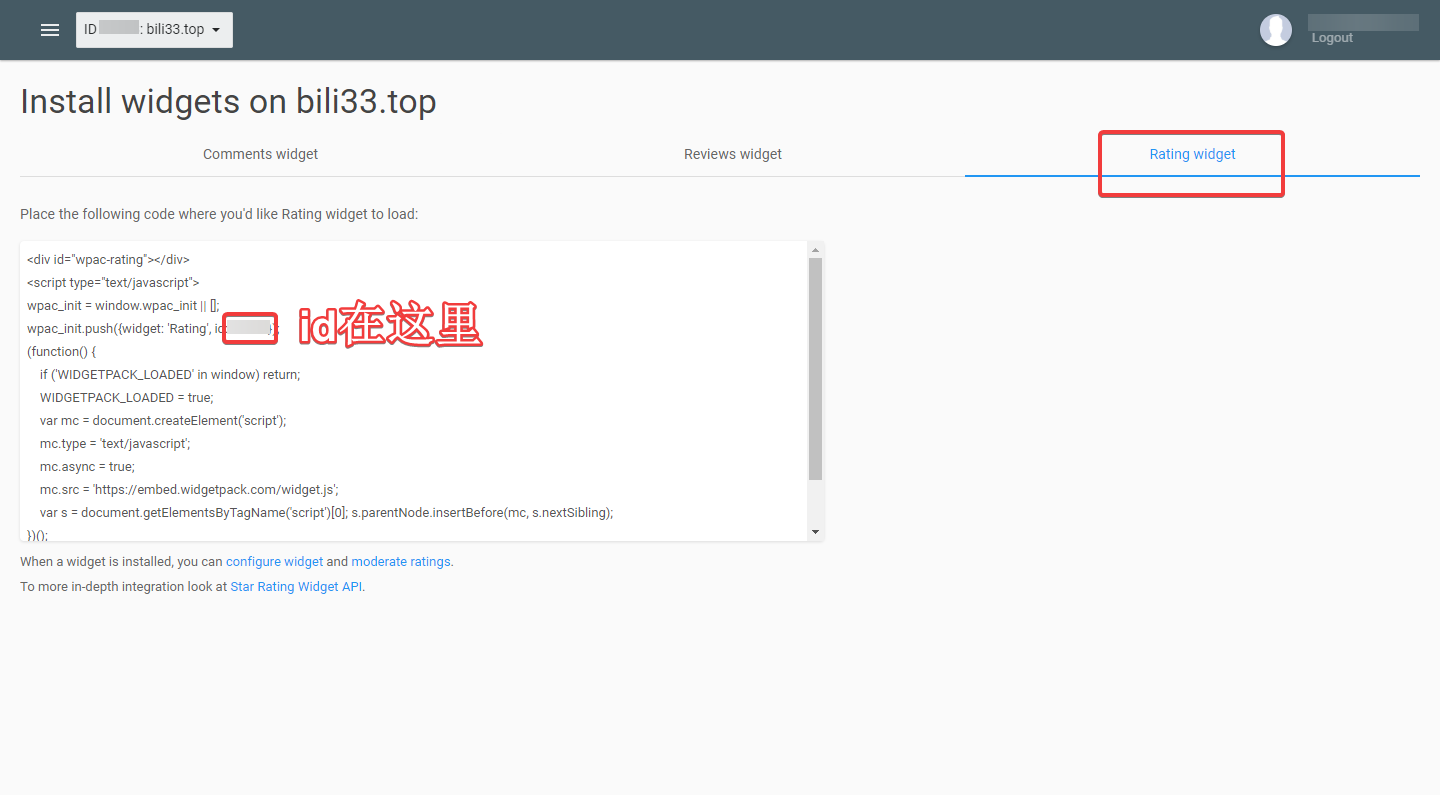
评分预设文档使用 首先你需要点击这里 下载预设文件
在这文档里面,你需要修改的是id。如何获取id,你可以查看下面这张图片
把文件放入./layout/includes/addons(若不存在则自己建立文件夹)
打开自己的butterfly.yml文件,在任意一行加入以下内容:
1 2 3 4 rating: enable: true id: 00000
然后去到./layout/post.pug里面,在你想要加入投票功能的位置加入以下代码(推荐加载打赏即reward后面)
1
2
if theme.rating.enable include includes/addons/rating.pug
然后对网站进行部署即可!
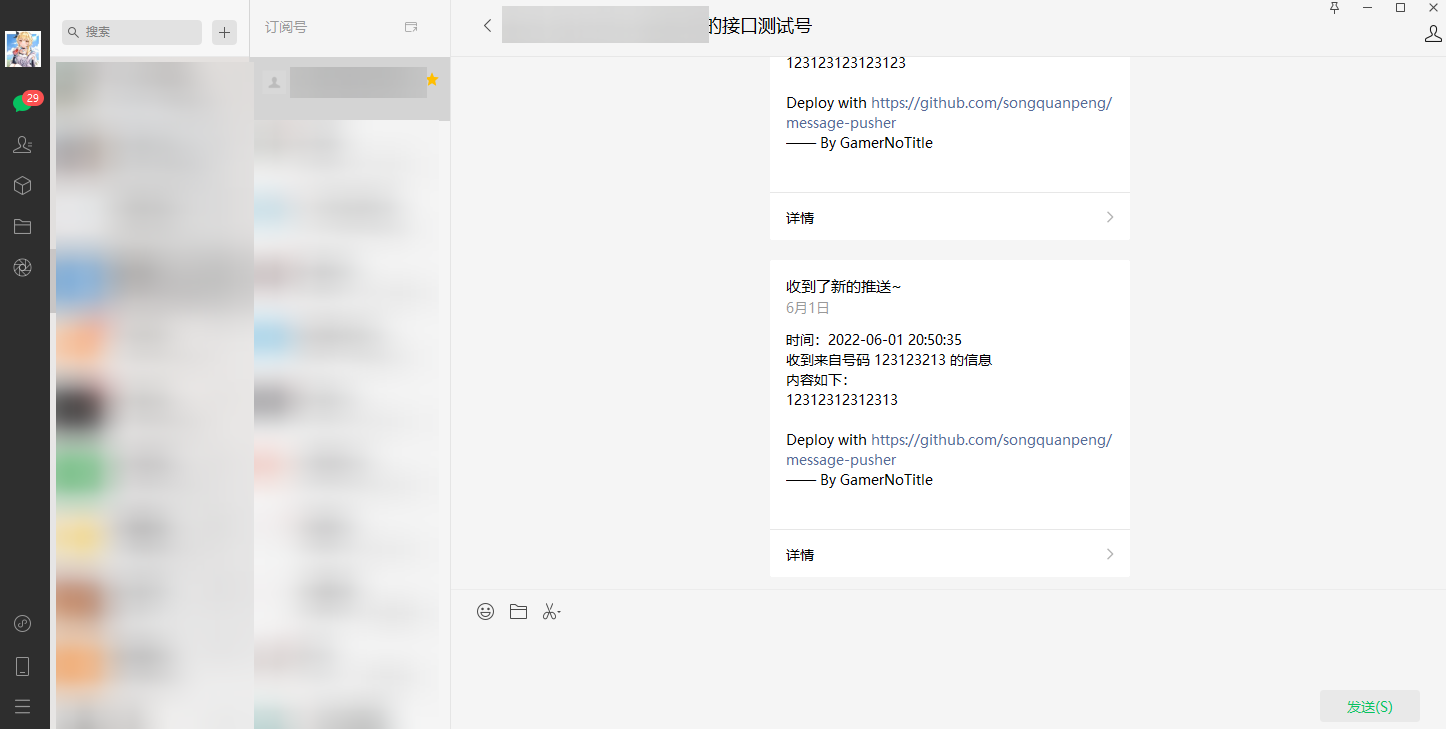
为网站加入实时对话功能
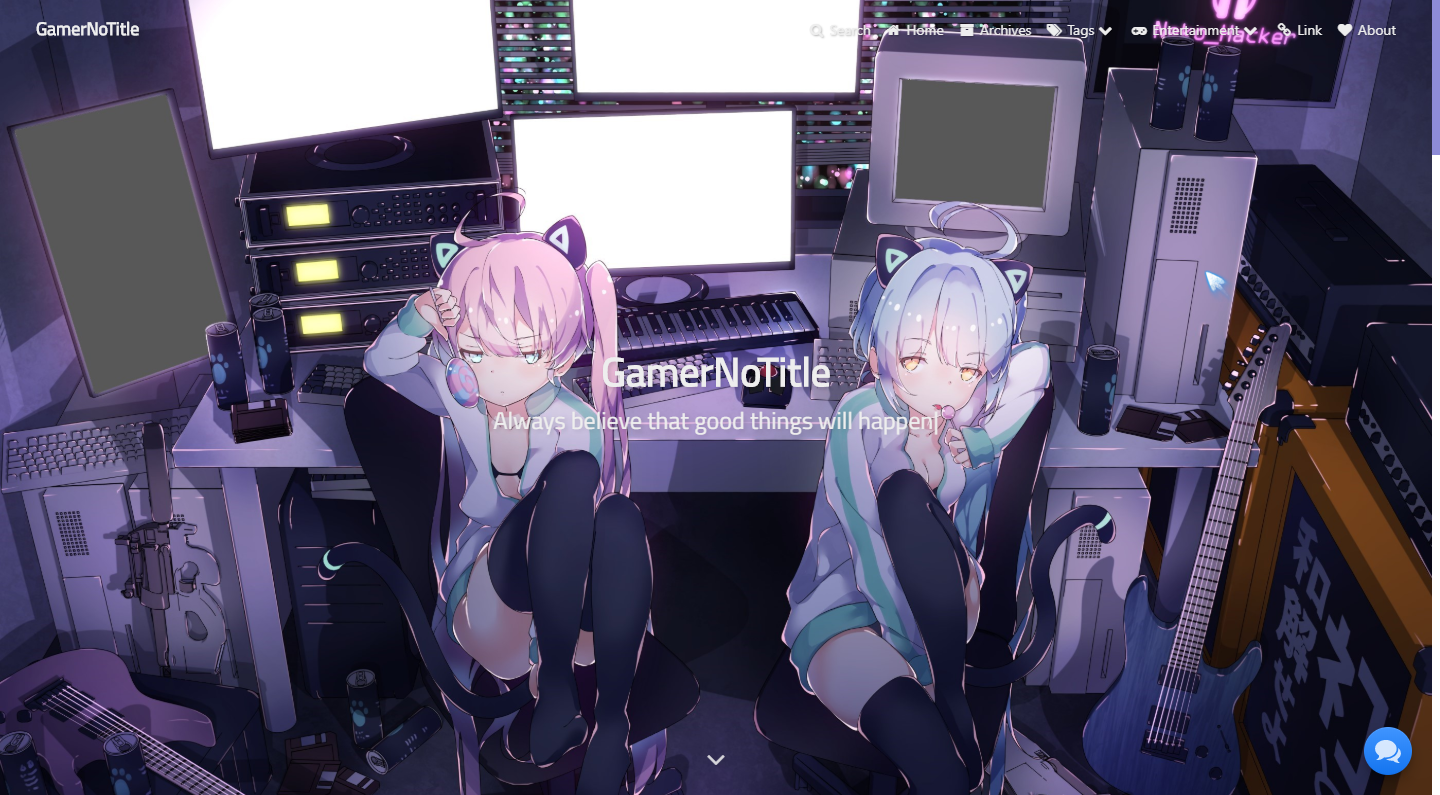
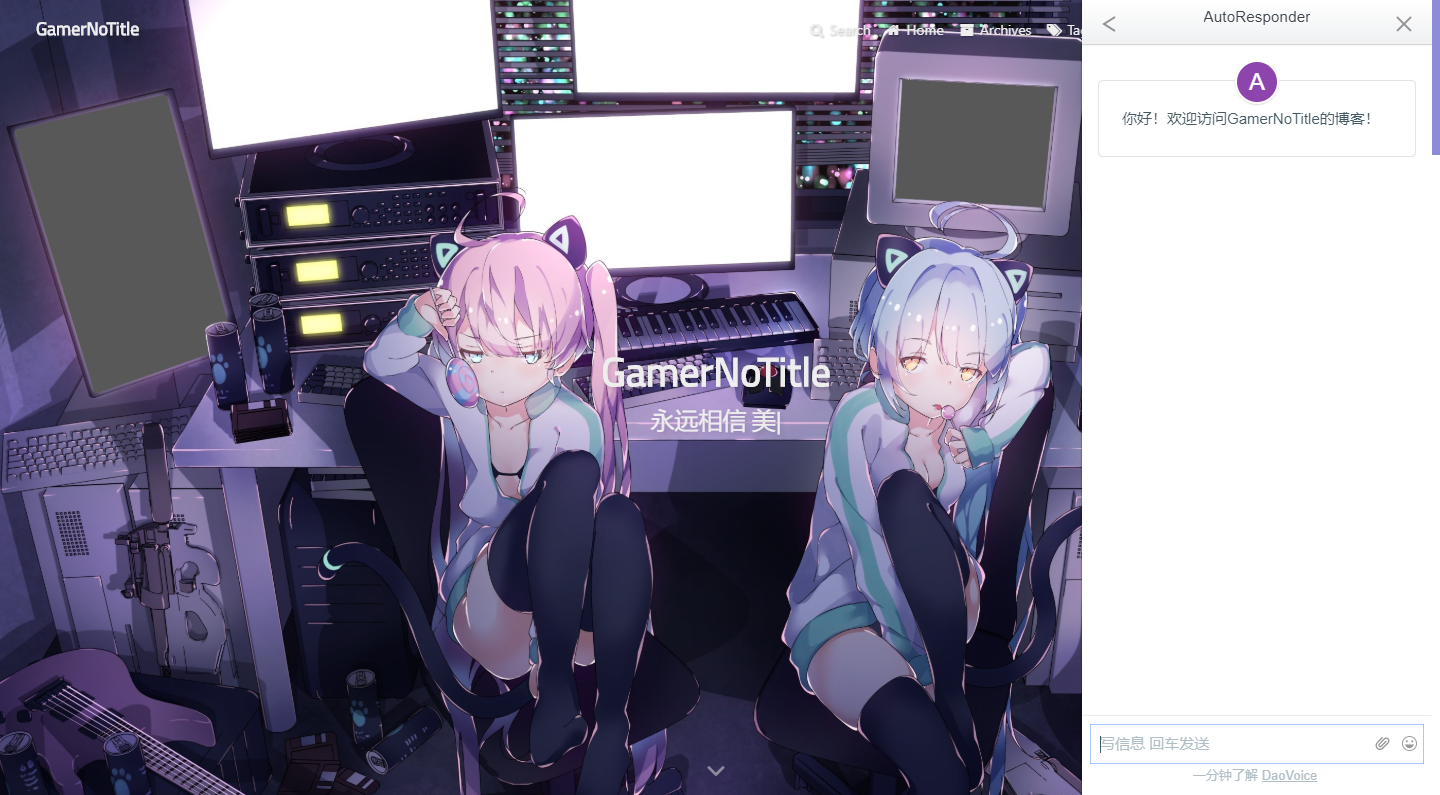
与其说是实时对话,怎么感觉像客服系统?(某群友想弄然后我先给搞出来了,接着他自己在我发文前弄好了)这次使用的是Daovoice ,照例我们先上一张效果图(如果想直接使用预设文档的话你可以点这里 )(注:本站未开启此功能)
是不是很像客服系统?然而你就是可以把它玩成聊天软件,话不多说,让我们开始吧!
首先我们需要在Daovoice 上面注册一个账号,添加我们自己的应用。添加完了以后,daocloud会给我们一些代码,需要我们加入到head中,并使用script调用才能出现右下角的那个按钮
新办法
预设文档点这里
我们先把daovoice给我们的两串代码整合一下
1 2 3 4 5 6 7 <script > (function (i,s,o,g,r,a,m ){i["DaoVoiceObject" ]=r;i[r]=i[r]||function (q =i[r].q ||[]).push (arguments )},i[r].l =1 *new Date ();a=s.createElement (o),m=s.getElementsByTagName (o)[0 ];a.async =1 ;a.src =g;a.charset ="utf-8" ;m.parentNode .insertBefore (a,m)})(window ,document ,"script" ,('https:' == document .location .protocol ? 'https:' : 'http:' ) + "//widget.daovoice.io/widget/xxxxxxxx.js" ,"daovoice" ) daovoice ('init' , { app_id : "xxxxxxxx" }); daovoice ('update' );</script >
接着把它转成pug形式(这里已经将appid作为一个变量,感谢@青苏 告诉我pug变量的正确写法)
1
2
3
4
5
6
7
8
html body script. (function(i,s,o,g,r,a,m){i["DaoVoiceObject"]=r;i[r]=i[r]||function(){(i[r].q=i[r].q||[]).push(arguments)},i[r].l=1*new Date();a=s.createElement(o),m=s.getElementsByTagName(o)[0];a.async=1;a.src=g;a.charset="utf-8";m.parentNode.insertBefore(a,m)})(window,document,"script",('https:' == document.location.protocol ? 'https:' : 'http:') + "//widget.daovoice.io/widget/!{theme.daovoice.appid}.js","daovoice") daovoice('init', { app_id: "!{theme.daovoice.appid}", }); daovoice('update');
然后将这串代码保存到./layout/includes/addons/daovoice.pug中
然后我们打开./layout/index.pug文件,在里面加入以下内容
1
2
if theme.daovoice.enable include includes/addons/daovoice.pug
然后我们再打开butterfly.yml,在里面加入以下内容
1 2 3 4 daovoice: enable: true appid: xxxxxxxx
接着保存,部署,发现右下角的按钮出来了吧~
实时对话预设文档使用 先点击这个链接下载预设文档→daovoice.pug
将文件放入./layout/includes/addons文件夹内,接着打开./layout/index.pug,在里面加入以下内容
1
2
if theme.daovoice.enable include includes/addons/daovoice.pug
然后打开butterfly.yml,加入以下内容
1 2 3 4 daovoice: enable: true appid: xxxxxxxx
接着部署即可!
旧办法 Daocloud提供给我的代码是下面这样的,正常来说除了那个js的名字不一样其他都是一样的(这里的js名字为了保证隐私安全我用了xxxxxxxx代替)
1 <script > (function (i,s,o,g,r,a,m ){i["DaoVoiceObject" ]=r;i[r]=i[r]||function (q =i[r].q ||[]).push (arguments )},i[r].l =1 *new Date ();a=s.createElement (o),m=s.getElementsByTagName (o)[0 ];a.async =1 ;a.src =g;a.charset ="utf-8" ;m.parentNode .insertBefore (a,m)})(window ,document ,"script" ,('https:' == document .location .protocol ? 'https:' : 'http:' ) + "//widget.daovoice.io/widget/xxxxxxxx.js" ,"daovoice" ) </script >
按照思路,首先我们需要把daovoice提供的代码都转换成pug形式,转换后就像下面这样
1
2
3
4
html body script. (function(i,s,o,g,r,a,m){i["DaoVoiceObject"]=r;i[r]=i[r]||function(){(i[r].q=i[r].q||[]).push(arguments)},i[r].l=1*new Date();a=s.createElement(o),m=s.getElementsByTagName(o)[0];a.async=1;a.src=g;a.charset="utf-8";m.parentNode.insertBefore(a,m)})(window,document,"script",('https:' == document.location.protocol ? 'https:' : 'http:') + "//widget.daovoice.io/widget/xxxxxxxx.js","daovoice")
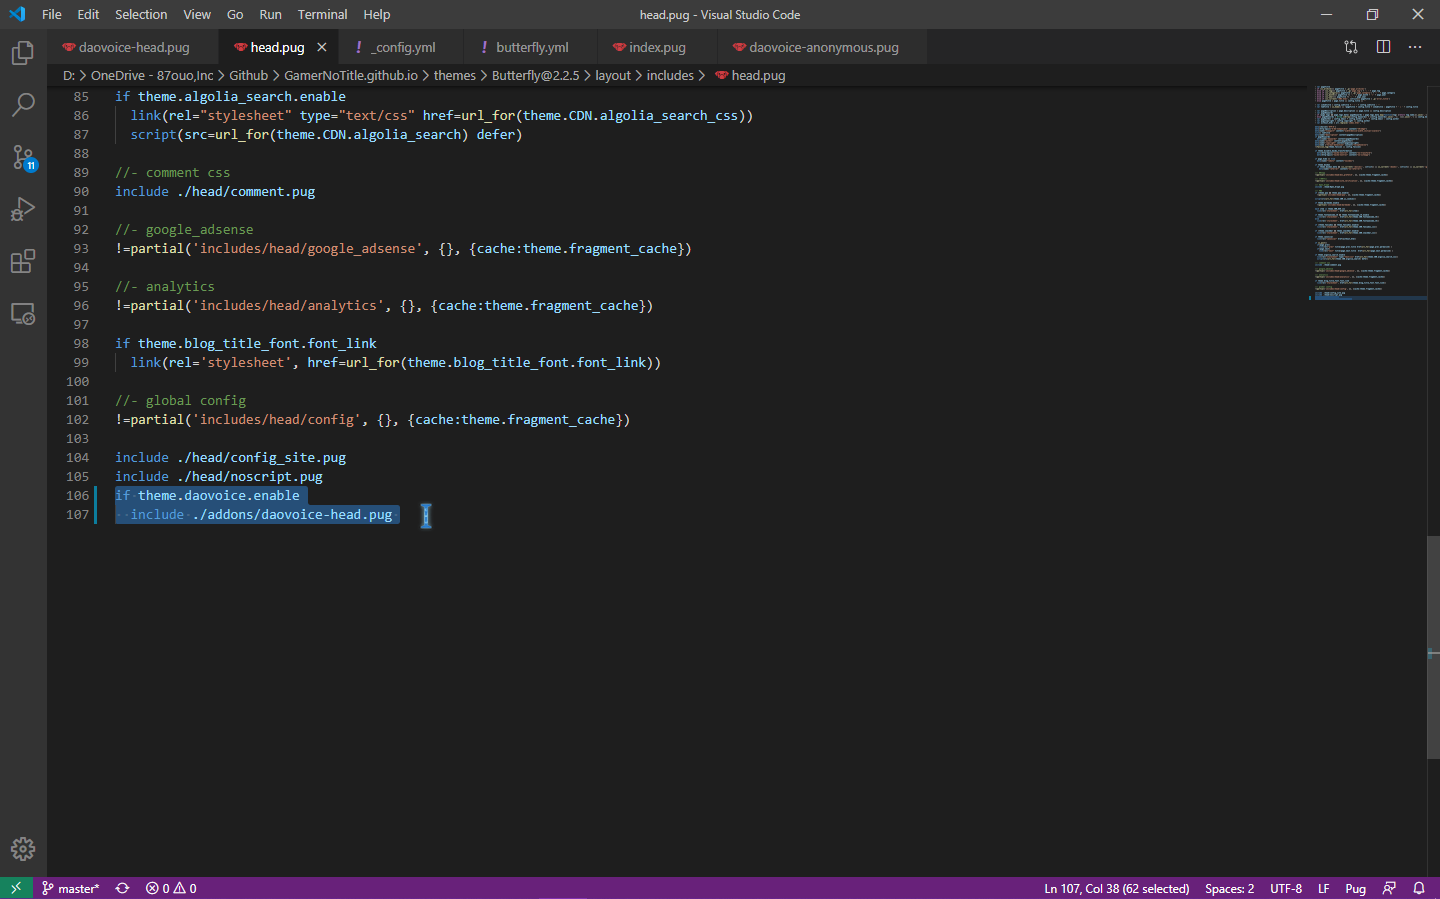
接着我们把这串代码放到daovoice-head.pug文件中,并把这个文件放到./layout/includes/addons里面(没有这个文件夹可以自己建立,也可以把我下面教程中的路径替换成你自己的),接着,我们打开./layout/includes/head.pug里面,加入以下代码
1
2
if theme.daovoice.enable //- 如果你不想在butterfly.yml中加入开关,想直接引入的话可以不用这一行 include ./addons/daovoice-head.pug
这样,head的引入就完成了
剩下的工作就是用一个script调用这个功能。根据daovoice提供给我们的代码(然而并没有把<script></script>加进去,差评哼)
1
2
3
4
daovoice('init', { app_id: "xxxxxxxx" }); daovoice('update');
我们需要给它的头和尾加入手动加入<script></script>才能正确调用,所以加了以后就是
1 2 3 4 5 6 <script > daovoice ('init' , { app_id : "xxxxxxxx" }); daovoice ('update' );</script >
接着仍然要把它转成pug文件,转出来以后就是这样
1
2
3
4
5
6
7
html body script. daovoice('init', { app_id: "xxxxxxxx", }); daovoice('update');
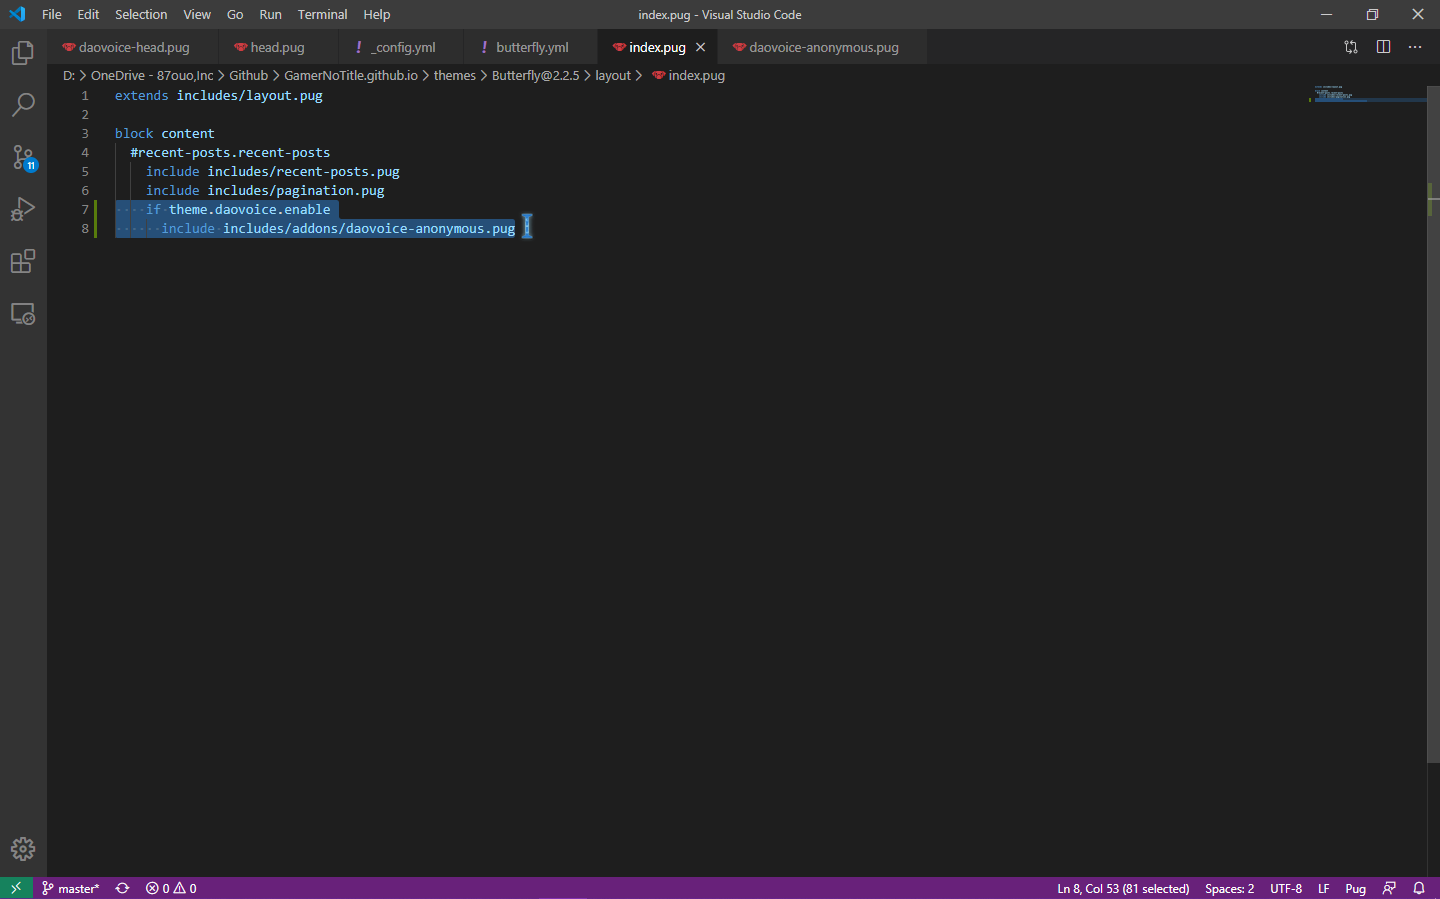
然后我们把这串代码保存到一个名为daocloud-anonymous.pug的文件,放到./layout/includes/addons里面,接着我们打开./layout/index.pug文件,在里面加入以下内容
1
2
if theme.daovoice.enable //- 这里同样,不需要的话可以删掉 include includes/addons/daovoice-anonymous.pug
然后保存,到butterfly.yml里面在任意一个位置加入以下内容
加入完成后保存,开始部署本地调试,看看右下角是不是多了一个小按钮啦?(按钮的样式需要在Daovoice后台更改)
旧办法实时对话预设文档使用 首先,你还是需要一个Daovoice账号,注册完了以后,点击下面的链接下载所需要的两个文件
Daovoice的Head预设文件 | Daovoice的调用Script
然后打开下载的daovoice-head.pug,在里面的第四行,把链接中的8个x改成你自己的应用id
1 2 3 4 html body script. (function(i,s,o,g,r,a,m){i["DaoVoiceObject"]=r;i[r]=i[r]||function(){(i[r].q=i[r].q||[]).push(arguments)},i[r].l=1*new Date();a=s.createElement(o),m=s.getElementsByTagName(o)[0];a.async=1;a.src=g;a.charset="utf-8";m.parentNode.insertBefore(a,m)})(window,document,"script",('https:' == document.location.protocol ? 'https:' : 'http:') + "//widget.daovoice.io/widget/xxxxxxxx.js","daovoice")
打开下载的daovoice-anonymous.pug文件,同样将里面的app_id改为自己的应用id
1 2 3 4 5 6 7 html body script. daovoice('init', { app_id: "xxxxxxxx", }); daovoice('update');
保存,把这两个文件放进./layout/includes/addons里面
接着打开./layout/includes/head.pug文件,在里面加入引入代码如下图
1 2 if theme.daovoice.enable include ./addons/daovoice-head.pug
保存,打开./layout/index.pug,在里面加入引入代码如下图
1 2 if theme.daovoice.enable include includes/addons/daovoice-anonymous.pug
保存,打开butterfly.yml,在任意一行加入以下内容
1 2 3 daovoice: enable: true
然后保存即可!
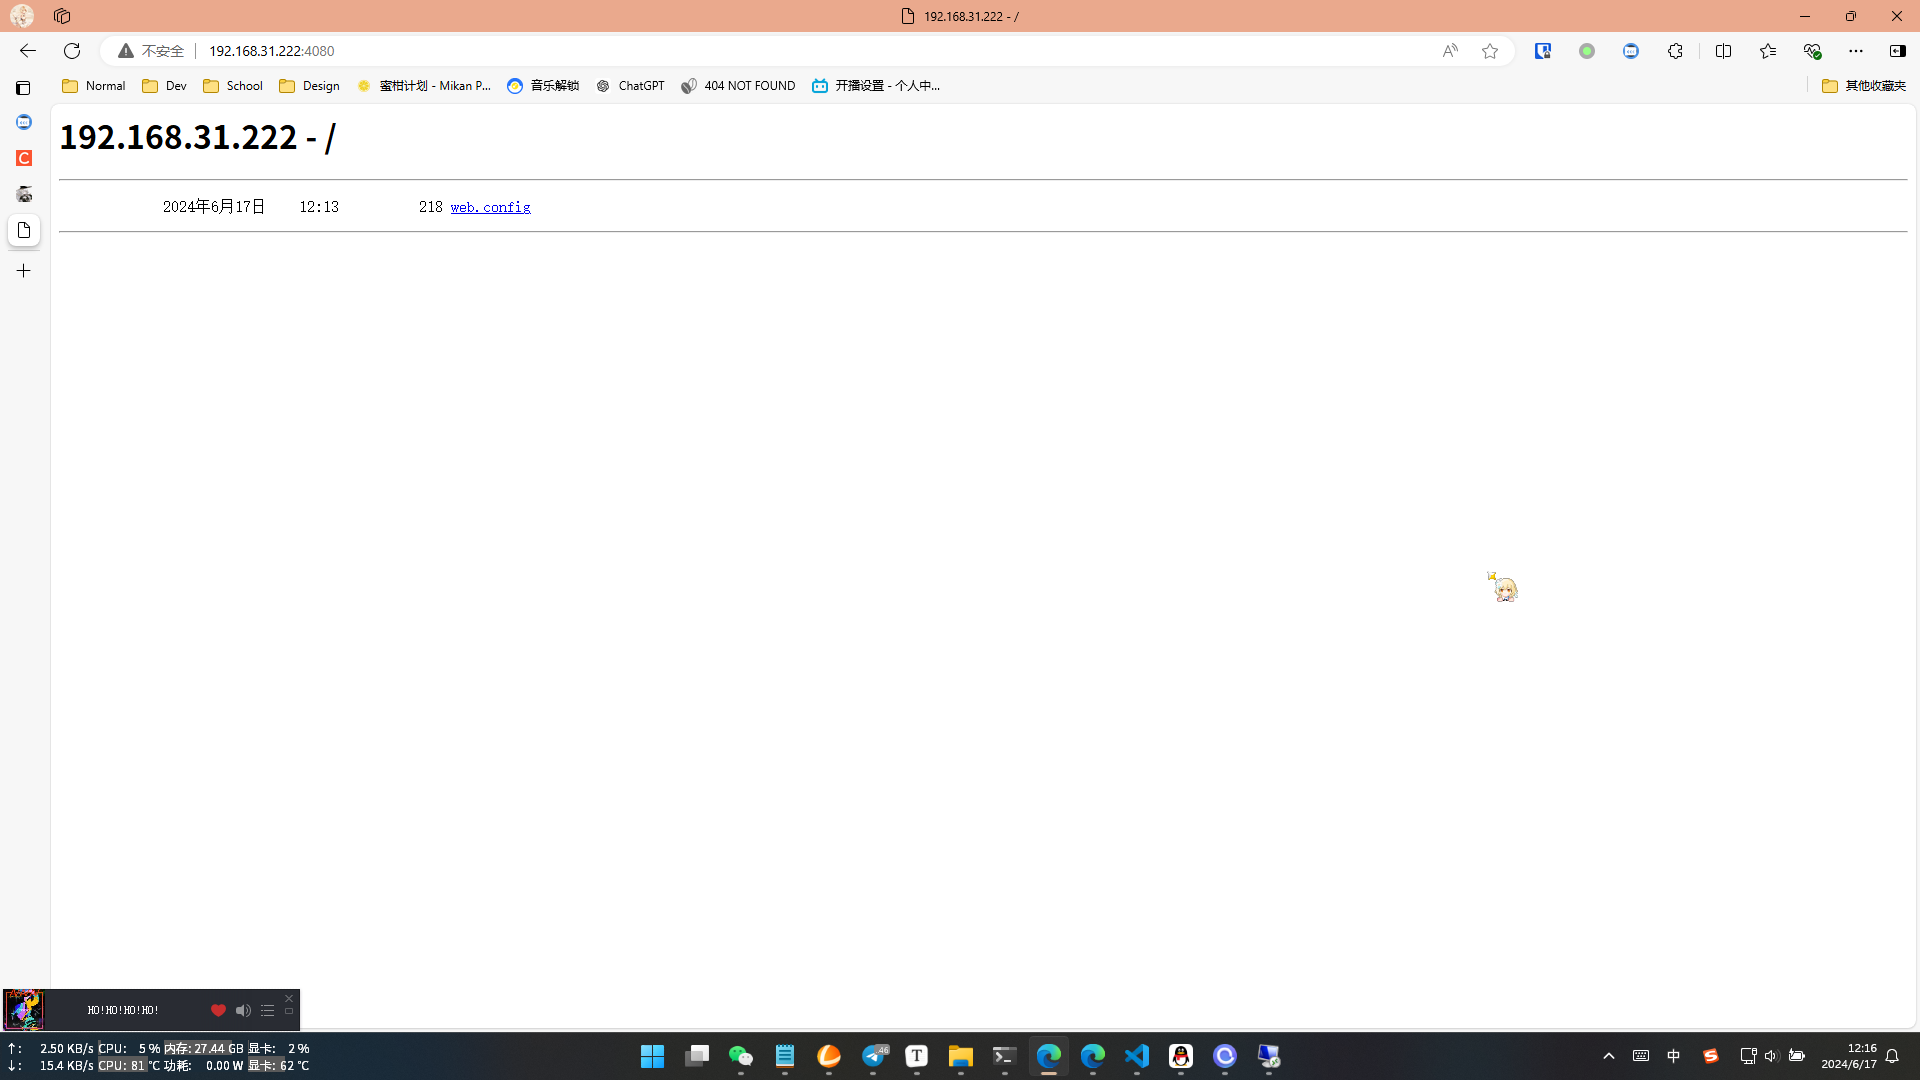
加入音乐小部件
Butterfly@dev-pjax分支不推荐
这里有两种做法,Aplayer方法和网易云自带播放器的方法,请根据自己的需要进行修改,预览图在每个方法的开头就有
Aplayer法
Aplayer是一个音乐播放器,官方文档在这里 ,这里我着重讲怎么添加,而不是aplayer的用法(已经配置好的文件在下面,可以直接下载使用)
首先,按照我的个人习惯,在layout/includes/addons文件夹里面复制粘贴一个layout/includes/widget/card_announcement.pug的副本,修改一下里面的内容,把公告的内容删掉,改成了下面这个样子
1 2 3 4 5 .card-widget.card-aplayer .card-content .item-headline i.fa.fa-music(aria-hidden="true") span= _p('Music')
接着,就要开始调用Aplayer了,按照官方的做法,我们要调用一个js和一个css文件,这里我保存了一份副本,并且修改了一下css,把进度条和循环按钮隐藏了,上传到github,通过jsdelivr调用
因为我们是内嵌一个html网页,所以我们这里要先用html写法写完,然后转成pug
1 2 3 4 5 html body link(rel="stylesheet" href="https://assets.bili33.top/css/APlayer.min.css") //- 引用修改的CSS #aplayer //- 相当于<div> script(src="https://assets.bili33.top/js/APlayer.min.js") //- 引用js文件
然后我们要给aplayer一些我们要放的音乐的信息,这里的写法是用<script></script>来赋值,至于怎么写请看官方文档,写好后记得转换成pug,下面我放出我的例子
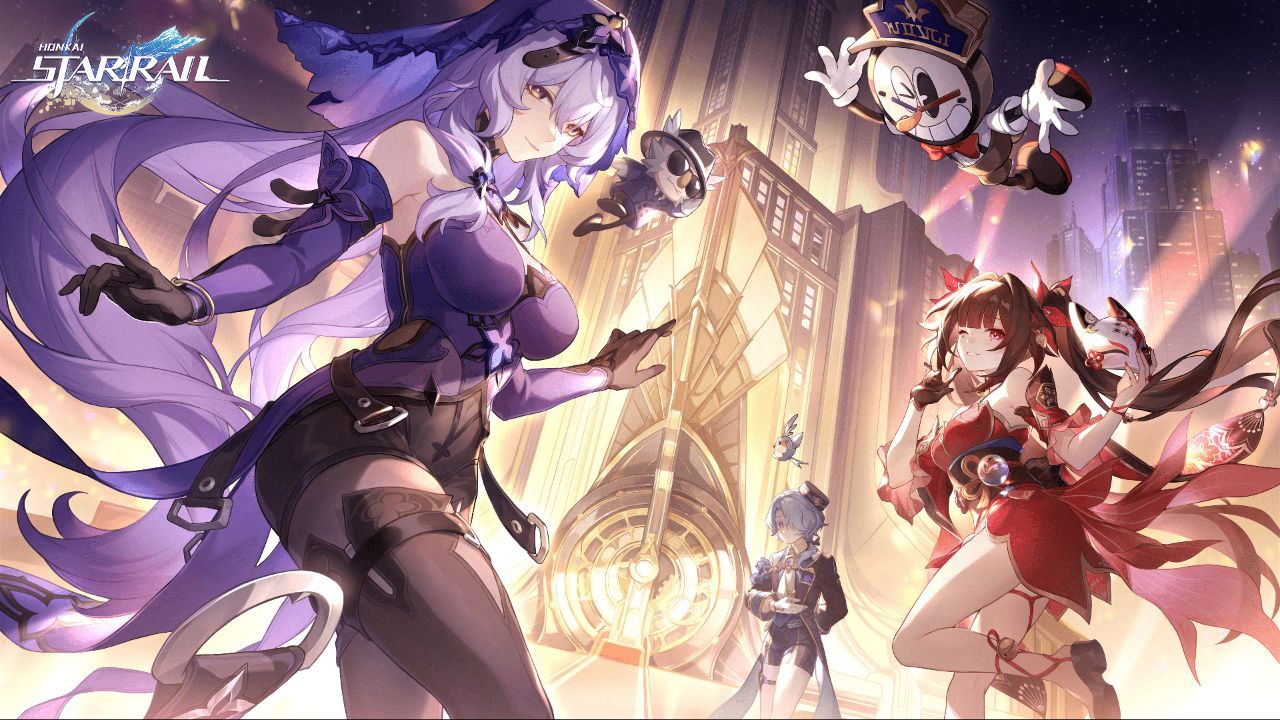
1 2 3 4 5 6 7 8 9 10 11 12 13 script. const ap = new APlayer({ container: document.getElementById('aplayer'), audio: [{ name: 'world.execute (me) ;', artist: 'Mili', url: 'https://cdn.jsdelivr.net/gh/GamerNoTitle/Picture-repo-v1@world.execute(me)/audio/Mili%20-%20world.execute%20(me)%20;.mp3', cover: 'https://cdn.jsdelivr.net/gh/GamerNoTitle/Picture-repo-v1@world.execute(me)/img/Album/Miracle Milk.jpg', theme: "#8e8cd8", lrc: "https://cdn.jsdelivr.net/gh/GamerNoTitle/Picture-repo-v1@Github-Basic/lrc/world.execute (me) %3B.txt" }] });
通过const给Aplayer一些信息,让它能够播放我们的音乐
接着打开layout/includes/widget/index.pug在你认为合适的地方添加(注意缩进)
1
2
if theme.aside.card_aplayer include ../addons/card_aplayer.pug
然后我们打开butterfly.yml,在aside的侧边栏显示设置里面添加
1 2 3 card_webinfo: true card_aplayer: true
然后就可以啦!
预设文档使用 首先先下载 预设文档,放到主题目录下的layout/includes/addons文件夹内(如果不存在请自己创建)
打开文件,修改里面的变量,关于变量请查看官方文档
修改完后保存,打开layout/includes/widget/index.pug,在你认为合适的位置加上以下内容(注意缩进)
1 2 if theme.aside.card_aplayer include ../addons/card_aplayer.pug
打开butterfly.yml,在aside的侧边栏设置加入以下内容
1 2 3 card_webinfo: true card_aplayer: true
然后保存即可!
网易云音乐官方部件法
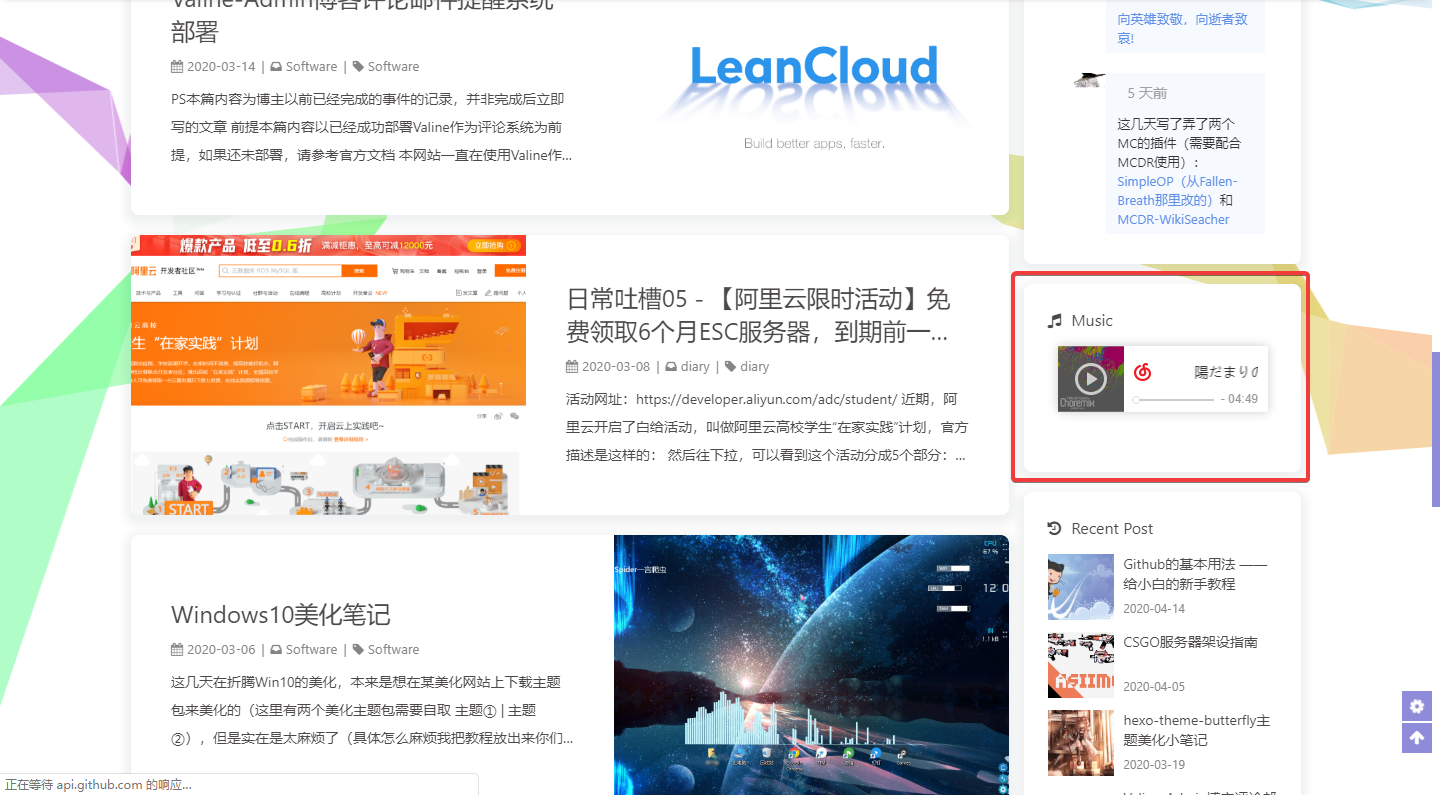
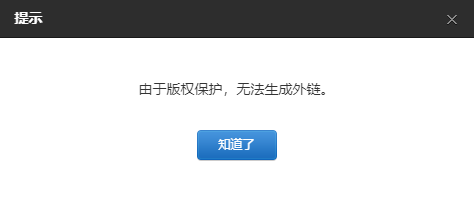
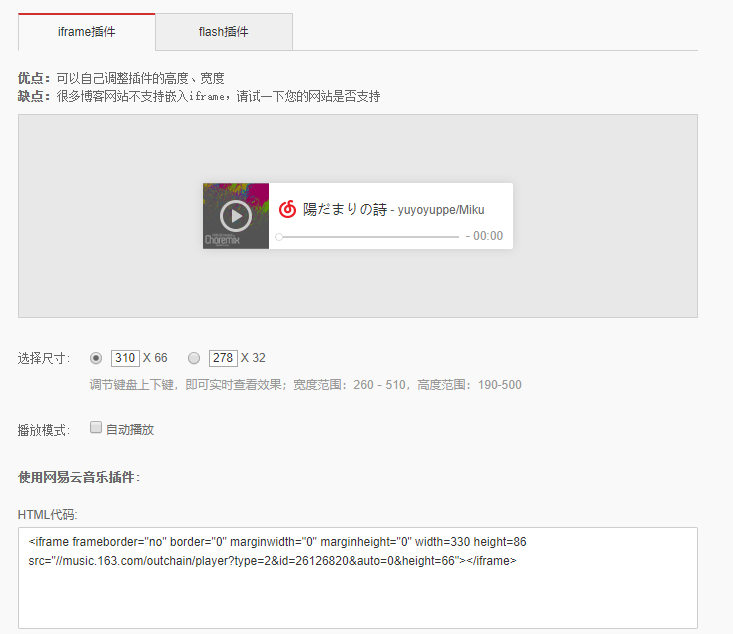
我们先打开网易云的一首歌,点击生成外联播放器,要求是这首歌不需要VIP进行下载,否则会二话不说给你弹出下面这个窗
正常情况下,会给你打开外联播放器的生成页面,在下面选择合适的参数,其中宽度我稍微试了一下,推荐为230,太小会观感体验不好,太大会直接超出框,设定好宽度我们就复制代码(宽度也可以直接在width=后面进行修改哦)
↑我这里选择的音乐
然后我们复制一份butterfly/layout/includes/widget文件夹里面的card_announcement.pug文件(主要是因为公告是最好进行修改的东西了) ,改名为card_music.pug,把里面改成以下内容
1 2 3 4 5 6 .card-widget.music .card-content .item-headline i.fa.fa-music(aria-hidden="true") span= _p('Music') |
然后在|那一行,把你刚刚获得的网易云链接放进去(保留前面的|)
然后保存,接着我们打开同目录下的index.pug
在里面你认为合适的位置加上以下内容
1
2
if theme.aside.card_music include ./card_music.pug
如果你不需要开关可以不加if判断
接着打开butterfly.yml文件,在aside设置中加上一行
如果想关掉的时候设置成false即可
这样我们就成功把网易云的音乐加入自己的侧边小部件了!
不定期更新